
Your DMV renewal notice shows up, and there it is: Smog Certification Required. If you drive a diesel truck, van, or SUV in the East Bay, that line usually leads to the same questions. Does my diesel even need testing? What do they check? Why did my friend's truck fail when it “ran fine”?
That confusion is normal. California's diesel smog check requirements aren't simple, and a lot of bad advice gets passed around in parking lots, online forums, and job sites. Owners hear half a rule, apply it to the wrong vehicle, and end up wasting a trip or getting stuck before registration.
A good diesel smog visit shouldn't feel like guesswork. It helps to know which vehicles are tested, what a technician looks for, and what problems usually cause a failure. Once you know those pieces, the process gets much easier to manage.
Table of Contents
- Your Diesel Smog Check Guide
- Does Your Diesel Need a Smog Check
- What Happens During a Diesel Smog Inspection
- Understanding Diesel Smog Check Exemptions
- Top Reasons Diesel Vehicles Fail Smog Checks
- Your Pre-Test Checklist for a First-Time Pass
- Get Your Diesel Certified at Speedy Smog
Your Diesel Smog Check Guide
Diesel owners usually don't struggle because they ignore the rules. They struggle because the rules are technical, and the details matter. A truck can drive well, start every morning, and still fail a smog inspection because the monitors aren't ready, the software isn't approved, or smoke hangs in the exhaust a little too long.
That's why the smartest approach is practical, not theoretical. Start with three questions:
- Does my diesel fall into the California testing program?
- What does the inspection include?
- Is there anything on my vehicle likely to trigger a failure?
If you answer those before your appointment, you avoid most of the usual headaches.
Practical rule: A diesel smog check is easier when you treat it like a compliance inspection, not just a quick errand.
Owners often focus only on the dashboard. If there's no warning light, they assume they're good. That works sometimes, but not often enough. Diesel testing also looks at emissions equipment, computer readiness, and visible smoke. A truck that “feels fine” can still have a problem where it counts for inspection.
This is especially true in the East Bay, where many diesel vehicles are work trucks, cargo vans, and daily drivers that rack up miles under real conditions. Short trips, recent repairs, battery disconnects, and aftermarket tuning all show up at smog time.
The good news is that most failures follow familiar patterns. Once you know the rules and the common trouble spots, you can usually spot problems before the test does.
Does Your Diesel Need a Smog Check
A lot of East Bay diesel owners call us after the DMV renewal notice shows up and catches them off guard. The fastest way to sort it out is to check two things on the vehicle first: the model year and the Gross Vehicle Weight Rating, or GVWR, on the driver-side door jamb.
For most light-duty diesel owners, the rule is straightforward. In California, diesel vehicles with a 1998 or newer model year and a GVWR under 14,500 pounds are generally part of the biennial Smog Check program. 1997 and older diesel vehicles are generally exempt, according to the California Bureau of Automotive Repair Smog Check program.
That covers many pickups, diesel SUVs, and Sprinter-style vans we see at the shop.
A few situations still catch owners by surprise:
- Registration renewal: If your DMV paperwork asks for a smog certificate, your diesel likely falls into the program.
- First California registration: An out-of-state diesel brought into California may need a smog inspection before it can be registered here.
- Change of ownership: A sale or transfer can trigger a smog requirement, depending on the transaction.
If you want the bigger picture on state testing rules, our guide to California smog check rules for vehicle owners explains where diesel fits in.
California diesel smog check requirements at a glance
| Vehicle Model Year | Gross Vehicle Weight Rating (GVWR) | Smog Check Required? |
|---|---|---|
| 1997 and older | Under 14,500 lbs | No |
| 1998 and newer | Under 14,500 lbs | Yes, every two years for registration renewal |
| 1997 and older | 14,500 lbs and above | Check program status carefully |
| 1998 and newer | 14,500 lbs and above | May fall outside the standard biennial program. Verify exact requirement before assuming exemption |
Where owners get tripped up
The biggest mix-up is using the wrong weight number. Curb weight is not the number that matters here. GVWR is. We see this with work trucks all the time. The truck may not look heavy, but the manufacturer-rated weight on the door label is what determines whether it falls into the standard program.
Another common problem is assuming diesel follows the same pattern as gasoline. Diesel owners often expect a grace period or assume age alone settles the question. That leads to last-minute appointments, registration delays, and avoidable stress.
If you're unsure, check the door jamb label and your registration paperwork before you book the test.
Five minutes spent verifying the model year and GVWR can save you a wasted trip, especially if you drive a diesel work vehicle and cannot afford downtime.
What Happens During a Diesel Smog Inspection
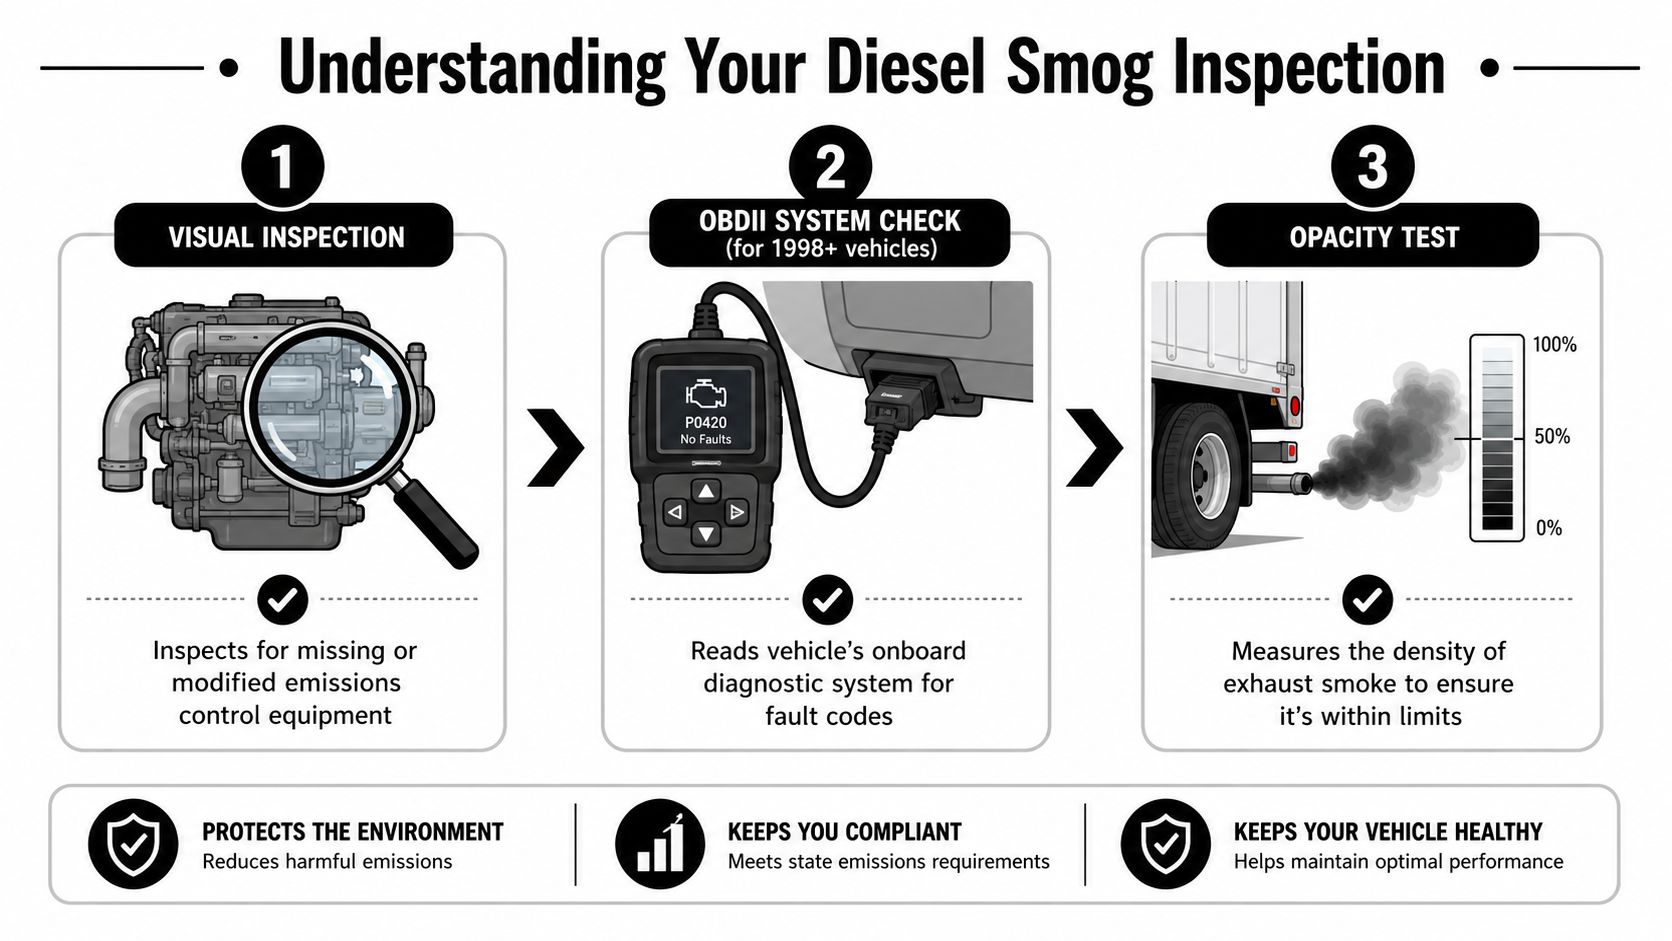
A lot of diesel owners walk in expecting one quick machine test. The actual inspection is more hands-on than that. At the shop, we verify three things: the emissions parts that should be on the vehicle are still there, the onboard computer shows the system is working properly, and the exhaust does not produce excessive visible smoke during the required procedure.
If you want a better sense of what the shop is using during the test, this page on diesel emissions testing equipment and inspection hardware shows the tools behind the process.
Step one is a visual inspection
This is often where problem trucks get flagged first.
The technician checks for missing, modified, or clearly non-compliant emissions components. On diesel vehicles, that usually means looking closely at the DPF, related emissions hardware, and signs that a system has been removed, bypassed, or altered.
We see this with work trucks fairly often. The owner may be focused on how the truck runs, but a visual failure can happen even if the engine feels strong on the road. If the setup does not match what the vehicle is supposed to have, that issue usually shows up right away.
Step two is the computer check
Next comes the onboard diagnostic check. The technician connects to the vehicle, reads fault information, and checks whether the emissions monitors are ready.
This part trips up owners who recently cleared codes, replaced a battery, or disconnected power during repairs. The warning light may be off, but the system can still show incomplete readiness. If the monitors have not finished their self-checks, the vehicle may not pass that day.
For newer light-duty diesels, the readiness rules are tighter than many owners expect. That is why a truck that seems fixed after a repair still needs enough normal driving time before it is ready for inspection.
Step three is the smoke test
The last part is the smoke inspection. In this stage, real-world diesel problems tend to show themselves.
The technician observes the exhaust and performs the required snap acceleration procedure to see whether visible smoke clears within the allowed limit. A diesel that feels acceptable in daily driving can still fail here if it has injector problems, heavy soot buildup, poor maintenance history, or an emissions issue that only shows up when the engine is revved.
From a shop perspective, this is one of the biggest surprises for owners. “It drives fine” does not always mean “it will pass smog.” If your truck has been smoking on cold starts, under throttle, or after long idle time, it is smart to address that before you come in.
Understanding Diesel Smog Check Exemptions
Many owners experience issues when they hear that some diesels are exempt, then stretch that idea farther than the rules allow. A quick assumption can turn into a DMV problem later.
Older diesels are the clearest exemption
The simplest exemption is age. If your diesel is model year 1997 or older, it falls outside the biennial light-duty diesel smog requirement covered earlier.
That's the cleanest exemption because it's based on model year. There's not much interpretation involved. If the vehicle is old enough, it's outside that part of the program.
Weight alone doesn't tell the whole story
The more confusing issue is weight. Many diesel owners believe anything over 14,000 lbs is automatically exempt, but that's not a safe shortcut. As noted in this guide to California diesel smog exemptions and GVWR checks, the right approach is a two-step verification process: confirm the vehicle's GVWR on the manufacturer's door jamb, then cross-reference that with the applicable CARB program requirements.
That matters because not every vehicle outside the standard light-duty smog lane is “free and clear.” Some heavier diesels fall under different compliance programs instead of the familiar biennial test. Owners who assume exemption without checking the exact program can end up with registration issues or compliance confusion.
A practical way to handle this is:
- Check the label first. Use the manufacturer's GVWR, not a guess.
- Match the vehicle's use. Personal, commercial, and specialized use can affect what program applies.
- Verify before renewal time. Waiting until your registration deadline is the worst time to sort this out.
Don't build your plan around “my buddy said heavy diesels are exempt.” Verify the door sticker, then verify the rule that applies to that specific vehicle.
The owners who stay out of trouble are usually the ones who document the vehicle correctly before they ever pull into a test bay.
Top Reasons Diesel Vehicles Fail Smog Checks
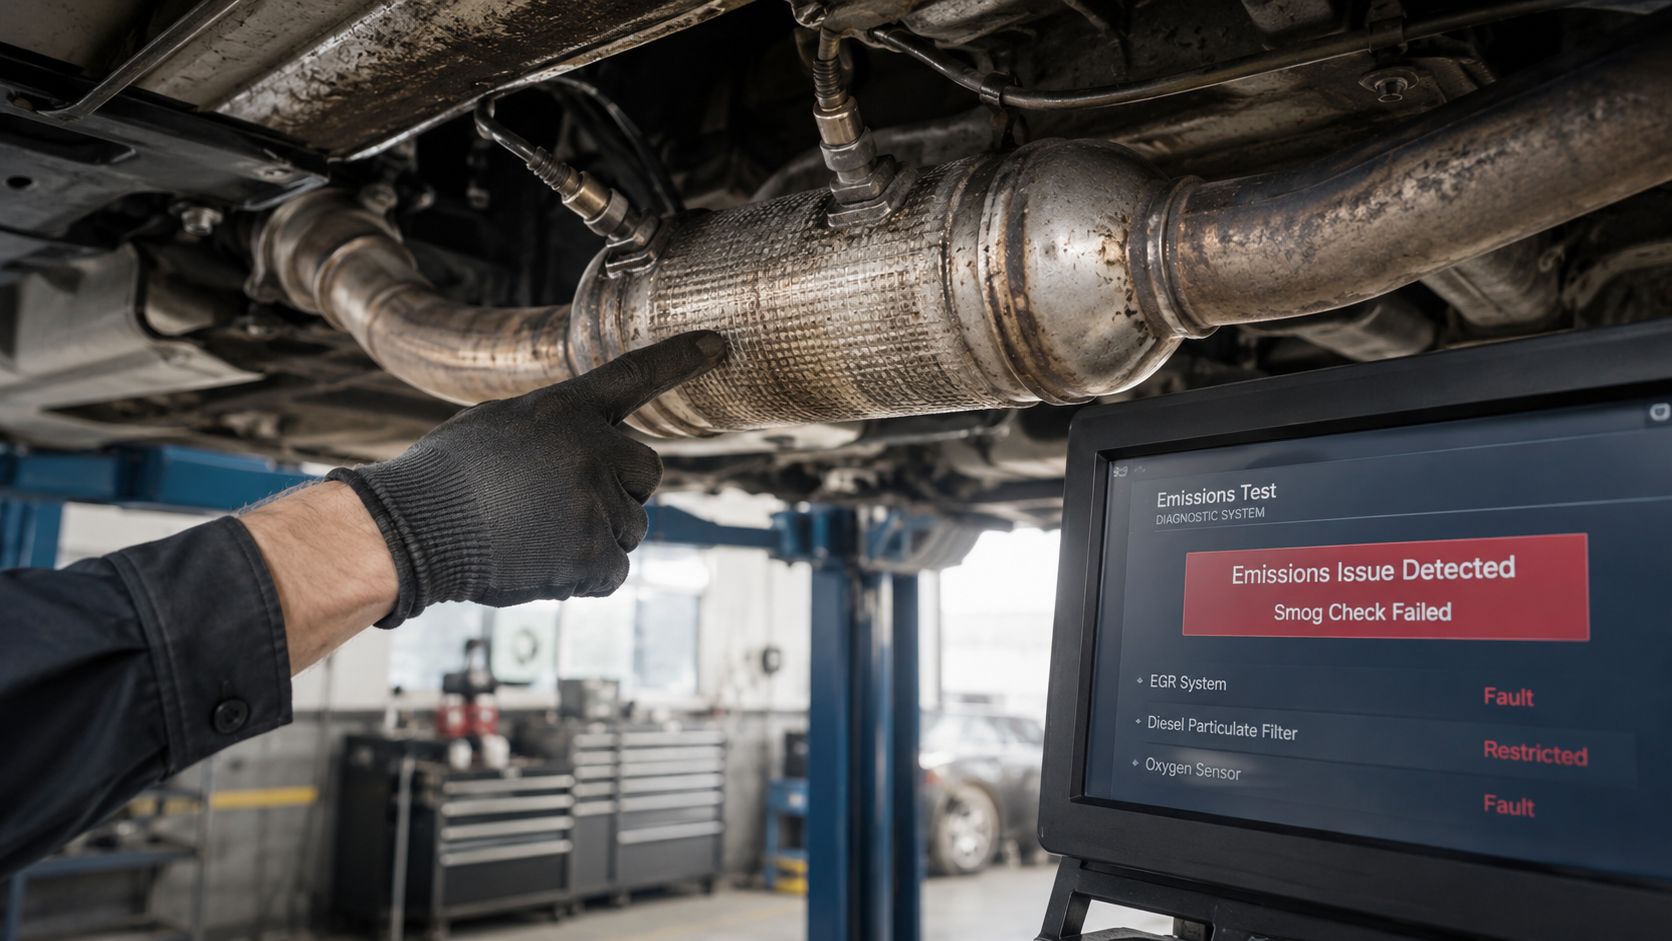
A diesel can run strong on the road and still fail in the bay. At Speedy Smog, the repeat problems are pretty consistent. The onboard system is not ready, emissions parts or software do not match California rules, or the vehicle produces visible smoke during inspection.
I hear the same comment all the time: “It passed last time.” That history helps, but it does not guarantee the next result. Batteries get disconnected. Repairs interrupt monitor completion. Used trucks show up with tuning or missing hardware that the current owner did not know about. A smog check looks at the vehicle as it sits that day.
Readiness monitors not set
This is one of the easiest failures to prevent, and one of the most common on newer diesels. If codes were recently cleared, the battery was disconnected, or a repair changed how the system operates, the computer may still show monitors as incomplete. In that condition, the inspection may stop before it really starts.
For newer light-duty diesels, the monitor rules are tighter than many owners expect. As noted earlier, model year 2007 and newer light-duty diesel vehicles have very limited allowance for unset monitors. If the wrong monitor is still not ready, the vehicle can fail even with no warning light on.
A quick pre-scan saves a wasted trip. Our diesel smog inspection checklist for California drivers is a good place to start if you want to catch that issue before you head to the shop.
What helps:
- Drive the vehicle normally after repairs. Give the computer time to complete its self-checks.
- Scan for readiness status before the appointment. “No codes” does not mean “ready.”
- Repair the actual fault first. Clearing codes without fixing the cause usually leads right back to the same problem.
What causes trouble:
- Disconnecting the battery right before test day
- Clearing the check engine light and coming straight in
- Assuming the truck is ready because it feels fine
Modified parts and software
Performance work is a big failure point. Owners add a tuner for towing, buy a used diesel with unknown upgrades, or replace parts with something that fits physically but does not meet California requirements. Then the visual inspection or system check catches it.
Diesel software changes are a common example. A tune may improve throttle response or pulling power, but if it is not approved for California use, that benefit does not matter at smog time. The same problem shows up with deleted emissions equipment, altered intake or exhaust components, and replacement parts that are not legal for that application.
A truck can be mechanically healthy and still fail because the emissions configuration is wrong.
This is a good place to pause and see the issue from the owner side:
The practical fix is to return the vehicle to a compliant setup. That is not always cheap, and that is the trade-off. A tune or delete may have made the truck more enjoyable to drive, but it can turn a routine smog visit into a repair project. On used diesels, check for signs of non-stock programming or missing emissions hardware before registration deadlines sneak up on you.
Visible smoke and underlying engine issues
Smoke failures frustrate owners because the truck may still seem usable day to day. It starts, pulls, and drives, but under snap acceleration it hazes enough to create a problem in the test lane.
Visible smoke usually points to a real mechanical issue. Common causes include injector problems, poor combustion, air-path faults, soot buildup, or a DPF-related problem that has not fully triggered a dash warning yet. Deferred maintenance also shows up here.
The smart move is diagnosis. Guessing gets expensive fast on diesel repairs. Check fuel delivery, air intake, boost behavior, engine condition, and emissions components in an orderly way. That approach costs less than replacing parts at random and coming back for a second test.
Your Pre-Test Checklist for a First-Time Pass
The best pre-test routine is boring. That's a good thing. Diesel smog appointments usually go more smoothly when the vehicle arrives warm, complete, and untouched by last-minute resets.
One point catches diesel owners off guard. For light-duty diesel vehicles with a GVWR of 14,000 pounds or less, California requires biennial smog inspections starting with model year 1998, and there is no eight-year model year exemption like the one many gasoline vehicles receive, as summarized in this discussion of California diesel inspection timing and diesel-specific exemptions. In other words, don't assume a newer diesel gets a pass just because it's relatively new.
For a shop-day prep list, this diesel smog inspection checklist for California drivers is a practical reference.
What to do before you leave home
- Drive it long enough to fully warm up. A short freeway run or normal steady driving helps more than idling in the driveway.
- Make sure the battery hasn't been recently disconnected. If it has, the monitors may not be ready yet.
- Use the vehicle normally before the test. Last-minute code clearing is one of the easiest ways to create a “not ready” problem.
- Pay attention to smoke. If you can see unusual exhaust behavior during acceleration, deal with that first.
What to bring and what to avoid
Bring the paperwork that makes the visit simpler. Your DMV notice, registration information, and any recent repair records can help if there's a question about prior work or timing.
Avoid two bad habits. First, don't show up with the fuel level extremely low and hope for the best. Second, don't schedule a smog check immediately after major repairs unless you already know the system is ready.
The easiest diesel smog pass is the one you prepare for the day before, not the one you try to rescue in the parking lot.
Get Your Diesel Certified at Speedy Smog
Diesel smog check requirements feel complicated until you break them into the parts that matter. First, confirm whether your vehicle falls into the testing program. Then make sure the truck is fully ready for inspection, not just driving well. Finally, look hard at the common failure points: readiness monitors, smoke, and non-compliant modifications.
That approach saves time because it deals with the actual reasons diesels fail. It also keeps the process calmer. When owners know what the station is checking, they don't have to treat smog day like a surprise exam.
If you want a smooth visit, choose a shop that understands diesel-specific testing, current California rules, and the details that trip people up. A STAR-certified station with experienced technicians can spot issues clearly, explain what's happening in plain language, and help you get through the inspection without the usual confusion.
If your diesel needs certification in the East Bay, Speedy Smog is a practical place to get it done. The shop is STAR Certified, experienced with diesel inspections, and focused on quick, friendly service for San Leandro, Oakland, and nearby drivers. If you want a straightforward smog visit with people who know California diesel rules, book your test with Speedy Smog.
You walk into a smog shop expecting a quick pass, and instead you leave holding a failed Vehicle Inspection Report and wondering how much this is about to cost. That's usually the moment people start hearing mixed advice. One person says the retest is always free. Another says you have to pay again. Both can be wrong.
The practical answer is that a smog check free retest in California depends on shop policy, your vehicle year, and how fast you handle repairs. The hidden rules matter more than the headline offer. Miss the deadline, go to the wrong station, or assume diagnosis is included, and the “free” part disappears fast.
Table of Contents
- Your Car Failed Its Smog Check Now What
- Understanding Eligibility for a Free Smog Retest
- Your Step-by-Step Guide to Claiming a Free Retest
- How STAR Stations Like Speedy Smog Handle Retests
- Actionable Tips to Pass Your Smog Retest
- What to Do If a Free Retest Is Denied or You Fail Again
Your Car Failed Its Smog Check Now What
You leave the station expecting to finish your registration, then the report comes back with a fail. That moment throws a lot of drivers off, especially when they assume the next step is expensive repairs and another full test fee.
Start with the report, not guesses.
California requires many vehicles from model year 1976 and newer to pass smog as part of registration, so a failed test has to be resolved before the renewal process is complete. The good news is that a failure report usually points you in the right direction. It tells you whether the problem is an OBD trouble code, an incomplete monitor, a visual failure, or tailpipe emissions. Those are not the same problem, and they should not be treated the same way.
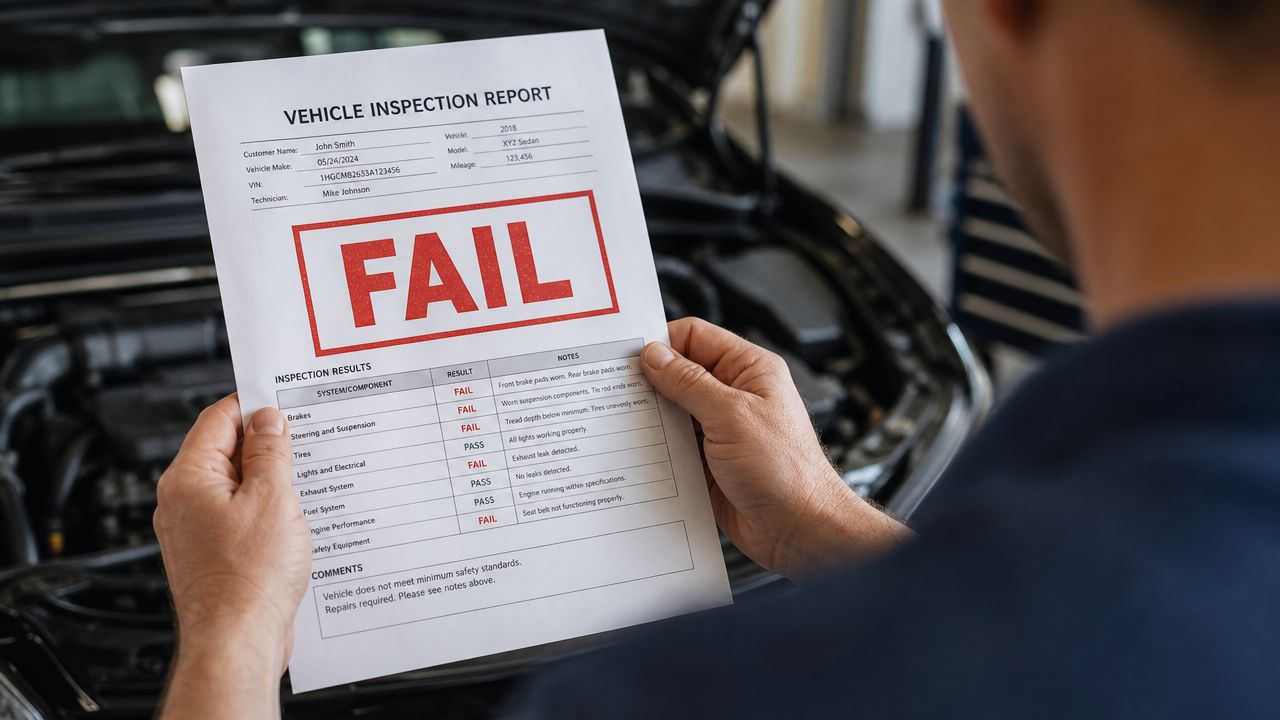
One of the biggest mistakes I see is drivers clearing codes, driving around for a day, and coming back too soon. Then the car fails again for incomplete readiness monitors. Another common mistake is paying for repairs before anyone matches the repair plan to the actual failure on the Vehicle Inspection Report.
If you need help reading the paperwork, this guide on understanding smog test results breaks down what the report is showing.
What matters right away
These three items usually decide whether this turns into a quick fix or a drawn-out headache:
- The exact failure type: Check engine light issues, monitor status problems, visual failures, and high emissions each require a different response.
- Your registration timeline: The DMV due date keeps coming even if the car is still being diagnosed.
- The station's retest terms: Free retest offers often come with limits on time, vehicle year, and what kind of failure qualifies.
Keep the failure report with you and show it to any repair shop. That saves diagnostic time and cuts down on random parts swapping.
The practical approach is simple. Fix the reason the car failed, keep an eye on your registration deadline, and ask about the retest policy before you leave the station. The hidden rules matter. A free retest may only apply within a short window, and some vehicles do not qualify at all.
Understanding Eligibility for a Free Smog Retest
A free retest isn't a California entitlement. It's a shop offer. That single point clears up most of the confusion.
The rule most drivers get wrong
Practical rule: The station decides whether a retest is free. State law doesn't.
That's the key takeaway from Xtreet's explanation of failed smog checks in California. The same source notes that most stations offer one free retest for 2000 and newer vehicles within a 30-day window, while 1999 and older vehicles virtually never get a free retest because those cars usually need more involved testing.
Why the split? It comes down to test type and shop time. Newer vehicles generally use the OBD-II process, which is faster and easier for a station to rerun. Older vehicles often require a more involved procedure, and many shops won't absorb that extra labor for free.
That's why “Do you offer a free retest?” isn't enough. The better question is, “Do you offer a free retest for my model year, and what's the deadline?”
Typical Free Retest Policies by Vehicle Year
| Vehicle Model Year | Common Retest Policy | Reason |
|---|---|---|
| 2000 and newer | Often one free retest within a limited window | These vehicles typically use the easier OBD-II test |
| 1999 and older | Usually no free retest, sometimes a partial discount | These vehicles often require more complex testing such as dyno and tailpipe procedures |
There's another consumer trap here. Shops can advertise “free retest,” but that usually means the retest only. It doesn't mean free diagnosis, free parts, or free repair labor.
Questions worth asking before the first test
Ask these at the counter before authorizing the inspection:
- Is my vehicle year eligible: Don't assume because your neighbor got a free retest that your car qualifies too.
- How long is the retest window: Some stations use a short deadline. Miss it, and you'll likely pay again.
- Do I need to return to the same location: Many policies only apply at the original shop.
- What paperwork do you require: Most stations want the original VIR and the same vehicle back.
A little clarity upfront saves the worst kind of return visit, the one where the car is fixed but the free retest has already expired.
Your Step-by-Step Guide to Claiming a Free Retest
You pick up your failed VIR, get the repair done, come back a few days later, and expect a quick free retest. Then the counter person says the offer expired, or it only applied to certain vehicles, or they need the original paperwork. That is the part drivers do not see coming.
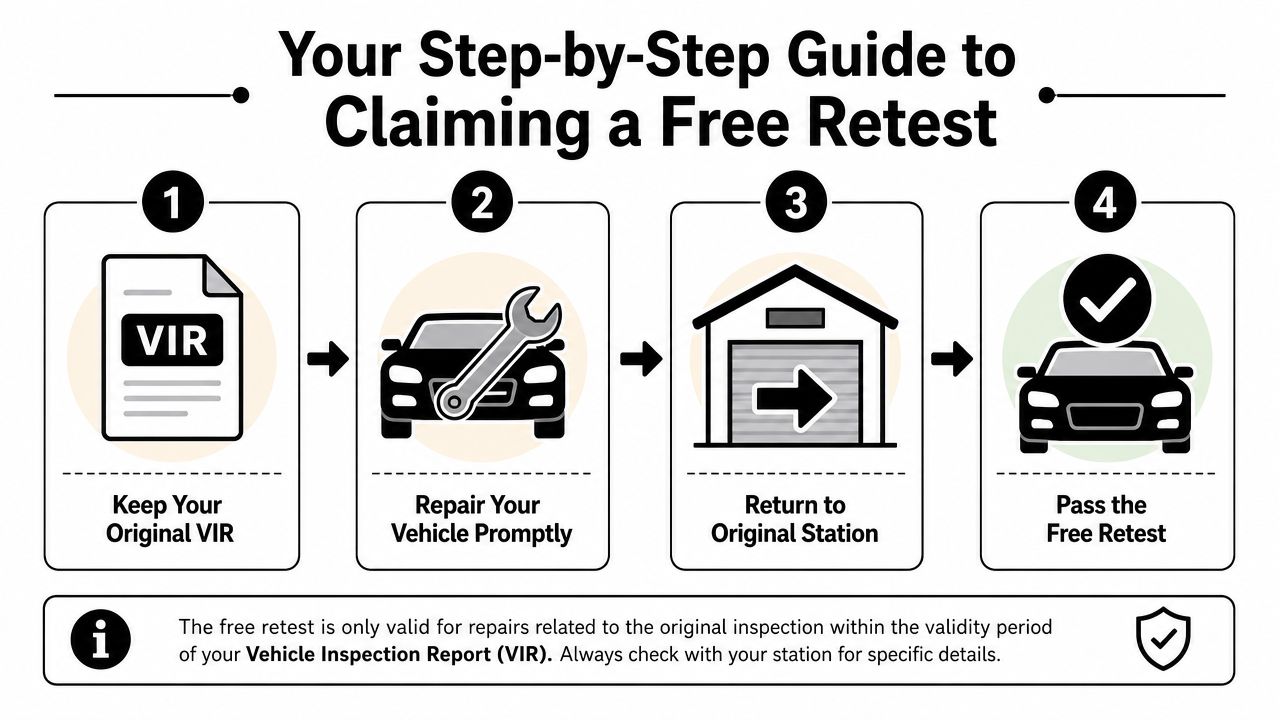
A free retest is usually simple to claim if you follow the shop's rules exactly. The hidden part is that every station sets its own policy, and the clock starts running right after the failed test. As noted earlier, California gives you a limited registration compliance window, and shops are not required to give unlimited retests. That is why I tell customers to treat the retest like a same-paperwork, same-car, same-location transaction.
If you are not sure why station type affects how clearly this process gets handled, read our guide on what a smog STAR station is. A disciplined station usually explains the retest rules before confusion starts.
What to bring back to the station
Bring everything that ties the retest to the original failure.
Your original VIR
This is the record the station uses to pull up the failed inspection. If you show up without it, the visit slows down fast.The same vehicle that failed
The retest is connected to that VIN. If the shop cannot match the car to the original test, the free retest offer can fall apart.Repair invoice or repair notes
Some stations ask for them, some do not. They help clear up what was fixed, especially if the failure involved more than one issue.A clear understanding of the deadline
Some free retest offers are short. Miss that window and you may be paying for another inspection even if the repair itself was done correctly.
What to say at the counter
Keep it direct and get the important answer before the test starts.
Use wording like:
- “I'm back for the free retest. Here's my original failed VIR.”
- “This is the same vehicle, and the repair is complete.”
- “Can you confirm I still qualify under your retest policy before you pull it in?”
That last question saves people money.
At the counter, the two problems I see most often are expired retest windows and missing paperwork. The car may be fixed, but if the shop cannot verify the original failed test under its own policy, the free retest is gone.
How the visit usually goes
A straightforward retest visit follows a predictable order:
- Check in and hand over the VIR
- Station confirms the vehicle and prior failed test
- Technician performs the retest
- If the vehicle passes, the certificate is sent electronically
The process gets messy when the owner waits too long, returns to a different station, or assumes “free retest” also includes diagnosis or repair work. It does not. The retest itself may be free. Everything that got the car ready for that retest usually is not.
How STAR Stations Like Speedy Smog Handle Retests
The station you choose affects more than convenience. It affects how clearly the process is explained, how consistently the test is run, and whether the retest conversation starts with facts or confusion.
Why the station type matters
A STAR station operates under higher performance standards. For drivers, that matters because a careful initial inspection reduces the chance of wasted time and unclear answers. If you want a quick primer on what that means, this page on what a smog STAR station is breaks it down well.
The other reason STAR stations matter is process discipline. Good stations are clear about eligibility, paperwork, and deadlines. That's especially important because the smog certificate is valid for 90 days from issuance, according to STAR Smog Center's California smog FAQ. If a car needs repairs and retesting, timing affects whether registration gets delayed.
What good retest handling looks like
A well-run station doesn't just say “free retest” and leave the rest fuzzy. It should be able to answer these points without hesitation:
- Which vehicles qualify
- How long the retest offer lasts
- Whether the original VIR is required
- What happens if the vehicle still fails
That transparency matters more than marketing language. The best experience is one where the customer knows the rule before the first test, not after the second trip.
Some stations are more customer-friendly with newer vehicles because retesting them is simpler on the equipment side. Older vehicles are a different story. Shops have to balance labor, bay time, and test complexity, which is why free retests are much less common there.
Actionable Tips to Pass Your Smog Retest
A free retest only saves money if the car passes. The smartest move is to treat the failed report like a repair checklist, not a guessing game.
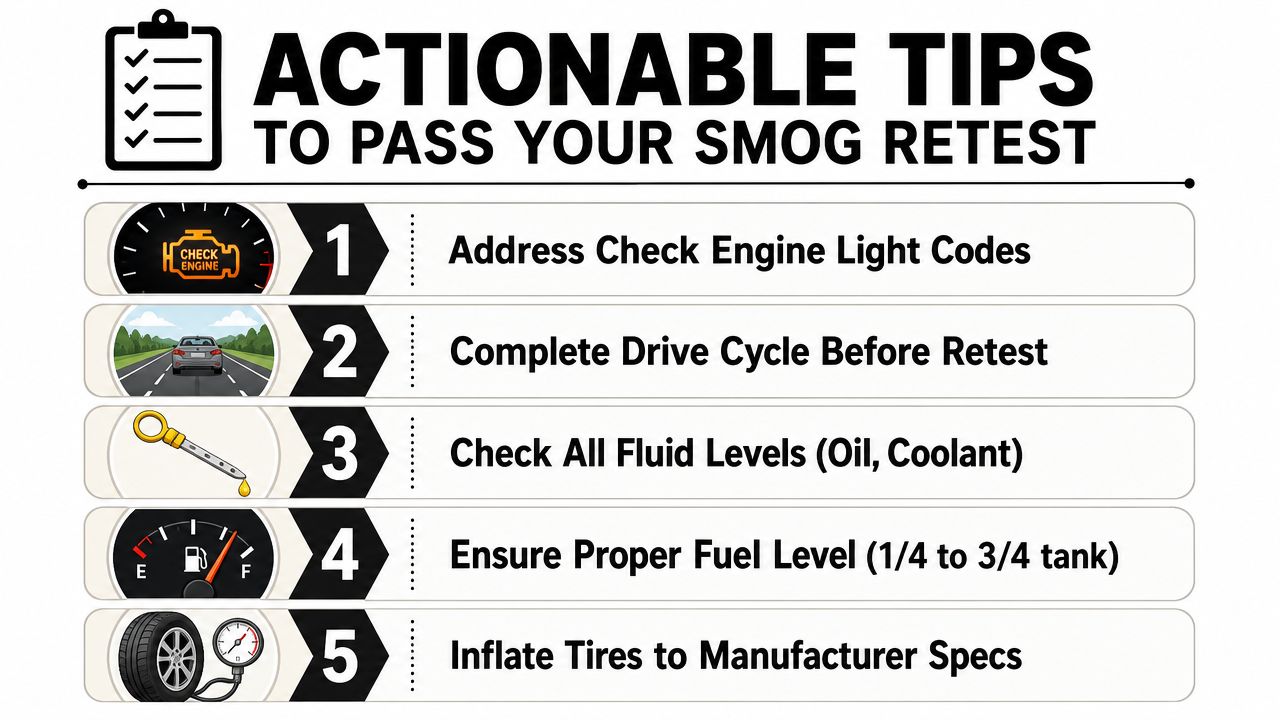
Do the repairs that actually match the failure
Start with the exact failure item on the VIR. If the problem is a check engine light or stored code, the fix is not “clear the code and hope.” The fix is repairing the cause, then making sure the vehicle is ready to test again.
A good quick read before you spend money is this breakdown of common smog check fail reasons. It helps drivers separate likely repair issues from simple readiness or preparation mistakes.
For vehicles that still fail after repairs, the Bureau of Automotive Repair offers the Consumer Assistance Program with up to $1,450 for 1996 and newer models and up to $1,100 for 1976 to 1995 models, with an approval letter and STAR station co-payment required before repairs, as described in this discussion of CAP repair assistance details.
Simple prep that helps on retest day
These are practical driver-level steps that can improve your chances:
- Fix the actual fault first: If the check engine light was involved, don't retest until the underlying problem has been addressed.
- Tighten the gas cap: A loose or poorly sealing cap can create avoidable trouble.
- Drive the car before the retest: Get the engine fully warm before you arrive so the emissions system is operating normally.
- Avoid an immediate retest after battery disconnect or code clearing: The vehicle may not be ready yet.
- Use normal fuel and normal driving: Don't try gimmicks. A properly repaired car is what passes.
For older vehicles, there's one extra point worth knowing. Some stations report better results when pre-1999 vehicles are driven 40 to 100 miles after an engine reset before retesting, based on the technical discussion in the earlier linked CAP source. That helps reduce false failures tied to incomplete readiness.
This video gives a useful visual walkthrough of general retest prep:
Don't spend your free retest on a car that isn't ready. Use the first failure report to verify the fix, then return.
What to Do If a Free Retest Is Denied or You Fail Again
You come back with receipts, the repair is done, and the station says the free retest no longer applies. That usually comes down to one of three things. The shop's time limit expired, the vehicle never qualified under that station's policy, or the retest is being requested after work that took too long to finish.
At a STAR station, drivers often get tripped up. “Free retest” is usually just the test portion. It does not cover diagnosis, parts, labor, or extra time spent chasing an intermittent fault. If the car sat at a repair shop waiting for an oxygen sensor, catalyst, or EVAP part, the retest window may have closed before the car was ready. As noted by Smog N Go's discussion of retest restrictions, if repairs run past the station's 90-day free-retest window, the consumer pays the standard retest fee.
That deadline is a shop policy issue, not a statewide guarantee.
If a station denies the retest, ask for the exact reason and keep it specific. “You're outside the time window” is different from “your vehicle was never included in our free retest offer.” Get the answer in plain language before you spend time arguing. In my experience, clear paperwork solves more of these disputes than frustration does.
If the car fails again, slow the process down and compare both VIRs side by side. Look for whether the same monitor, pollutant, or system failed twice, or whether a new problem showed up after the repair. A repeat failure usually points to an incomplete diagnosis. A different failure can mean the original issue was fixed, but the car still has another emissions problem that was hidden the first time.
Here's the practical next move:
- Match the failure to the repair invoice: If the invoice says the EVAP issue was repaired, but the VIR still shows an EVAP failure, take both documents back to the repair shop.
- Ask what was tested, not just what was replaced: Parts-swapping gets expensive fast. Good shops can explain the diagnostic steps.
- Check whether the car is a referee case: Modified emissions equipment, engine swaps, label problems, and unusual test conflicts often belong with the Smog Check Referee.
- Look into BAR assistance if cost is the problem: CAP may help qualified drivers who are stuck between a failed test and repair bills they cannot absorb.
The expensive mistake is repeating the same loop. Same vague diagnosis, same retest, same failure, same bill.
A second failure is usually a signal to change something. Change the repair approach, change who diagnoses it, or confirm whether the car belongs in the referee system before you pay for another inspection.
If you need a fast, straightforward inspection from a STAR-certified team that explains the retest rules clearly before you start, Speedy Smog is a practical place to book your next smog check in San Leandro.
That DMV renewal notice usually lands at the worst time. You're sorting mail at the kitchen counter in San Leandro or tossing keys on the table after crawling through East 14th traffic, and there it is. A deadline, a fee that looks higher than you expected, and maybe the words Smog Certification Required staring back at you.
Trouble doesn't arise because the process is impossible. Individuals get tripped up because California's registration renewal process has a lot of small rules, and one missed detail can turn a simple online payment into a branch visit, a delay, or a failed smog attempt. Around the East Bay, I see the same problems over and over. Drivers go for a smog too early, try to renew too fast after the test, miss a hold on the record, or show up unprepared after a battery replacement.
This guide is for Oakland and San Leandro drivers who want the practical version. Not the polished DMV version. The version that tells you what causes headaches, what usually works, and how to avoid wasting half a day on something that should've been straightforward.
Table of Contents
- Don't Panic About That DMV Notice
- Decoding Your Renewal Notice and Preparing Your Documents
- The Smog Check Guide for San Leandro and Oakland Drivers
- Choosing Your Renewal Method Online Mail or In Person
- Understanding Fees and Resolving Registration Holds
- Troubleshooting Common Issues and Final Steps
Don't Panic About That DMV Notice
A lot of drivers open that envelope and assume they've already messed something up. Usually, they haven't. They just haven't decoded the notice yet.
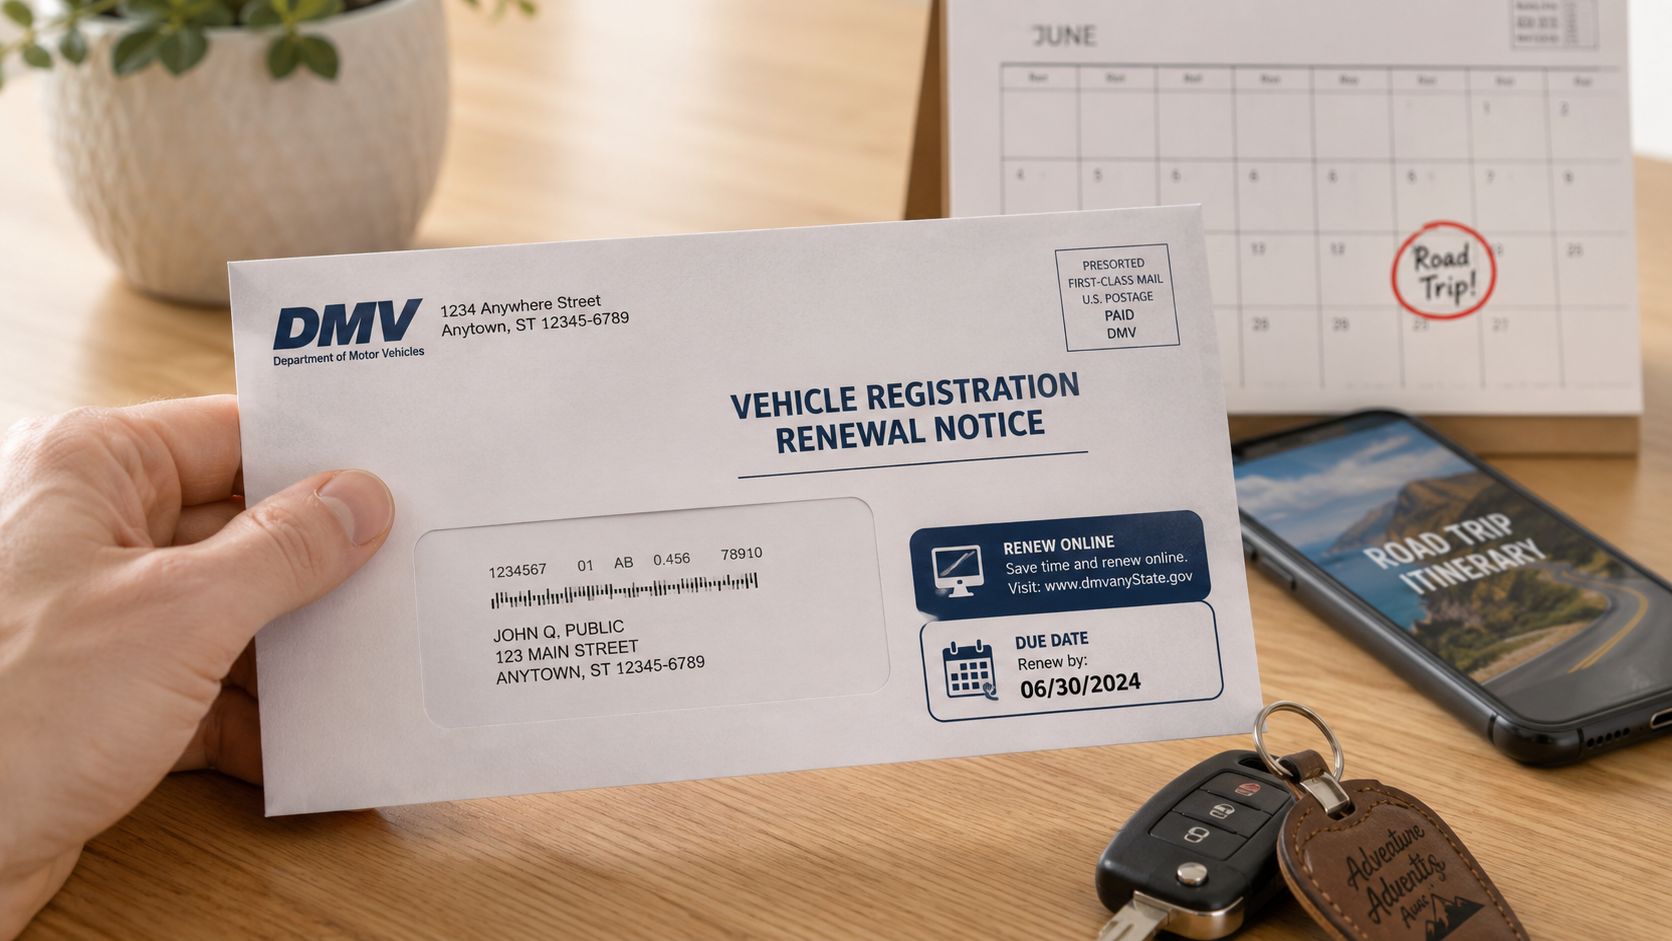
In California, late renewal is common enough that it shouldn't surprise anyone. As of 2013 to 2014, 23% of California drivers renewed late, and 5% of vehicles failed to renew entirely, according to local reporting on California registration delays. A big reason is that some drivers aren't eligible to finish online or by phone because unpaid parking tickets or other delinquencies block the easy options.
That matches what East Bay drivers run into in real life. The notice arrives, they think, "I'll handle this online tonight," and then the DMV system says no. Now it's not a quick errand anymore.
What that envelope usually means
The notice is really just a checklist in disguise. It tells you:
- whether your vehicle needs a smog certification
- when your renewal is due
- how much the state is asking you to pay
- whether something on your record may stop a fast renewal path
If the notice mentions smog, that's your first move. Not your second. Not after you try to pay online. If there's a hold, that has to be dealt with before the registration renewal process will move cleanly.
Local reality: Most renewal stress comes from doing the right steps in the wrong order.
Drivers around San Leandro and Oakland also tend to underestimate timing. A weekday task can spill into the weekend fast if you need emissions testing, insurance verification, or hold resolution. That's why it helps to start with a plain-English read of the notice and use a practical DMV notice guide like this East Bay resource on reading a DMV notice for smog and renewal.
Once you know what the state is asking for, the process gets a lot less mysterious.
Decoding Your Renewal Notice and Preparing Your Documents
The notice itself isn't hard to read once you know where to focus. The problem is that individuals often scan the price first, then skip the lines that govern the process.
What to read first on the notice
Start with the due date. That's the one detail you can't negotiate with. Then look for any wording that tells you a smog certification is required. If you see that, treat the smog check as the gatekeeper for everything else.
After that, look for anything that suggests a problem with eligibility. If your record has an issue, the notice may point you toward a less convenient renewal path. That's where drivers lose time, especially if they assumed online renewal would work automatically.
A simple way to read the notice is this:
- Deadline first. Know how much runway you have.
- Smog requirement second. If it's listed, handle that before payment.
- Fee total third. Important, but not the first thing to solve.
- Restrictions last. Any mention of a hold or special instruction matters.
What to gather before you do anything
Don't overcomplicate this part. Most drivers just need a small stack of basics ready before they start the registration renewal process.
- Your renewal notice: Bring it with you. It contains the details tied to your vehicle record.
- Current proof of insurance: Make sure it's active and matches what the DMV expects from an approved insurer.
- Your driver's license: You may need it for identity verification or in-person handling.
- Your vehicle information: Keep the VIN handy. Some renewal paths require the last five digits.
If you're hoping to renew online, the state also expects a valid insurance record on file and, when applicable, a smog certificate already transmitted to DMV records. Missing one piece is often enough to kick you out of the fast lane.
Bring the renewal notice to the smog station. It reduces mix-ups and gives the technician the exact vehicle details tied to your renewal.
Vehicle prep that saves failed smog attempts
This is the part many people skip, and it costs them.
According to the California Bureau of Automotive Repair smog check guidance, vehicles with modified software need to be restored to manufacturer settings or have California Air Resources Board approval before testing. Non-approved software causes an automatic failure. The same source notes that if your battery was recently disconnected or replaced, you may need to drive the vehicle for 1 to 2 weeks so readiness monitors can reset. It also states that 30% of drivers who fail do so because of incomplete monitor errors rather than true emissions faults.
That tells you something important. A failed smog doesn't always mean your car is dirty or broken in a major way. Sometimes the car isn't ready to be tested yet.
Before you schedule the inspection, check these practical points:
- Battery work happened recently: Give the car enough normal driving time to reset monitor status.
- Software tune or modification installed: Return it to a compliant setup before the test.
- Warning lights on the dash: Don't assume it'll be fine. Have the issue checked first.
- Old paperwork missing: Find your renewal notice before leaving home.
A little prep here is worth more than rushing the appointment.
The Smog Check Guide for San Leandro and Oakland Drivers
For many East Bay drivers, the smog check is the step that decides whether the whole renewal goes smoothly or turns into a chain of delays.
If your notice requires smog, don't treat it like a side errand. Treat it like the hinge point. Until that certification is properly transmitted, your registration renewal process isn't really moving.
Why the smog step controls the whole timeline
California doesn't just want you to pass a test. For renewal purposes, the smog certificate must be electronically transmitted to the DMV, and it's valid for 90 days from issuance, according to this California smog and DMV renewal timing guide. The same source says a common mistake is attempting online payment immediately after the test, even though DMV servers require a 48-hour latency window to update. It adds that ignoring that delay results in a 15% to 20% failure rate for immediate online transactions.
That's one of the most annoying parts of the system because your test can be complete and valid, but the DMV database still isn't ready to recognize it.
For some drivers, the renewal notice will also specify a STAR Certified station. If it does, don't ignore that wording. Use the right type of shop from the start or you'll just create another trip for yourself.
What makes a smooth smog visit
A smooth visit usually comes down to preparation and using a station that handles DMV-related testing all day long. Around San Leandro and Oakland, drivers generally want three things: speed, clear communication, and confidence that the result is transmitted correctly.
The practical checklist is short:
- Bring the renewal notice: It helps the station match the test to the correct vehicle record.
- Make sure the Check Engine light is off: The same renewal timing guide notes that if the light is on, the vehicle will fail automatically.
- Use the station listed type required by your notice: If STAR is required, don't guess.
- Don't plan to pay the DMV immediately after the test: Build in the system update delay.
For East Bay drivers trying to keep this simple, a local resource like this guide to smog check registration renewal in San Leandro can help you line up the sequence correctly before you leave home.
A fast smog appointment only saves time if the car is ready and the DMV record updates cleanly afterward.
One more point that matters locally. A lot of Oakland and San Leandro drivers try to squeeze renewal errands into a lunch break or before school pickup. That can work for the inspection itself. It usually doesn't work if you're expecting the DMV payment portal to recognize the smog result right away.
The delay that catches East Bay drivers
This is the quiet trap in the process. You pass the smog, get back in the car, pull out your phone, log into DMV renewal, and get an error. The natural assumption is that something went wrong at the station. Often, nothing went wrong. The data just hasn't landed in the DMV system yet.
A similar issue shows up outside California too. Boulder County tells drivers to wait 24 hours after an emissions test before renewing online or at a kiosk, stating, “After successfully completing the emissions test, please wait 24 hours for the emissions test to be updated online or at an MV Express kiosk,” as noted in Boulder County's renewal guidance. Different states use different systems, but the practical lesson is the same. Immediate renewal attempts can fail because the update window hasn't closed.
That timing issue is why patience saves more time than rushing.
A short visual walkthrough helps if you like to see the process in action:
When drivers follow the order correctly, the smog step is usually manageable. When they improvise, it becomes the part they complain about for the rest of the week.
Choosing Your Renewal Method Online Mail or In Person
Once the smog requirement is handled and any timing delay has passed, you still have to pick how you'll finish the renewal. This choice is often made based on habit instead of what fits their situation.
Some drivers want the fastest path. Others want a paper trail. Others don't have a choice because a hold or mismatch is forcing them into manual handling. There's no single best method for everyone.
Vehicle Registration Renewal Methods Compared
| Method | Speed | Convenience | Best For |
|---|---|---|---|
| Online | Fast once your record is fully eligible | High | Drivers with no hold, current insurance on file, and a completed DMV update after smog |
| Slower but straightforward | Medium | Drivers who prefer paper records and aren't in a rush | |
| DMV kiosk | Fast when available and eligible | High | Drivers who want a middle ground and like getting materials without waiting for mail |
| In person | Slowest for most people | Low to medium | Drivers with holds, title questions, or record issues that need human review |
How to choose based on your situation
Online is usually the cleanest option when everything lines up. If your insurance is current, your smog is already reflected in DMV records, and there isn't a hold, this is the easiest way to finish the registration renewal process. The catch is that online renewal is unforgiving. If one requirement isn't in place, the system often just rejects the attempt without much nuance.
Mail works better than people think, especially if you don't need the sticker immediately. It's not glamorous, but it gives some drivers peace of mind because they have copies, envelopes, and a more traditional paper trail. The downside is obvious. You're waiting on processing and delivery rather than solving it the same day.
DMV kiosks are often the underrated option. They can be a very good fit for drivers who want something quicker than mail and less involved than a full branch visit. They aren't magic, though. If your DMV record isn't ready, the kiosk won't fix the underlying problem.
In person is the fallback for the tricky cases. If you've got a hold, unresolved notice issue, or something that doesn't match in the record, a branch visit may be unavoidable. Nobody picks this option because it's fun. They pick it because the easier channels won't complete the transaction.
A few decision rules make the choice easier:
- Choose online if: your record is clean and you want the least friction.
- Choose mail if: you value documentation and can wait.
- Choose a kiosk if: you want a quicker physical transaction without a branch line.
- Choose in person if: the system is blocking you and you need someone to review the file.
If you're still trying to decide after the smog step, this local page on DMV smog check near me and registration renewal options gives a practical look at how East Bay drivers usually sequence the process.
If the easy methods keep failing, stop retrying the same thing. That's usually a sign you have an eligibility issue, not a browser issue.
The right method is the one that matches your record, your timing, and your tolerance for waiting.
Understanding Fees and Resolving Registration Holds
The amount due is the part that gets the strongest reaction. A lot of drivers expect a single flat registration price and get irritated when the number looks much higher than they had in mind.
Why the amount can feel all over the map
California registration renewal fees are made up of multiple charges, not one simple fee. According to this breakdown of California registration fee components, renewal fees typically range from $100 to $500 or more. The same source explains that the Vehicle License Fee is approximately 0.65% of the vehicle's current value, and that a base registration fee averages around $60, with a $28 CHP fee, local transportation fees ranging from $10 to $40, plus transportation improvement fees that vary by vehicle age.
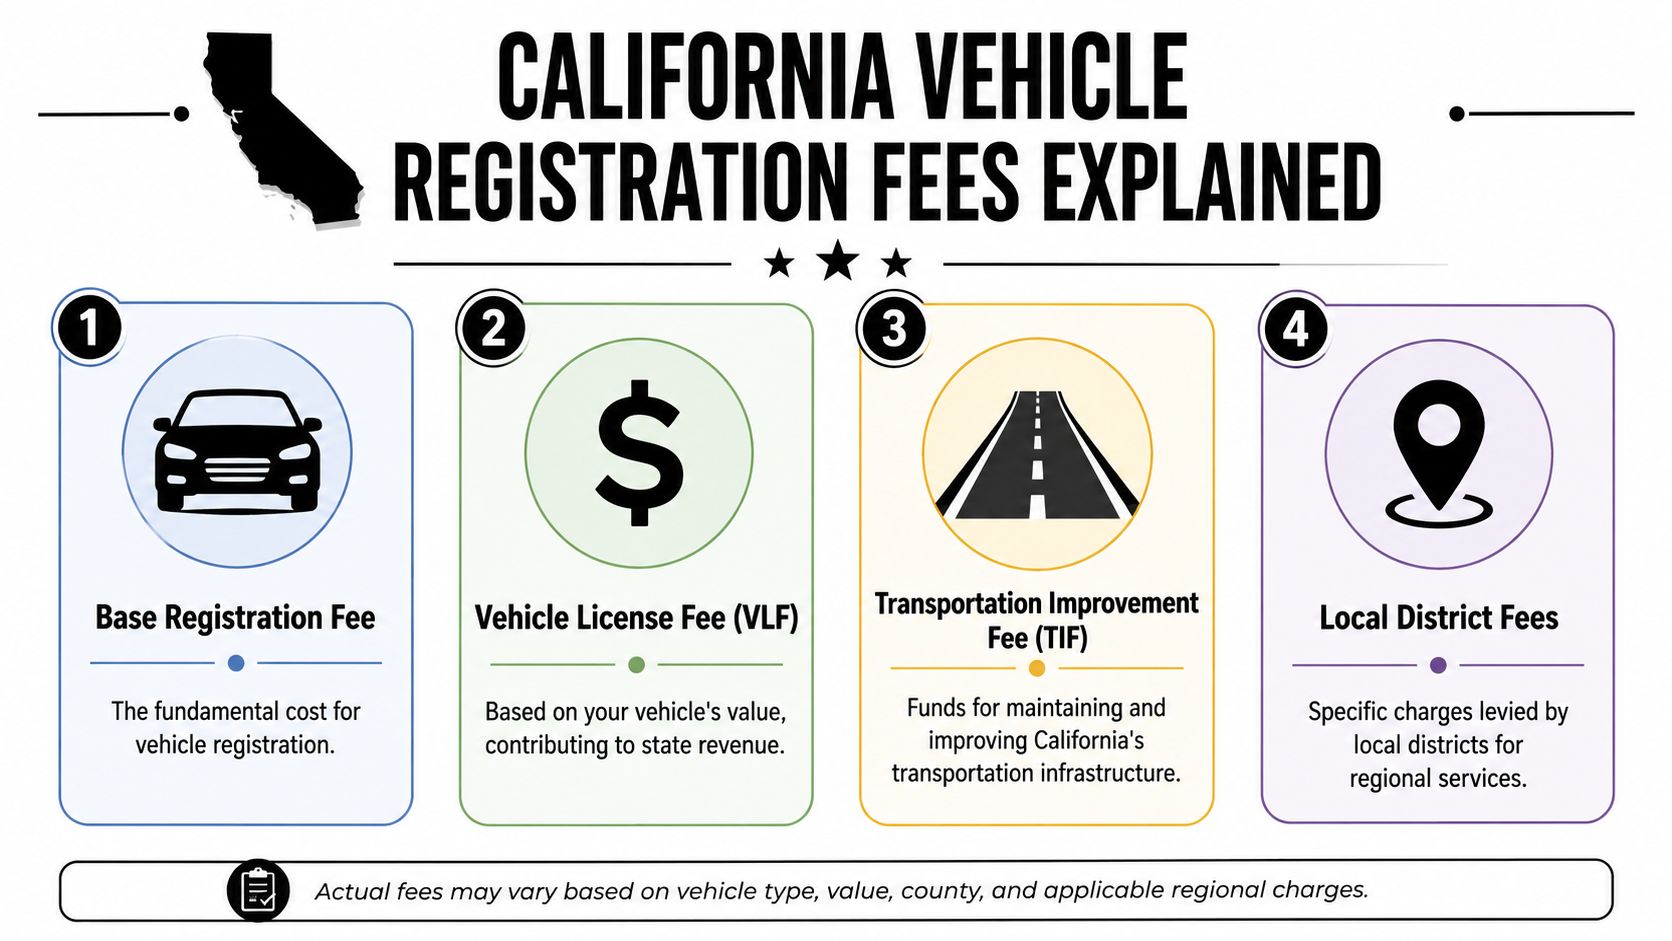
That explains why two neighbors with similar-looking cars can have very different renewal bills. Vehicle value matters. County and local charges matter. The fee total isn't random. It's layered.
What a registration hold usually means
The number on the notice isn't always the main issue. Sometimes the actual problem is a hold tied to the vehicle or owner record. In practical terms, a hold means the DMV isn't ready to let you complete the renewal through the easy channels.
Commonly, a hold points to unresolved obligations such as parking citations, toll matters, or other delinquencies that have to be cleared first. When that happens, drivers often waste time trying the online system again and again, hoping it suddenly works. It usually won't.
Your best move is to identify the agency behind the hold and resolve that issue directly. That may mean paying the underlying balance, obtaining a release, or waiting for the update to post before trying the renewal again.
A few realities help here:
- The DMV usually isn't the root cause: It may be enforcing a block placed by another agency.
- Paying registration alone won't fix it: The hold has to clear.
- In-person handling may be necessary: Not every blocked renewal can be solved online.
Practical rule: If the notice or DMV system points to a hold, solve that first. Every other step is secondary until the block is gone.
One more thing about costs. The Vehicle License Fee functions like a property tax on the vehicle, which is why newer or more valuable vehicles usually cost more to renew. That part frustrates drivers, but once you understand what you're being charged for, the amount becomes easier to verify and less mysterious.
Troubleshooting Common Issues and Final Steps
By this point, most of the hard part is done. The last stretch is usually about clearing small problems without overreacting.
Quick answers for last minute problems
I passed smog and the DMV still won't let me renew online.
Wait and try again later if you tested very recently. System timing is a common issue. If enough time has passed, check whether your record has another restriction.
My notice says smog is required, but I want to renew first and test later.
That usually creates more trouble than it solves. If smog is required for your renewal cycle, handle that item before trying to complete payment.
I replaced my battery and now something feels off in the process.
If the vehicle isn't ready for emissions testing yet, the problem may be monitor status rather than a major mechanical fault. Give the car normal driving time if needed before testing.
The fee seems wrong.
Read the notice carefully and look for the separate fee components rather than assuming it's one flat amount. Value-based and local charges can change the total.
Online keeps failing and I don't know why.
Stop repeating the same attempt if the result doesn't change. Check for record holds, insurance mismatches, or timing issues tied to recent smog transmission.
What do I do after payment goes through?
Keep your confirmation. When your registration card and sticker arrive, put the card in the glove box and affix the sticker correctly to the plate. If you used a kiosk, you may receive materials right away. If you renewed by another method, you'll need to wait for delivery.
The California registration renewal process gets easier once you stop treating it like one transaction and start treating it like a sequence. Read the notice carefully, handle the blockers in order, and don't rush the parts that depend on DMV system updates. That's how you keep a small chore from becoming an all-day East Bay headache.
If your renewal notice says smog is required, Speedy Smog is a solid local choice for East Bay drivers who want the emissions step handled quickly and correctly. As a STAR Certified station in San Leandro, they focus on the part of the registration renewal process that causes the most delays, and they do it with the kind of straightforward service people appreciate when DMV deadlines are hanging over them.
You walk out to your car, start it up, and there it is. The check engine light. Maybe the car feels fine. Maybe it has a rough idle, poor acceleration, or a smell you didn't notice last week. Either way, that little light can make a simple drive feel expensive fast.
The good news is that the light isn't a verdict. It's a message. Modern vehicles have a built-in way to tell you what system noticed a problem, and learning how to read OBD codes gives you a practical first step before you guess, replace parts, or hand the car over to a shop. The code itself matters, but the key difference between a quick answer and a wrong one often comes from the extra context professionals use, especially freeze-frame and live data.
Table of Contents
- That Dreaded Check Engine Light What It Really Means
- Choosing Your Code Reading Toolkit
- The Step by Step Guide to Reading Your Codes
- Decoding the Alphabet Soup P C B and U Codes
- Beyond the Code Freeze Frame and Live Data Insights
- Next Steps Clearing Codes and When to Call a Pro
That Dreaded Check Engine Light What It Really Means
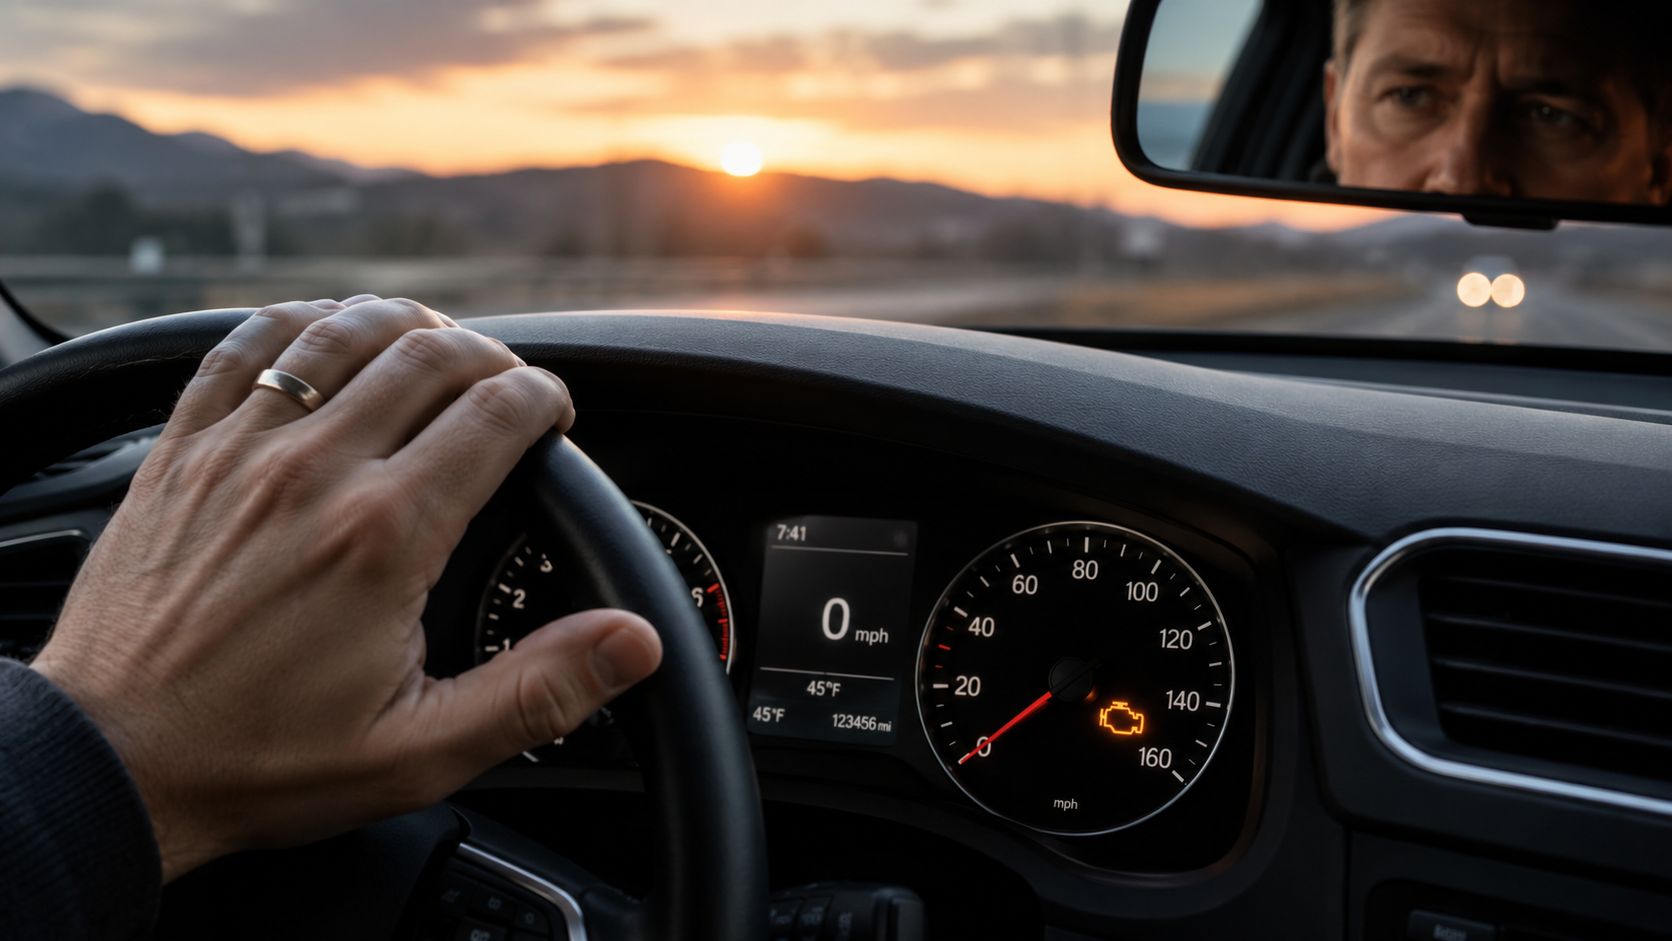
You're driving home, the car feels mostly normal, and that amber check engine light pops on. Most owners ask the same two questions right away. Can I keep driving, and how serious is this?
Sometimes the issue is minor. Sometimes it points to a problem that can get expensive if you wait. Treat the light as an early warning, then verify what the car is complaining about before replacing parts or clearing anything.
What the light is actually doing
On OBD-II vehicles, the check engine light means the computer has seen a fault and stored information about it. That stored information usually includes a diagnostic trouble code, and many vehicles also save freeze-frame data showing the conditions present when the fault set. Engine load, coolant temperature, fuel trim, and RPM often matter just as much as the code itself.
That context is what separates a useful diagnosis from guesswork.
The code tells you which system complained. It does not automatically identify the failed part. A misfire code, for example, can come from ignition trouble, a fuel delivery issue, a vacuum leak, or even a mechanical problem inside the engine.
The check engine light starts the diagnostic process. It does not finish it.
Why owners get tripped up
The same warning light can show up for problems with very different levels of urgency. A loose gas cap, an aging oxygen sensor, an EVAP leak, or a fault affecting how the engine runs can all trigger it. From the driver's seat, they look identical.
That's why reading the code is only step one. Good diagnosis comes from pairing the code with freeze-frame details and, if your scan tool allows it, live data. Professionals rely on that extra information every day because it helps answer the question owners want to know. Is this a small fix, something that can damage the car, or an emissions issue that needs closer testing?
If registration is coming up, a warning light can also affect your inspection outcome. You can see how that works in these check engine light and smog test requirements.
One more practical point. If the light is flashing, stop driving as soon as it is safe and have the car checked. A steady light usually gives you more room to diagnose carefully. A flashing light often means an active misfire that can damage the catalytic converter fast.
Choosing Your Code Reading Toolkit
The right scanner saves time before you ever read the first code. A cheap tool that only spits out a fault number can leave you guessing. A better one shows the conditions behind that code, which is where diagnosis starts to get useful.
Handheld scanner or phone-based adapter
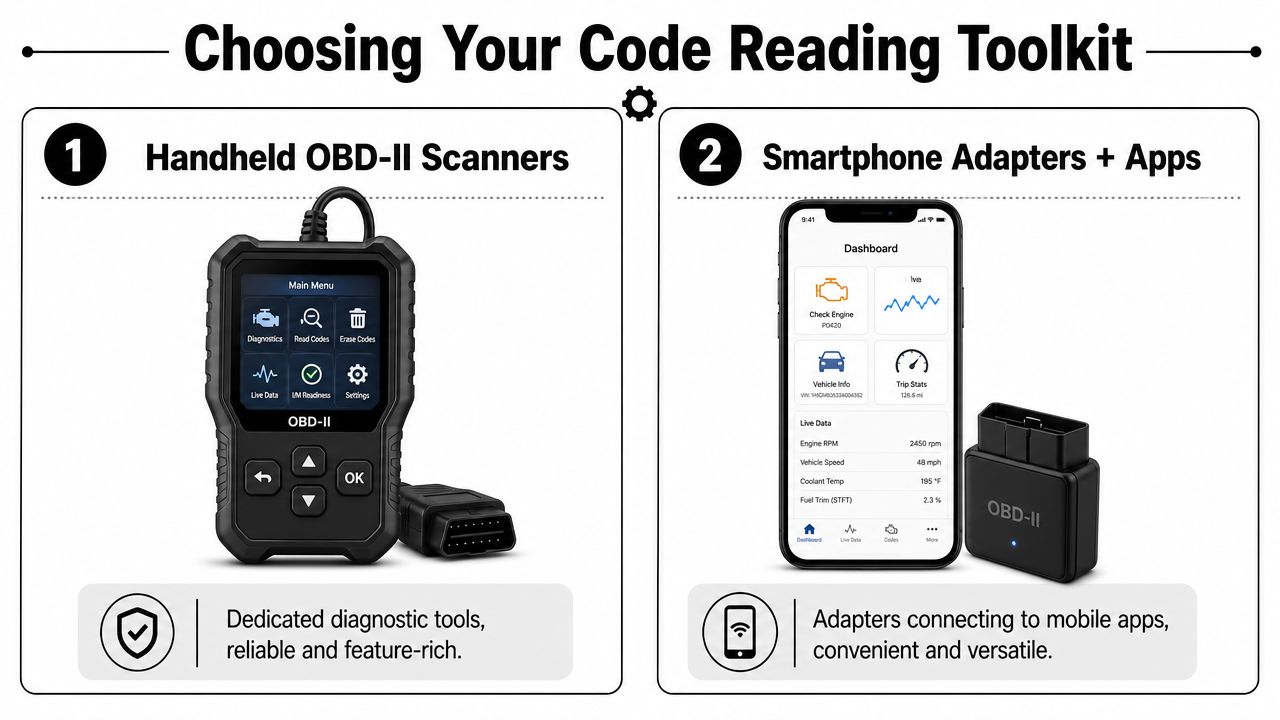
A handheld scanner fits drivers who want a dedicated tool that works every time you plug it in. No pairing. No app permissions. No dead phone battery in the driveway. I still like handheld units for quick checks because they are simple and usually less frustrating when all you want is the code and basic data.
A Bluetooth or Wi-Fi adapter paired with an app gives you more room to work. The phone screen is easier to read, and many apps do a better job showing freeze-frame details, live sensor values, and saved reports. The trade-off is setup. Some apps are excellent, some are cluttered, and some adapters lose connection at the worst time.
Here is the practical comparison:
| Tool type | Best for | What works well | Trade-off |
|---|---|---|---|
| Handheld scanner | Owners who want a dedicated tool | Fast setup, no phone required, straightforward menus | Smaller screens can make data harder to review |
| Smartphone adapter + app | Owners who want more detail and portability | Easier data review, app-based visuals, convenient storage | Setup depends on app quality and phone compatibility |
What every tool should handle
Start with compatibility. The tool needs to read standard OBD-II codes through the 16-pin connector used on U.S. cars and light trucks built since 1996. It should also show more than a code description.
These features matter most:
- Stored and pending codes so you can catch faults that come and go.
- Freeze-frame data so you can see engine load, coolant temperature, fuel trim, and other conditions present when the code set.
- Live data or PID viewing so you can check whether the problem is happening now or only under certain conditions.
- Clear code definitions that go beyond a vague one-line label.
Buying rule: Choose the cheapest tool that can read freeze-frame and live data clearly. That extra context is often the difference between replacing a part and actually fixing the problem.
Which one fits your car and your habits
For occasional use on one vehicle, a decent handheld scanner is often enough. For owners who like to save scans, compare readings, or watch sensor behavior during a road test, a phone-based setup usually gives you more for the money.
Vehicle type matters too. Gas vehicles are usually straightforward at the basic code-reading stage. Diesel emissions systems can get more complicated fast, especially when you are dealing with monitors, aftertreatment faults, or inspection concerns. If that applies to your vehicle, this guide to a California diesel smog check process gives helpful background before you decide whether to keep diagnosing at home or book a specialist.
The Step by Step Guide to Reading Your Codes
The actual process is easier than generally expected. Problems usually come from rushing, plugging into the wrong port, or turning the key at the wrong time.
Find the port and connect the tool
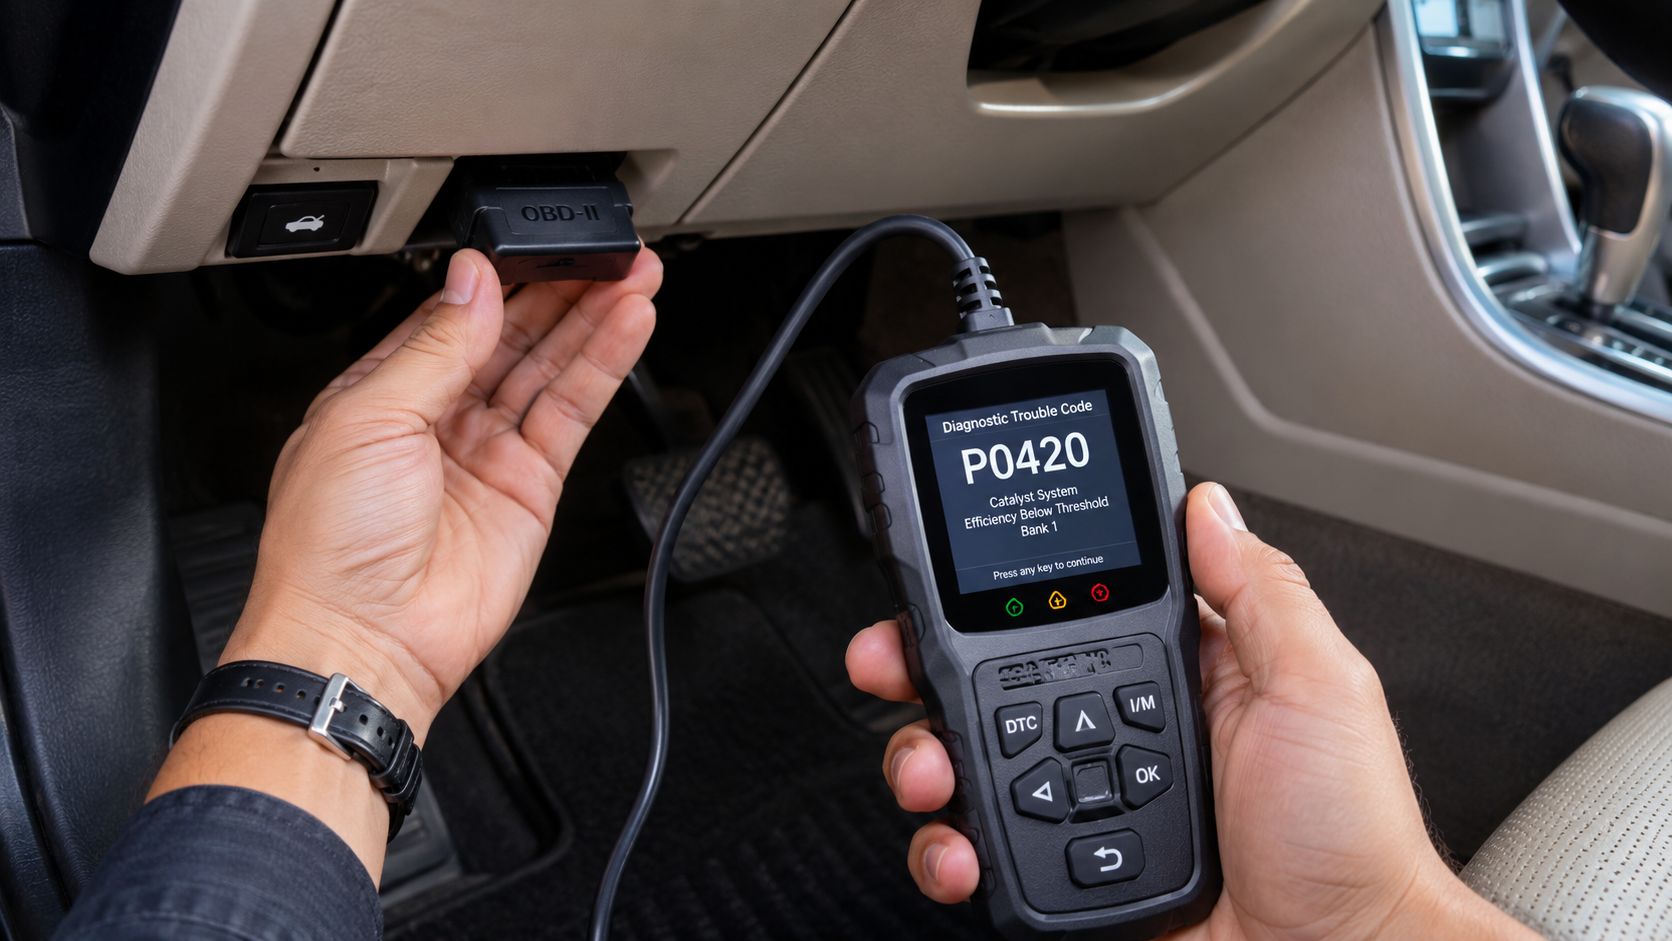
Look under the driver's side of the dashboard, usually near the steering column. The connector is a 16-pin trapezoid-shaped port. In most cars, it's visible without removing trim, though sometimes it's tucked slightly upward.
Once you've found it:
- Turn the engine off before plugging the scanner in.
- Insert the scanner firmly so the connection is fully seated.
- Turn the ignition to ON without starting the engine.
- Wait for the scanner to initialize and communicate with the car's computer.
- Choose Read Codes from the menu.
According to Raise A Hood, following that standard sequence on post-1996 OBD-II vehicles gives a success rate of over 95% when done correctly. Their guide also stresses that you should record all codes before clearing anything, because pending codes can point to intermittent faults. You can review that method in their article on reading diagnostic codes before you visit the shop.
What to write down before you do anything else
Don't trust your memory. Write down:
- The full code exactly as shown
- Whether it's stored or pending
- Any symptom you noticed such as rough idle, hesitation, or hard start
- Whether the light came on during cold start, highway driving, or stop-and-go traffic
That last part matters because faults often show up only under certain conditions.
A quick visual walk-through helps if you've never done this before:
Mistakes that cause bad reads
Most failed attempts come from a few common issues:
- Key in the wrong position. If the ignition isn't in ON, the ECU may not wake up for communication.
- Loose connection. The plug has to be seated fully.
- Starting the engine too soon. For basic code retrieval, start with key on, engine off.
- Clearing too early. That wipes out clues you may need in ten minutes.
If the scanner powers up but won't link, stop and retry the sequence instead of stabbing through menus. Clean process beats speed here.
Decoding the Alphabet Soup P C B and U Codes
A code only helps if you can read the structure correctly. I see a lot of DIY scans go off track because the owner searches the last two digits and misses the letters and earlier numbers that tell you which system is even talking.
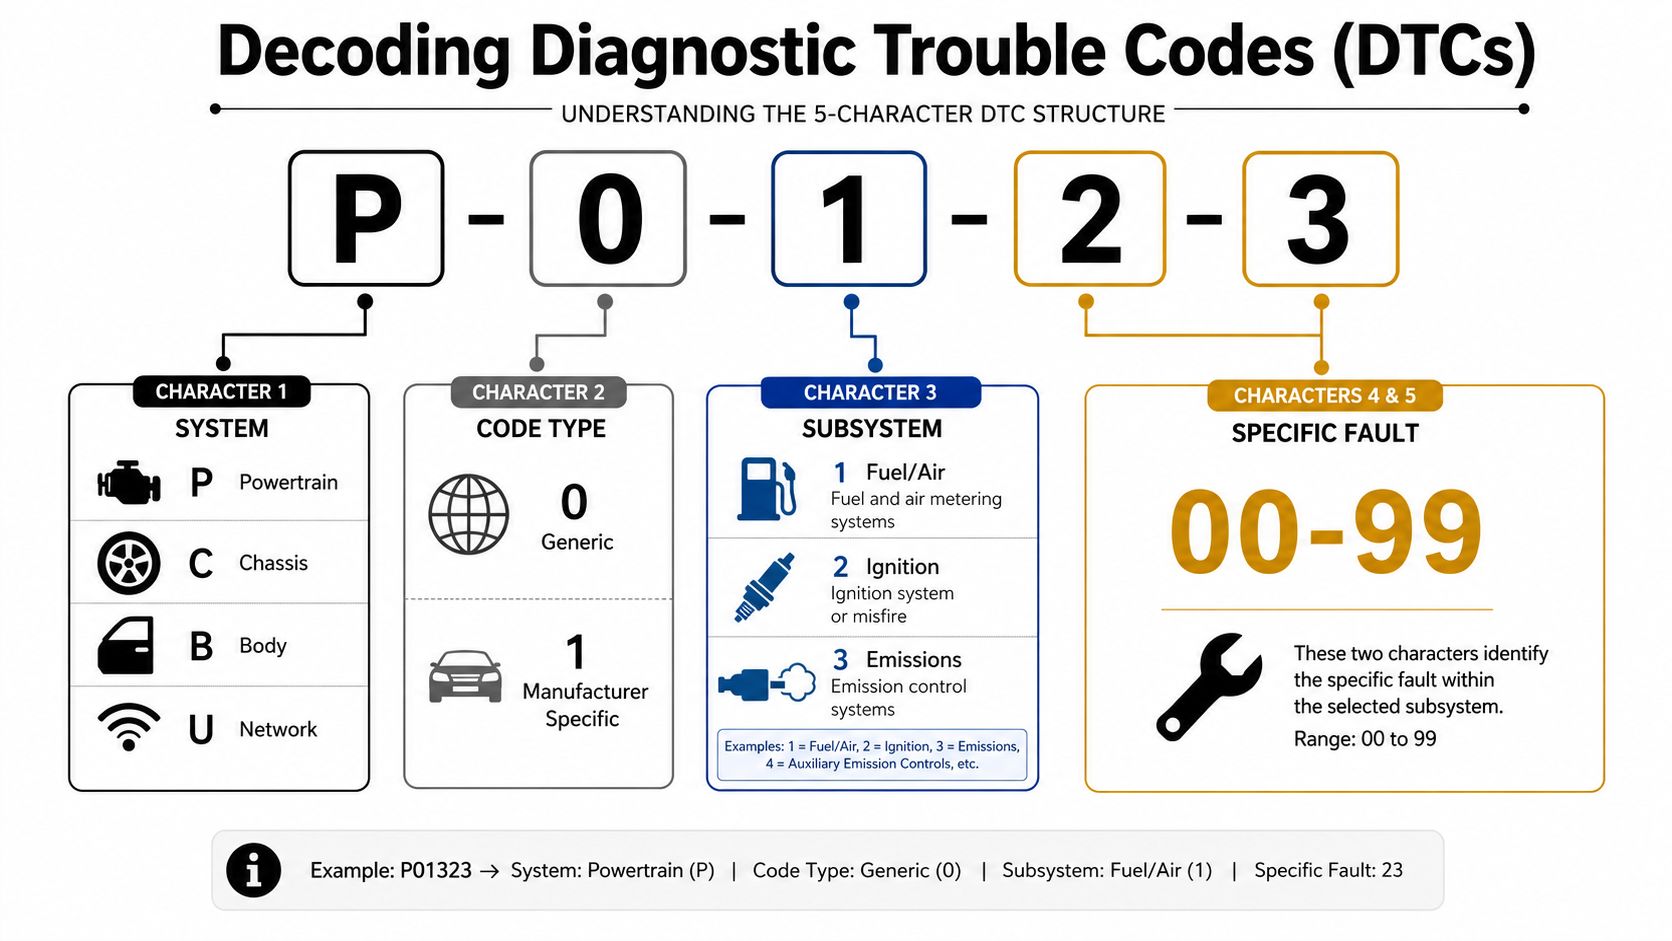
Every standard DTC has five characters. Read them left to right, because each position narrows the fault down a little more.
Start with the first letter
The first character identifies the part of the vehicle that set the fault:
- P = Powertrain, usually engine, transmission, fuel, ignition, and emissions-related systems
- C = Chassis, such as ABS, steering angle, or suspension-related controls
- B = Body, including airbags, climate control, lighting, and other cabin or body systems
- U = Network/Communication, meaning modules are not talking to each other the way they should
If the check engine light is on, you will usually find a P-code. Still, U-codes matter more than many owners expect. A communication fault can trigger symptoms that look like a bad sensor when the actual problem is voltage loss, wiring trouble, or a module that drops off the network.
The second digit tells you how specific the code is
The second character is usually the first number, and it tells you whether the code is generic or manufacturer-specific.
- 0 = generic SAE/OBD-II code
- 1 = manufacturer-specific code
- 2 and 3 can also appear on some vehicles, depending on the system and standard used
That distinction matters practically. A generic P0* code usually has a standard meaning across brands. A P1* code often needs a factory service chart or a better scan tool description to avoid guessing.
The third digit points to the subsystem
The third character groups the fault into a smaller category inside that main system. On many powertrain codes, for example, it often lines up like this:
- 1 or 2 = fuel or air metering
- 3 = ignition or misfire
- 4 = emissions controls
- 5 = idle control or vehicle speed input
- 7, 8, 9 = transmission-related faults on many vehicles
These categories are useful, but they are still only a map. They do not confirm the failed part.
The last two digits identify the fault
The fourth and fifth characters narrow it down to the specific fault that the computer recognized. That is where you get the familiar code itself, such as P0300 or P0420.
Here is a practical example.
Example: P0300
| Character | Meaning |
|---|---|
| P | Powertrain |
| 0 | Generic code |
| 3 | Ignition/misfire category |
| 00 | Specific fault ID |
P0300 means random or multiple cylinder misfire detected.
That does not mean you should install plugs, coils, or injectors right away. I have seen P0300 caused by vacuum leaks, low fuel pressure, valve sealing problems, bad grounds, and even incorrect airflow readings. The code gives you the system and the symptom path. Freeze-frame and live data are what separate a smart first check from parts swapping.
Why P, C, B, and U codes should change your next step
A P-code often sends you toward engine performance or emissions diagnosis. A C-code may push you toward ABS or stability control data that a basic code reader cannot access. A B-code can point to a body control issue that has nothing to do with drivability. A U-code often calls for wiring checks, module communication testing, or battery and charging system checks before anything else.
That is also why scan tool capability matters. A cheap reader may show only generic powertrain faults, while a better tool can read pending, enhanced, and manufacturer data across multiple modules. If you are also trying to get a vehicle ready for inspection, it helps to understand how OBD readiness monitors affect smog testing before you clear anything.
Quick decoder table
| Code part | What it tells you |
|---|---|
| 1st character | System family such as P, C, B, or U |
| 2nd character | Generic or manufacturer-specific code type |
| 3rd character | Subsystem category |
| 4th and 5th characters | Specific fault identifier |
Read the whole code before you search it. That habit alone prevents a lot of wrong turns.
Beyond the Code Freeze Frame and Live Data Insights
DIY code reading becomes real diagnosis. The code is the headline. Freeze-frame data and live data tell you what was happening when the problem showed up and whether the system is still acting up now.
Why freeze-frame matters
Freeze-frame data is a snapshot taken when the fault set. Depending on the vehicle and tool, it may show things like RPM, temperature, and speed at the time of failure. That context is often what separates a one-time hiccup from a repeatable fault.
Ignoring freeze-frame data is a major source of bad diagnosis. Mobile Elite Auto reports that nearly 60% of misdiagnosed OBD issues come from overlooking that operating context, especially on hybrid and diesel vehicles where fault patterns can depend heavily on conditions. Their article on reading OBD-II codes and interpreting vehicle health is one of the few consumer-level explanations that highlights this gap.
What live data helps you confirm
Live data shows readings while the car is running. Depending on your scanner, that can include sensor voltage, oxygen readings, and RPM. Instead of just seeing that a code exists, you can watch whether a sensor is stuck, slow to respond, or behaving normally while another issue is causing the fault.
Use it to answer practical questions:
- Does the fault happen cold or hot
- Is the sensor reading changing logically
- Does the engine smooth out when conditions change
- Do the numbers line up with the symptom you're feeling
Shop habit: Pull the code, save the freeze frame, then look at live data before you order parts.
If you're dealing with emissions-related faults, readiness status becomes part of the picture too. This guide to OBD readiness monitors is helpful when you're trying to understand why a recently repaired or recently cleared vehicle still isn't ready for inspection.
Next Steps Clearing Codes and When to Call a Pro
A lot of drivers clear the check engine light the minute they see a code. I get the temptation. The light turns off, the dash looks normal again, and it feels like progress. But if you erase codes before you finish diagnosing the problem, you also erase the history that helps confirm what failed.
That matters even more if you just spent time checking freeze-frame and live data. Those details are what separate a useful code pull from a parts guessing exercise.
The right order
Follow this sequence instead:
- Write down every code and save the freeze-frame data your scanner shows.
- Compare the code to the symptom so you're testing a problem, not chasing a label.
- Inspect or repair what the evidence points to.
- Confirm the fix with a recheck, a road test, or live data that now looks normal.
- Clear the code after that, then drive the car through the conditions that originally set the fault.
That order saves time. It also keeps you from losing the clues you may need if the problem comes back.
A simple example is an evap code. If you tighten a loose gas cap and clear the code right away, you still do not know whether the system will pass its self-test. If you check readiness and drive the car through a normal cycle, you get a much better answer.
When DIY stops making sense
Some jobs are reasonable at home. A loose connector, a damaged vacuum line, or a basic ignition problem can be within reach if you have a scanner, a meter, and a little patience.
Other cases need shop-level testing.
Call a pro if:
- The same code returns after you made a repair
- Several codes show up together and do not point to one obvious cause
- You have a manufacturer-specific code with limited service information
- The problem affects emissions readiness or smog inspection results
- The car has drivability symptoms that make road-testing unsafe
- Live data does not match the code and you need deeper circuit or smoke testing
That last point catches a lot of DIY readers. The code may name one sensor, but freeze-frame and live data can show that the sensor is reacting to another fault upstream. That is where a good technician earns their keep. They test the circuit, verify the failure, and avoid replacing parts that were never bad.
A code reader is a strong first step. Accurate diagnosis still comes from context, testing, and knowing when the trail has gone past what you can confirm in your driveway.
If you need a smog inspection or want a trusted local shop for emissions-related concerns, Speedy Smog is a STAR Certified smog check station in San Leandro that helps drivers get accurate, efficient testing without the usual hassle.
Your registration renewal notice shows up, you open it, and there it is: Smog Check Required. For a lot of California drivers, that one line creates more stress than it should. People wonder if they need the test before they pay DMV fees, whether the shop sends the results in for them, and why the DMV website sometimes still says incomplete even after a pass.
The good news is the process is usually straightforward once you handle it in the right order. Most problems come from timing mistakes, not from the smog test itself. Drivers wait too long, test too early, or assume a paid renewal means the registration is finished when it isn't.
This guide is built around what works for a smooth smog check registration renewal. It focuses on sequence, deadlines, and the practical details that keep you legal and keep the DMV from kicking your renewal into limbo.
Table of Contents
- Your DMV Renewal Notice Arrived Now What
- Decoding Your DMV Notice When a Smog Check Is Required
- Finding a Great Smog Station and Preparing Your Vehicle
- The Smog Test Process What to Expect at the Station
- After the Test Navigating Pass or Fail Scenarios
- FAQ Smog Checks for Special Situations
Your DMV Renewal Notice Arrived Now What
The envelope shows up, you spot the word “smog,” and the stress usually starts right there. The part that trips drivers up is not the test itself. It is the order of the steps. Get that right, and smog check registration renewal is usually routine.
Start with the notice. Read every line before you pay anything, book anything, or assume you already know what DMV wants. If the notice calls for a smog check, build your plan around the due date and leave yourself a little room for the DMV system to catch up after the test.
Handle timing before you handle the test
Here's the shop-floor version. If your registration deadline is close, pay the DMV renewal fee on time to avoid late penalties, then finish the smog requirement as soon as possible. A lot of drivers assume the payment alone finishes the renewal. It does not. DMV still needs a passing smog result sent electronically before it will complete registration and issue the sticker.
That timing detail matters more than people expect.
A passing result does not always show up in DMV records the minute you leave the station. In real cases, the electronic update can take 24 to 48 hours. That is why waiting until the last day creates avoidable panic, even if the car passes.
Use this order
- Read the renewal notice fully. Confirm whether a smog check is being requested.
- Check the due date right away. That date controls every other decision.
- Pay the renewal fee on time if the deadline is close. That helps you avoid penalties while you finish the smog portion.
- Schedule the test with a little cushion. Give yourself time in case the car needs a retest or the DMV update is not immediate.
- Confirm DMV received the result. If you passed today, give the system a day or two before assuming something went wrong.
If you are not sure whether the notice requirement makes sense for your vehicle, this plain-English guide to California smog check rules can help you sort that out fast.
Treat it as a sequence, not one errand. That is the easiest way to avoid late fees, last-minute surprises, and the “I passed, so why don't I have my sticker yet?” phone call.
Decoding Your DMV Notice When a Smog Check Is Required
The first question isn't where to test. It's whether your vehicle needs a test at all.
California's basic rule is that the biennial smog check requirement applies to gas-powered vehicles that are 8 model years or older and diesel vehicles from 1998 onward weighing 14,000 pounds or less, and the smog certificate is valid for exactly 90 days from the test date according to this California smog requirement summary.
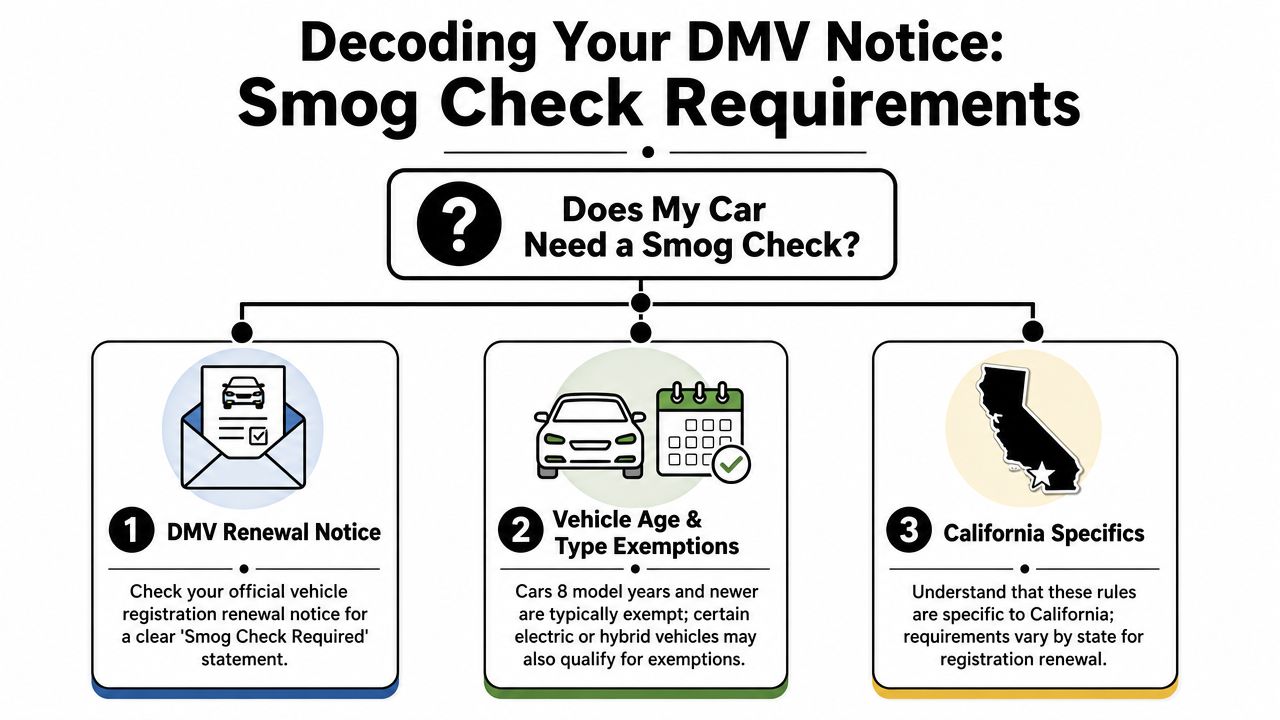
Vehicles that usually need a smog check
If your renewal notice says smog is required, it usually lines up with one of these situations:
- Older gasoline vehicle: Your car has aged into the biennial testing cycle.
- Eligible diesel vehicle: Certain diesel vehicles also fall under California testing rules.
- Ownership transfer: A sale can trigger a smog requirement even when a driver is used to thinking only about renewal cycles.
If you want a plain-English breakdown of eligibility categories, this guide to California smog check rules is a useful reference.
Common exemptions that confuse drivers
A lot of drivers get tripped up because they hear half a rule from a friend and assume it applies to them. California has exemptions, but they're specific.
- Newer gasoline vehicles: Gasoline vehicles less than 8 years old are generally exempt from the biennial smog cycle, though they must pay a smog abatement fee.
- Electric vehicles: These are exempt.
- Motorcycles: These are exempt.
- Pre-1976 classics: Older collector vehicles in that category are exempt from the standard smog program.
The easiest mistake is assuming “newer car” means no smog issue at all. It may mean no biennial inspection, but not that every registration detail disappears.
What a STAR notice means
Some renewal notices specify a STAR station. Drivers often read that like it means their car is in trouble. Usually it just means the DMV requires the inspection to be performed at a station that meets STAR program standards.
That's an administrative requirement, not an accusation. If your notice says STAR, go to a STAR-certified shop and you've handled that part correctly.
If your notice says STAR required, don't overthink it. The important part is choosing the right kind of station the first time.
Finding a Great Smog Station and Preparing Your Vehicle
A smooth smog visit starts before you pull into the bay. The best shops make the process easier, but drivers still help themselves by arriving with a vehicle that's ready to be tested and with the basics already in hand.
The wrong approach is rushing in with a glowing warning light, a cold engine, and no clue whether the shop can perform the kind of inspection your notice requires. That's where a quick checklist pays off.
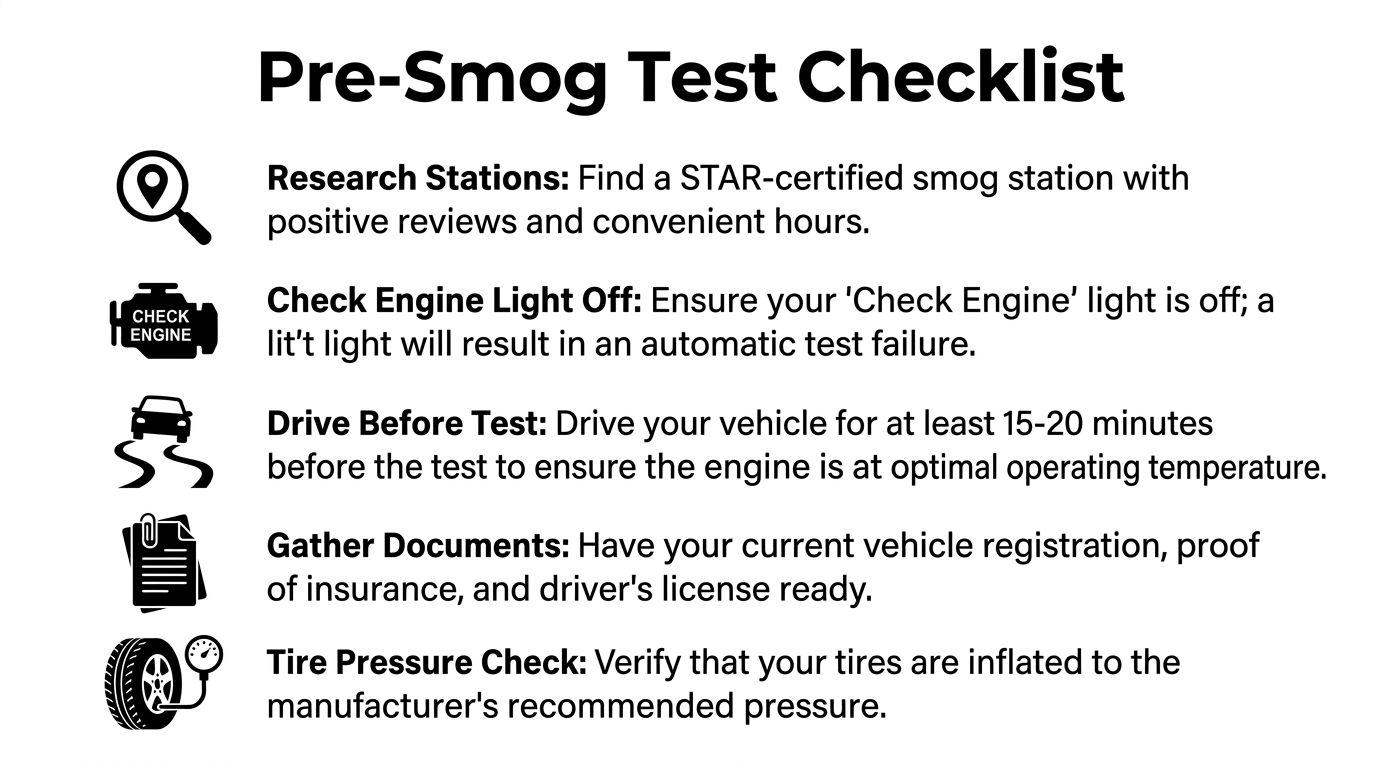
A practical pre-test checklist
Before heading to the station, do these simple things:
- Check the dashboard first. If the Check Engine light is on, don't assume it will “probably pass anyway.” That light usually means you need diagnosis before testing.
- Drive the car first. A warmed-up vehicle tends to make the visit smoother than one that's been sitting all day.
- Bring your paperwork. Having your registration and driver details handy saves time at check-in.
- Choose the right station type. If your notice says STAR required, the station must be able to perform that inspection.
- Look for transparent pricing. Honest shops explain their testing fee clearly instead of surprising you at the counter.
For drivers who want a clear explanation of what makes a station different, this overview of what a smog STAR station is helps separate marketing talk from actual program requirements.
What to look for in the shop itself
Not every station runs the same way. A good shop usually shows it in small details:
| What to check | Why it matters |
|---|---|
| Clean check-in process | Less confusion and fewer delays |
| Clear answers about STAR testing | Helps you avoid a wasted trip |
| Comfortable waiting area | Makes the errand less miserable |
| Straight pricing | Reduces last-minute surprises |
| Efficient workflow | Gets you in and out without chaos |
A fast shop isn't just one that works quickly under the hood. It's one that knows how to move drivers through the paperwork, inspection, and reporting process without creating confusion.
What does not help
Drivers sometimes try shortcuts that don't improve their odds. Showing up at a random station because it's nearby, ignoring a warning light, or waiting until the registration is nearly expired all make the process harder.
The best results usually come from basic discipline. Pick a qualified station, arrive prepared, and leave yourself enough time to solve a problem if the vehicle doesn't pass on the first attempt.
The Smog Test Process What to Expect at the Station
For many people, the most stressful part is the unknown. In reality, the visit is usually routine. You arrive, check in, hand over the vehicle details, and the technician takes it from there.
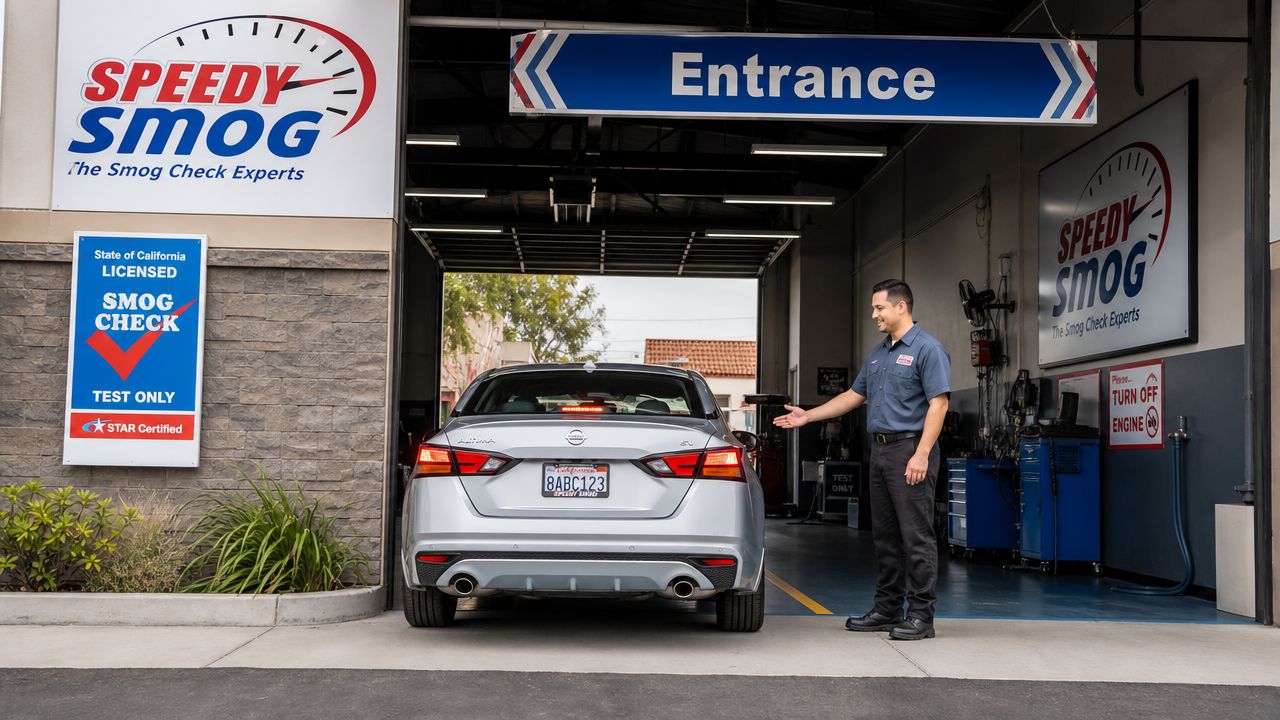
The station then performs the inspection required for your vehicle. Depending on the car, that can include a visual check, functional checks, and emissions-related data review. For most drivers, the experience feels a lot less dramatic than they expected.
What the appointment usually feels like
A well-run station keeps things simple. The technician confirms the vehicle information, explains anything unusual if your notice has special requirements, and gets the test moving. You wait while the inspection is completed.
Some drivers like knowing approximately how long they'll be there before they go. If that's you, this page on how long a smog check takes gives a practical sense of timing.
A smog appointment should feel organized, not mysterious. If the shop can't explain the process clearly, that's usually a bad sign.
What happens after a pass
One of the most important pieces of the smog check registration renewal process happens after the test bay work is done. At a STAR Certified station, the passing result is transmitted electronically to the DMV immediately, and the $8.25 certificate fee is a fixed pass-through charge that shops cannot mark up, as explained in these STAR station FAQ details.
That matters because you do not need to carry a paper certificate from office to office to finish the process. The result goes into the system electronically.
Here's a quick visual overview of the inspection experience:
One shortcut that never works
Some drivers ask if they can get tested outside California when renewal time is tight. For California registration renewal, that doesn't work. An out-of-state smog inspection is not accepted for this purpose.
That's one of those details people often learn the hard way. If California requires a California-recognized result, save yourself the wasted trip and handle it through the proper channel.
After the Test Navigating Pass or Fail Scenarios
You leave the station, the test is over, and the next step depends on one thing. Did the car pass, or did it fail? That sounds straightforward, but timing mistakes in this phase cost drivers the most time and stress.
A pass means you are close. A fail means you need a repair plan. In both cases, the smartest move is to handle the DMV side in the right order instead of assuming everything updates the same day.
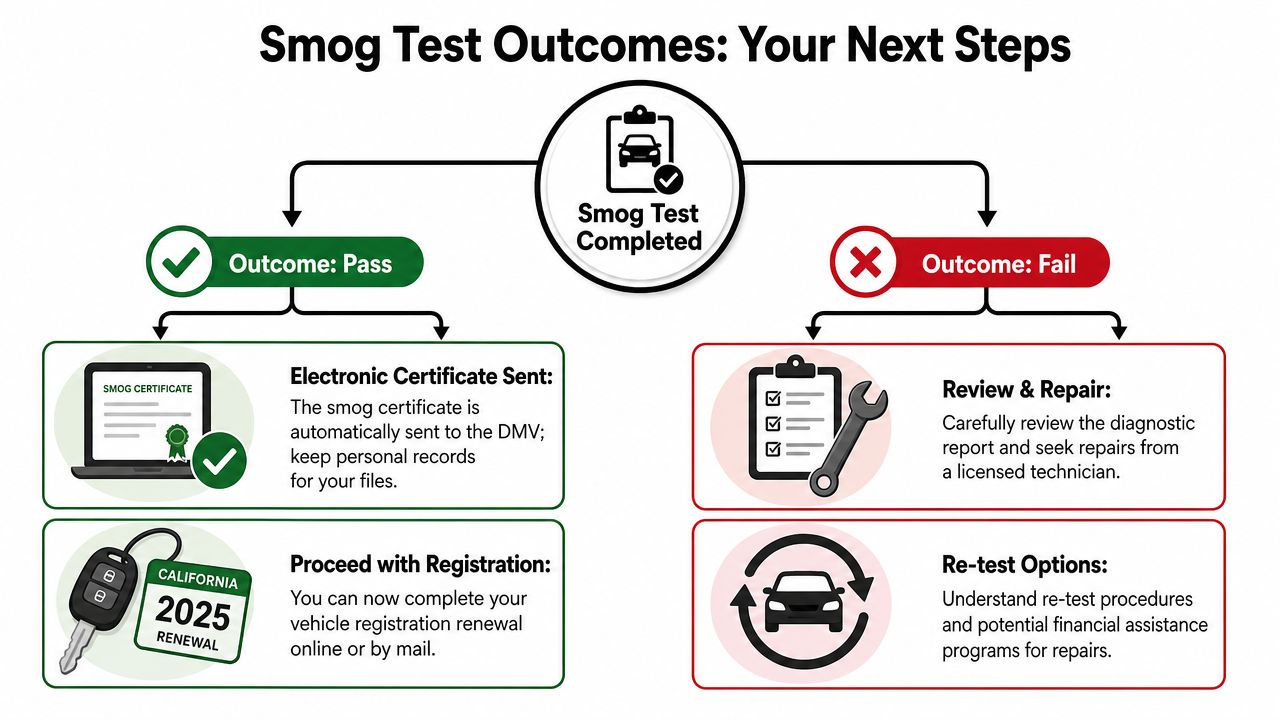
If your vehicle passes
A passing test result gets you through the emissions requirement, but your renewal is not finished until DMV records catch up and your fees are handled. Drivers get tripped up here all the time because the shop sends the result electronically, but the DMV side may not show complete right away.
Use this pass checklist:
- Pay the DMV renewal fee by the due date if you have not already. That helps you avoid late penalties, even if the registration record has not updated yet.
- Wait before assuming there is a problem. A passing smog result often takes about 24 to 48 hours to appear correctly in DMV systems on the customer side.
- Keep the receipt and test paperwork. If there is a delay, that paperwork gives you the test date, station information, and proof that the inspection was completed.
- Check your renewal status after the sync window. If the DMV still does not show the pass after that, then it makes sense to call and ask questions.
That timing matters. I have seen drivers pay attention to the test result but forget the fee deadline, and I have seen the opposite too. They pay DMV right away, then panic a few hours later because the smog still shows as missing. In many cases, the system just has not caught up yet.
If your vehicle fails
A failed test is a repair problem, not a personal failure. The report tells you where to start, and the worst approach is guessing.
Start with the inspection report. Then make decisions in this order:
- Read the failure details carefully. Look at the actual reason for failure before approving repairs.
- Choose a shop that can diagnose emissions faults, not just replace parts. Misfires, monitor issues, EVAP leaks, and catalyst faults can overlap. Random part swapping burns money fast.
- Finish the repair before retesting. If the car needs a drive cycle or monitor reset procedure, make sure that is done too.
- Keep an eye on your registration due date. Even while you sort out repairs, the DMV clock keeps running.
The expensive mistake is rushing into repairs without a diagnosis, then rushing back for a retest before the car is ready.
California also has a Consumer Assistance Program for some motorists dealing with smog-related repair costs. If the repair estimate is getting painful, ask about that option early rather than after you have already spent money.
The timing rule people miss
The practical order is what saves headaches. Pay your DMV renewal fee on time if the deadline is coming up, even if the car has not passed yet. Then finish the smog side. The DMV will not issue the sticker until it receives a passing result, but paying on time can keep you from stacking late penalties on top of repair costs.
There is another timing issue many guides skip. Smog results are not always visible in DMV records the instant you leave the shop. A short delay is normal, and that is why same-day panic calls happen.
The certificate validity window still matters too, as noted earlier. Testing too early can box you in if other renewal steps drag out. Testing too late can leave no room for repairs, monitor resets, or a DMV sync delay. The sweet spot is close enough to your renewal date that the result stays useful, but early enough to fix a problem without a last-minute scramble.
When you still need to drive
If the registration date is closing in and the smog issue is still unresolved, ask the DMV whether you qualify for a Temporary Operating Permit. For some drivers, that buys enough legal driving time to finish repairs, retest properly, and avoid making rushed decisions just to keep the car on the road.
FAQ Smog Checks for Special Situations
My car is out of state during renewal
This catches people by surprise all the time. If the car is outside California when your renewal comes up, an out-of-state emissions test usually does not satisfy California's smog requirement for registration renewal.
The fix is paperwork, and paperwork takes time. Depending on your situation, the DMV may want a statement of facts or another form tied to a temporary exemption. Start that process early, especially if your registration deadline is close. Waiting until the last few days is how a routine exception turns into late fees, extra calls, and a parked car.
My notice says STAR Station Required
A STAR requirement sounds more serious than it usually is. In practice, it means the DMV wants the inspection done at a STAR-certified station.
It does not mean the car already failed in the system. It means you need to choose the right shop the first time.
Call ahead and ask one direct question: "Are you currently licensed as a STAR station, and can you perform my test today?" That 30-second check saves a wasted trip.
I passed, so why does the DMV still show incomplete
This is one of the biggest stress points in renewal season. You pass, you pay, you check your DMV status that night, and it still shows incomplete.
A passing result is sent electronically from the station, but the DMV side does not always update right away. California's Bureau of Automotive Repair explains the 90-day validity window on a passing certificate at California's Bureau of Automotive Repair smog check page. In real shop-to-DMV timing, a short delay before the DMV record catches up is normal.
If you passed today and the DMV website has not updated yet, give it a little time before assuming something went wrong. I tell customers to avoid same-day panic unless the registration deadline is immediate and there is another problem in play, like a name mismatch or unpaid renewal fees.
This is also why timing matters. Test early enough to leave room for a DMV sync delay, but not so early that you burn too much of that 90-day window.
What if I'm selling the car
Sales catch owners off guard more often than renewals do. A car can be fine on its regular registration cycle and still need a smog inspection for transfer.
In California, vehicles 4 years old or older generally need a smog test for a title transfer. Sellers who wait until a buyer is ready to sign often end up scrambling for an appointment, especially if the notice also points them to a STAR station.
Check the requirement before you list the car. It is much easier to sell a car when the smog side is already handled.
If you're in the East Bay and want a clean, straightforward smog visit, Speedy Smog in San Leandro is a practical choice. They're a STAR Certified station with fast service, transparent pricing, and a comfortable waiting area, which makes smog check registration renewal a lot less painful when you just want to get certified and get back on the road.
Your DMV renewal notice shows up, and somewhere in the fine print you see that your diesel needs a smog check. That's usually when the questions start. Do diesels get the same test as gas cars? Will they plug into the computer, test the tailpipe, or both? If your truck runs fine, why does any of this matter?
At the counter, I hear the same concern from East Bay drivers all the time: they don't mind doing the test, they just want to know what's happening to their vehicle and what could hold up their registration. That's fair. Diesel smog checks feel more technical because the equipment is more specialized, and the results can point to problems you won't always notice in everyday driving.
That equipment matters on a big scale, too. In 2024, systems designed specifically for diesel vehicles accounted for 56% of all market installations in the automotive emission test equipment sector, which shows how central diesel testing is to compliance work across the industry, according to Industry Research's automotive emission test equipment market report.
For California drivers, the useful question isn't “What's the whole global market doing?” It's simpler than that. What tool is being used on your vehicle, what is it checking, and what do those results mean for passing your smog check and keeping your DMV registration moving?
Table of Contents
- Your Diesel Smog Notice Arrived What Now
- The Tools of the Trade Key Diesel Testing Equipment
- The Diesel Smog Check Process at a STAR Station
- Why STAR Certification Matters for Your Diesel Test
- Decoding Your Test Results What the Readings Mean
- How to Prepare Your Diesel for an Easy Pass
- Your Partner for a Fast and Compliant Smog Check
Your Diesel Smog Notice Arrived What Now
A lot of diesel owners have the same first reaction: confusion, not panic. The vehicle may be running well, there may be no warning lights on, and then the DMV notice lands anyway. If you haven't dealt with a diesel smog check recently, it's easy to assume it works just like a gas car inspection. It often doesn't.
One customer type I see often is the owner of an older diesel pickup who's convinced the shop will just “plug it in and print a pass.” Another is the owner of a newer diesel SUV who's worried they're heading into a long, expensive diagnostic session. Usually, reality lies somewhere in between. The inspection follows a process, the equipment has a specific purpose, and most of the stress comes from not knowing what each step means.
Why the notice feels more confusing for diesel owners
Diesel testing has more moving parts because diesel emissions problems show up differently. A gas car owner usually thinks in terms of a check engine light or a failed monitor. Diesel owners also have to think about smoke output, visible exhaust behavior, and whether the emissions hardware is present and working as intended.
That's why it helps to think of the smog check as both a compliance test and a health check. The machine isn't just looking for a pass or fail. It's looking for signs that the engine and emissions system are behaving the way California expects them to.
Most diesel smog stress comes from uncertainty, not from the test itself.
What you actually need to know first
Start with three basics:
- Bring the vehicle in warmed up. A cold diesel can give you misleading behavior and rougher results.
- Expect more than one kind of check. The inspection may involve a visual review, a computer check, and for some vehicles, a smoke or opacity measurement.
- Treat the notice like a deadline, not a suggestion. If the test is tied to registration, waiting until the last minute removes your repair options if something fails.
If you understand what the tools are doing, the process stops feeling mysterious. That's the difference between walking into a test lane worried and walking in prepared.
The Tools of the Trade Key Diesel Testing Equipment
Diesel emissions testing equipment works like a doctor's toolkit. One tool looks for symptoms you can see. Another checks what the vehicle reports about itself. Another helps confirm whether the engine behaves properly under load or under a specific test condition. No single tool tells the whole story.
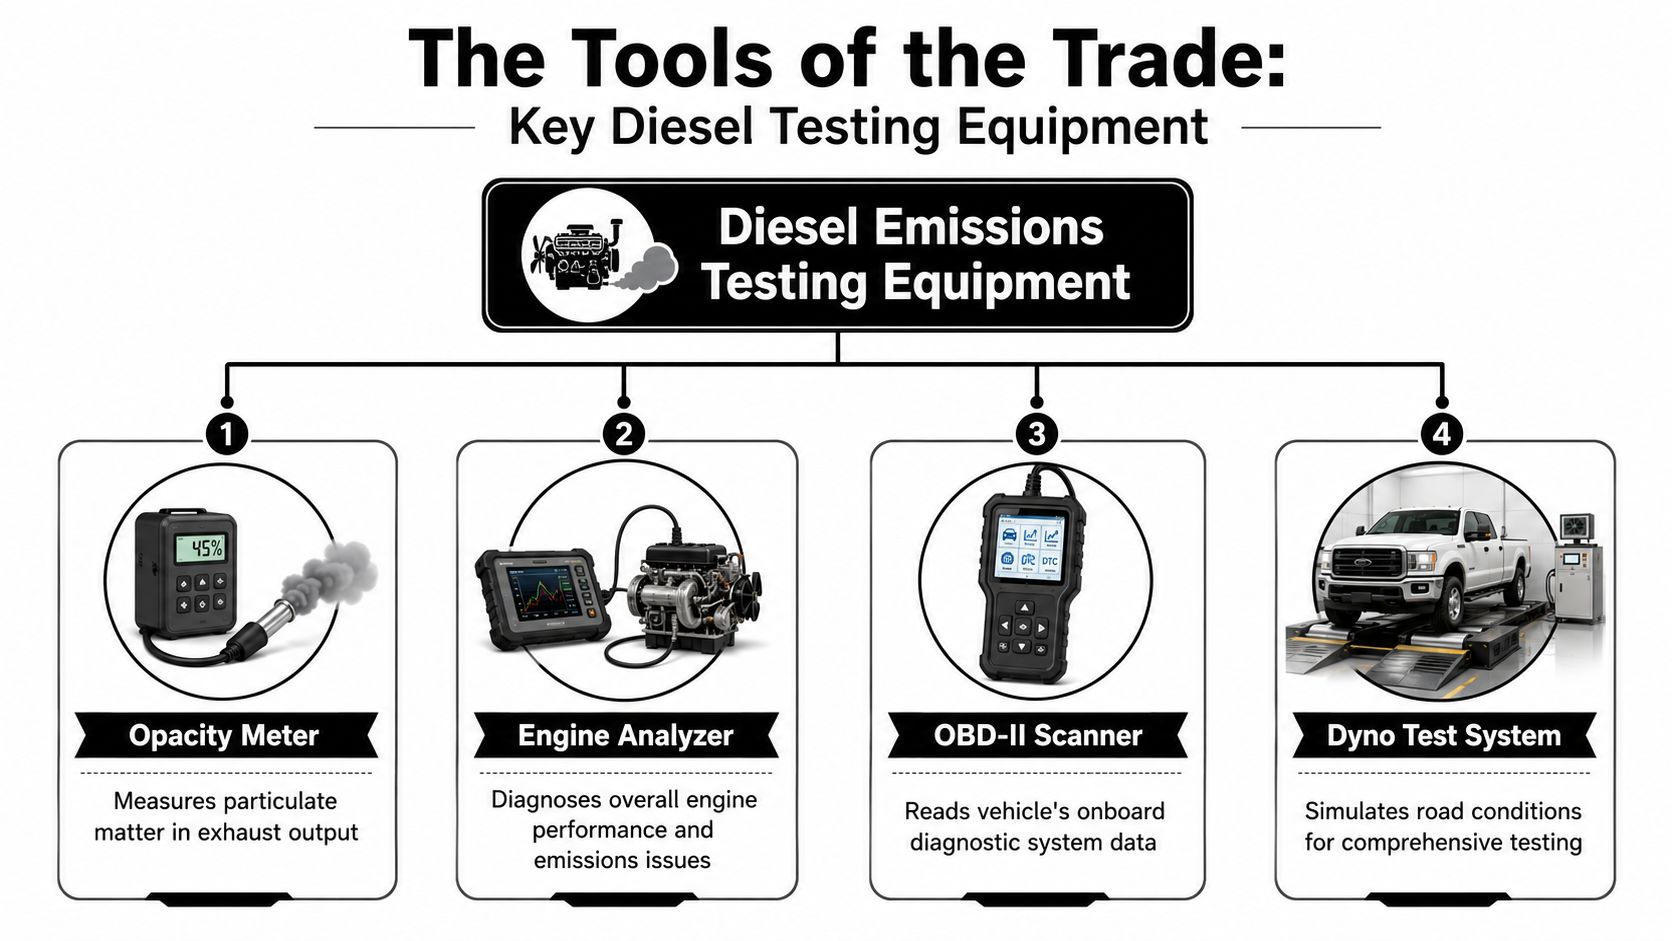
What each tool is actually checking
The opacity meter is the classic diesel-specific tool. It measures visible smoke in the exhaust stream, which gives the technician a direct read on particulate output. That matters because smoke isn't just cosmetic. It's often a clue that combustion is incomplete or that the aftertreatment system isn't doing its job. Opacity meters are also the leading product category in this market, projected to hold 45.00% of total automotive emission test equipment market revenue in 2025, according to Future Market Insights on automotive emission test equipment.
The OBD-II scanner reads the vehicle's onboard diagnostics. That's the electronic side of the inspection. It checks whether the vehicle has stored trouble codes, whether emissions-related systems are reporting faults, and whether the onboard data lines up with a healthy emissions system. For many drivers, this is the part they expect. But on a diesel, it's only one part of the picture.
An engine analyzer helps the technician interpret overall engine behavior. It's less about one pass-fail number and more about connecting symptoms. If a diesel has a rough idle, poor throttle response, or signs of an air-fuel imbalance, that can point toward the reason behind smoke output or fault activity.
A dyno test system is the “stress test” version of the toolkit. It simulates road conditions so the vehicle can be checked under controlled load instead of just sitting still. California procedures vary by vehicle and program requirements, but the idea is simple: some emissions problems show themselves better when the engine has to work.
If you're trying to understand how these systems fit into the state test itself, this overview of a California diesel smog check process gives useful context.
Practical rule: If a diesel owner says, “My truck feels fine, so it should pass,” that's not always enough. Some failures only show up when the tool checks smoke, data, or load in a structured way.
Diesel Smog Check Equipment at a Glance
| Equipment Type | What It Measures | Role in a California Smog Check |
|---|---|---|
| Opacity Meter | Visible exhaust smoke and particulate output | Verifies whether tailpipe smoke stays within the required test standard for applicable diesel vehicles |
| OBD-II Scanner | Emissions-related fault codes and system status | Checks the onboard computer for problems that can trigger a smog failure |
| Engine Analyzer | Overall engine behavior and related performance clues | Helps identify why a vehicle is smoking, idling poorly, or setting faults |
| Dyno Test System | Vehicle behavior under simulated driving load | Used when a test procedure requires controlled operating conditions rather than a simple idle check |
Why the right tool matters
Drivers sometimes ask whether one machine can do it all. It can't. A scanner won't tell you how much smoke is coming out of the tailpipe. An opacity meter won't explain why the computer set a fault. A dyno won't replace a visual inspection.
That's the core value of diesel emissions testing equipment when it's used correctly. Each tool answers a different question, and together they give a reliable picture of whether the vehicle is compliant or whether something needs attention before registration can move forward.
The Diesel Smog Check Process at a STAR Station
At a STAR station, the diesel smog check is structured. It's not a random set of shop opinions, and it's not a mechanic taking a guess based on how the exhaust smells. The sequence matters because each step screens for a different kind of problem.
What happens when your vehicle enters the bay
The first step is usually the visual inspection. The technician checks that the emissions-related components that should be on the vehicle are present and haven't been tampered with. Missing, disconnected, or obviously altered equipment can stop the process fast.
Then comes the electronic inspection for vehicles that use onboard diagnostics as part of the program. The scanner communicates with the vehicle and checks for emissions-related faults and system readiness. If the computer is reporting a problem, the test result reflects that. This is one reason clearing codes right before a smog check usually backfires. The system still needs to show that it has completed the right self-checks.
For some diesels, especially older ones, the key moment is the opacity test, often associated with the Modified Snap Acceleration approach. The technician uses the meter at the tailpipe and measures visible smoke under a defined test procedure rather than relying on guesswork.
If an older diesel smokes only when you get on the throttle, the tailpipe test is where that problem usually shows itself.
If you're not sure why your registration notice points you toward this kind of facility, the explanation of what a smog STAR station is clears up why California routes some vehicles to higher-performing stations.
Why some diesel tests are different from lab testing
Shop testing and development testing are not the same thing. In engineering and regulatory work, advanced diesel emissions measurement can involve Portable Emission Measurement Systems (PEMS) for real-world operation, along with engine dynamometer testing over standardized cycles using Constant Volume Sampling (CVS) for exhaust dilution, as described by DieselNet's overview of emissions measurement methods.
That matters for one reason only to the average driver. Professionals use different tools for different jobs. A laboratory setup can study emissions in extreme detail. A STAR station uses the approved field equipment and procedures that determine whether your vehicle meets the requirement for registration.
What drivers usually notice during the test
From the waiting room, the process can look simple. In the bay, it's methodical.
- The vehicle is identified and checked in. Paperwork and vehicle details have to match.
- The inspection follows the required sequence. Skipping steps isn't how compliant testing works.
- The final result is based on the approved test outcome. Not on a technician's hunch, and not on whether the vehicle “sounds healthy.”
That consistency is what makes the result valid for DMV purposes.
Why STAR Certification Matters for Your Diesel Test
For diesel owners, STAR certification matters because accuracy matters. You don't want a rushed inspection, and you don't want a sloppy one. You want a result the DMV accepts and a process that follows the rules the same way every time.
A STAR station operates under tighter performance expectations than a basic testing site. For the driver, that means the station is expected to maintain a higher level of consistency in how testing is performed and reported. If your registration notice requires a STAR inspection, choosing anything else doesn't help. If it doesn't require one, a STAR station still gives you confidence that the result will fit California's standards.
Why accuracy matters more than speed alone
Fast service is nice. Accurate service is the point.
A diesel smog check can affect your registration timeline, your next repair decision, and your understanding of whether the problem is electronic, mechanical, or both. That's why station quality matters more on diesels than many owners realize. A weak process creates confusion. A disciplined process gives you a result you can trust.
Here's the practical side. Some vehicles are directed to STAR stations. Others aren't. But if you drive a diesel and want the inspection handled by a shop that's used to regulated testing standards, STAR is the safer lane.
A good diesel test doesn't just give you an answer. It gives you an answer that holds up when registration is on the line.
That's why experienced diesel owners tend to care less about flashy promises and more about whether the station follows the process cleanly, uses the right equipment, and submits a result that won't create headaches later.
Decoding Your Test Results What the Readings Mean
A pass is easy to understand. A fail usually isn't. What most drivers want to know is what the machine saw, what that says about the vehicle, and whether they're dealing with a simple repair issue or a bigger emissions problem.
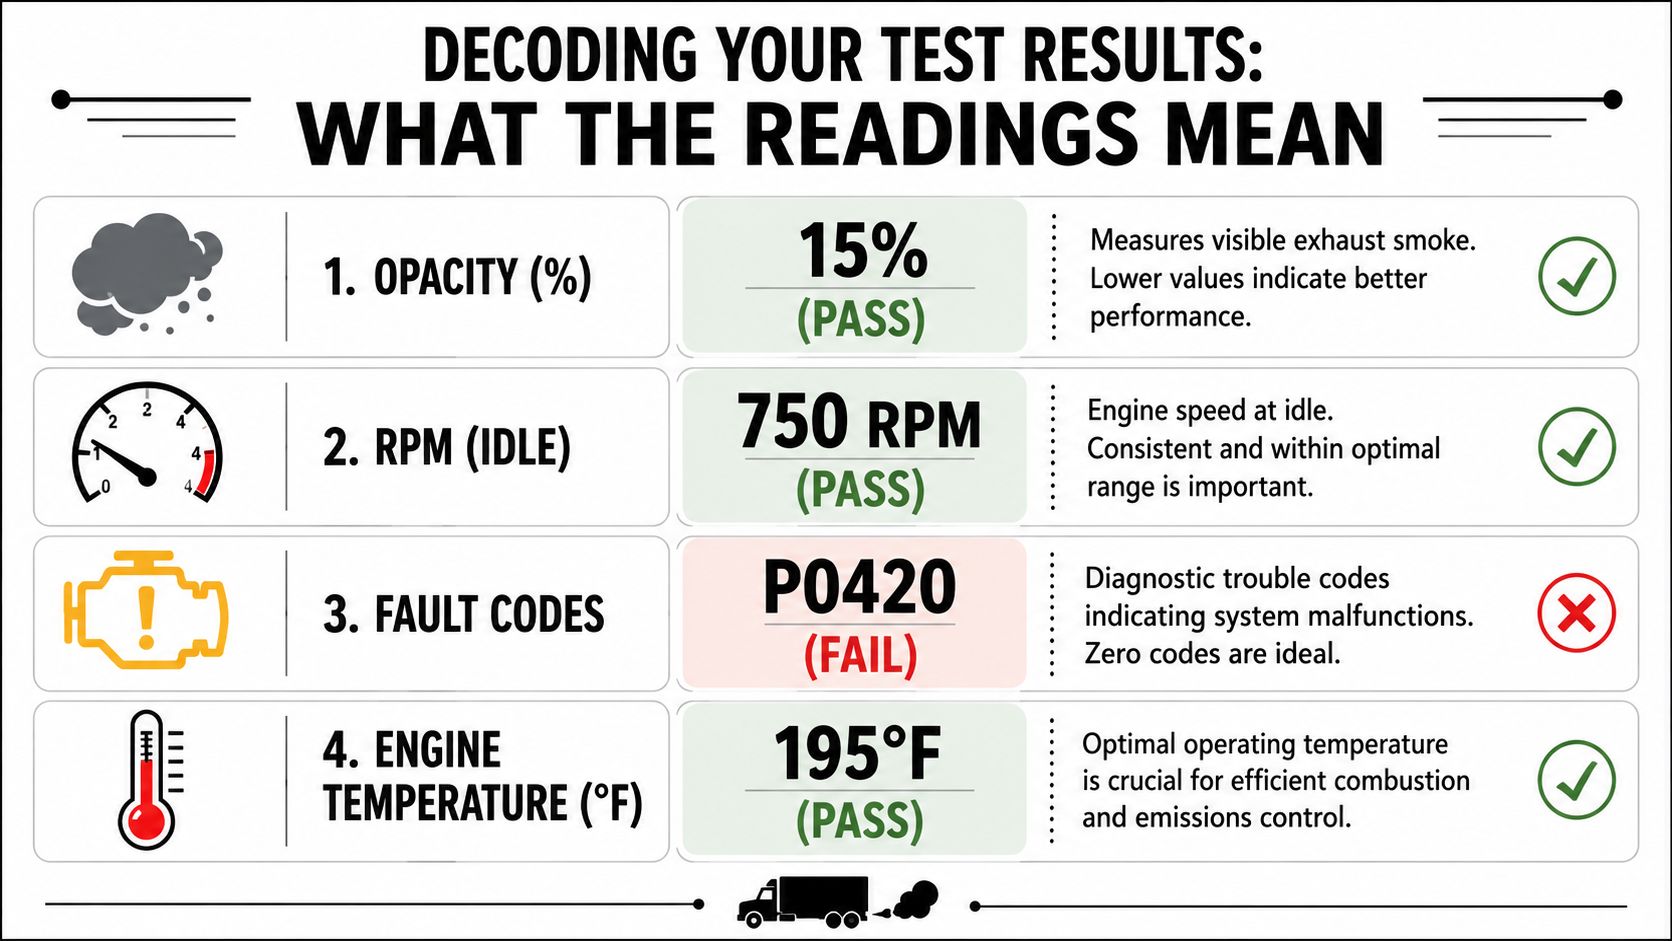
What a smoke reading is telling you
On a diesel, an opacity result is often the clearest real-world clue. If the reading is high, the engine may be producing excess soot, burning fuel poorly, or failing to control particulate output the way it should. In plain English, the tailpipe is showing that combustion and emissions control aren't lining up.
That doesn't mean the cause is always dramatic. A restricted air path, injector issue, turbo problem, or aftertreatment weakness can all show up as smoke behavior. The reading doesn't repair the vehicle. It tells you where to start looking.
What computer data can and cannot prove
Fault codes matter because they tell you the vehicle has detected a problem in an emissions-related system. If the check engine light is on for the wrong reason, that can lead straight to a fail. But code data has limits.
The big misunderstanding with diesels is assuming onboard sensor data can replace a tailpipe measurement. It can't. The clearest statement on this point is that the only way to definitively know a diesel's emissions status, especially for older vehicles, is to measure directly at the tailpipe with an opacity meter, because DPF sensor data alone cannot confirm real-world performance during a Modified Snap Acceleration test, as discussed in this diesel opacity testing video reference.
That's why one vehicle can “look good on the scanner” and still fail when tested properly at the exhaust.
How to read the result like a technician
When I explain results to drivers, I usually translate them this way:
- Clean computer report, clean tailpipe behavior: good sign. The vehicle is usually doing what it should.
- Clean computer report, dirty tailpipe behavior: something mechanical or combustion-related may be slipping past what the onboard system can confirm.
- Fault codes present: the vehicle is telling on itself. Even if it seems to drive normally, the system has identified an emissions issue.
- Intermittent symptoms: these are the frustrating ones. The truck may behave on the way to the shop and act up only under test conditions.
Don't treat a failed reading as a verdict on the whole vehicle. Treat it as evidence. Good diagnosis starts there.
A useful diesel smog result isn't just pass or fail. It narrows the problem so you can make a smarter repair decision.
How to Prepare Your Diesel for an Easy Pass
Most smog failures aren't surprises to the vehicle. They're surprises to the owner. A little prep goes a long way, especially with diesels that spend a lot of time on short trips, sit between uses, or have had recent battery disconnects or repairs.
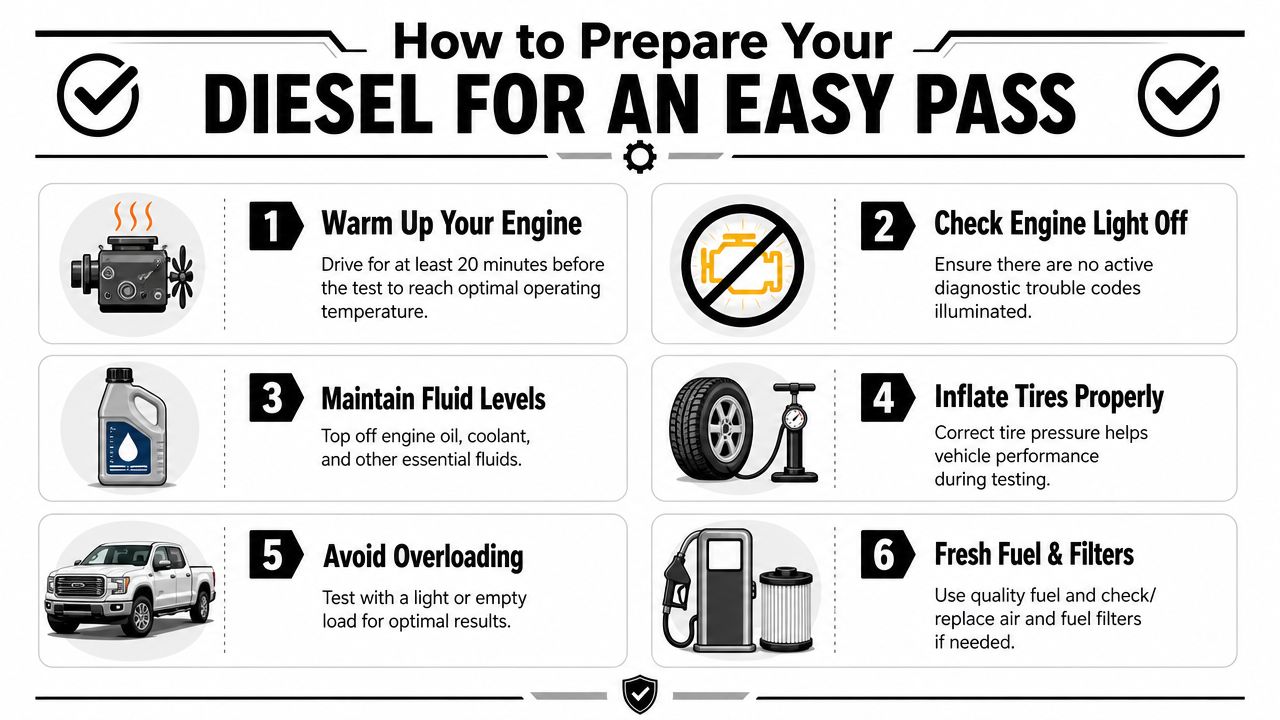
A simple pre-test checklist
Use a basic routine before you head to the station:
- Warm the engine fully. A proper drive before the test helps the engine and emissions system operate normally.
- Make sure the check engine light is off. If the light is on, don't assume the shop can “test around it.”
- Look for obvious under-hood issues. Loose hoses, disconnected sensors, or recent repair leftovers can create avoidable failures.
- Stay current on maintenance. Dirty filters, overdue oil service, and neglected intake issues can hurt diesel combustion quality.
- Avoid last-minute code clearing. If you recently disconnected the battery or reset faults, the system may not be ready for inspection.
For a more shop-focused prep list, this guide to diesel smog check prep in California is worth reviewing before your appointment.
A quick visual walkthrough can help, too:
Why California drivers need to be more proactive
Some diesel owners move here from other states and assume the rules will be similar. They often aren't. States including Illinois, Georgia, and Utah explicitly exempt light-duty diesel vehicles from mandatory emissions testing, as noted by Illinois Air Team's diesel testing FAQ. California drivers face a stricter and more hands-on compliance environment, so preparation matters more.
That difference catches people off guard. A driver may have owned a diesel for years elsewhere without ever thinking about smoke behavior, readiness status, or emissions hardware condition. In California, those details become registration issues.
What doesn't work
A few habits waste time:
- Showing up with a cold engine
- Ignoring a warning light because the vehicle “still drives fine”
- Assuming recent repairs automatically mean test-ready status
- Waiting until the registration deadline to find out if there's a problem
The easiest pass is usually the result of normal maintenance, a warmed-up vehicle, and no unresolved warning signs.
Your Partner for a Fast and Compliant Smog Check
Diesel emissions testing equipment can look intimidating if you only see it from the waiting room. Once you know what the tools are checking, the process makes a lot more sense. One tool reads the vehicle's own diagnostics. Another checks the exhaust directly. The station follows a set sequence so the result is accurate, consistent, and valid for DMV use.
That understanding helps in two ways. First, you're less likely to walk into the test guessing. Second, if the vehicle doesn't pass, you'll have a better sense of what the result is telling you instead of treating it like a mystery printout.
For East Bay diesel owners, the goal is simple: get a compliant inspection, get clear answers, and keep registration moving without drama.
If you need a diesel smog check in San Leandro or the East Bay, Speedy Smog offers STAR-certified testing with the kind of clear, practical service drivers appreciate. Whether you're coming in with a renewal notice, an older diesel that needs proper tailpipe evaluation, or a newer vehicle that needs a clean DMV-compliant inspection, the team can help you get it handled quickly and professionally.
You open your DMV renewal notice, glance down, and there it is. Smog certification required. If you drive a hybrid, that line can stop you cold because a lot of owners still assume hybrids are treated like fully electric cars.
They aren't.
That mix-up causes more registration delays than it should. The good news is that a smog check for hybrid vehicles is usually simpler than people expect, faster than a gas-car test, and much less intimidating once you know what the station is checking.
Table of Contents
- Do Hybrids Even Need a Smog Check in California?
- California's Hybrid Smog Check Rules Explained
- The Hybrid Smog Test Process What to Expect
- Common Hybrid Smog Check Failures and How to Pass
- Understanding STAR Certification and Finding a Local Smog Station
- Hybrid Smog Check FAQs
Do Hybrids Even Need a Smog Check in California?
Yes. Most hybrids do need a smog check in California.
The biggest point of confusion is that people lump hybrids in with EVs. That's the mistake. A fully electric vehicle has no gasoline engine to test. A hybrid still has an internal combustion engine, so California treats it as an emissions-regulated vehicle even though the testing method is different.
According to Diamond Certified's California smog check FAQ guide, many owners wrongly believe hybrids are exempt like EVs, but hybrids are required to undergo biennial inspections unless they are 8 model-years or newer. That misunderstanding is exactly why some drivers get surprised by a DMV notice.
Practical rule: If your hybrid burns gasoline, assume you may need a smog check unless your registration paperwork says you're still in an exempt window.
The easiest first step is to trust the DMV notice in your hand. If it says a smog certification is due, treat that as your answer and get it handled before registration turns into a deadline problem.
If you want the broader framework behind that notice, California's rules are easier to follow when they're laid out plainly. A quick read through these California smog check rules helps clear up who's exempt, who isn't, and why hybrids sit in their own category.
A lot of guides stop at “yes” or “no.” That's where owners get stuck. The answer is yes, hybrids are in the program, but the test is more efficient than a conventional gasoline vehicle inspection. That difference matters because many hybrid owners walk in expecting a long, old-school tailpipe test when that's not what happens.
California's Hybrid Smog Check Rules Explained
California didn't always test hybrids this way. According to the California Smog Check Program overview, hybrid vehicles officially became subject to smog check requirements in April 2015. That was the point where hybrids were folded into emissions compliance in a formal way.
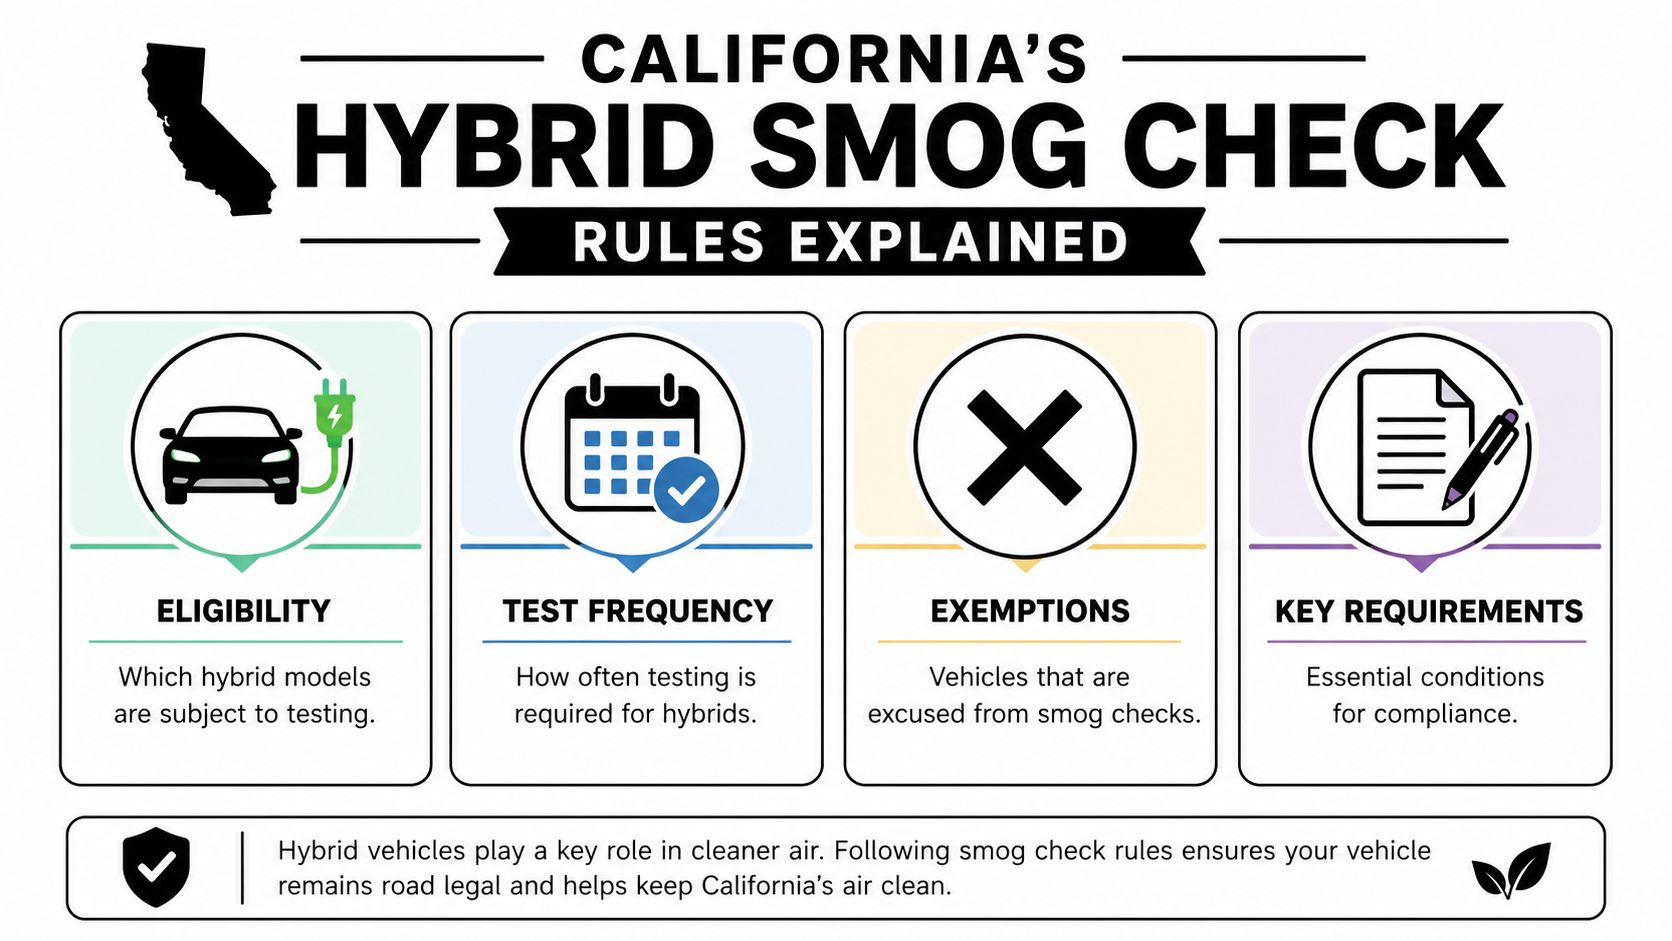
Which hybrids need testing
Here's the plain-English version:
| Hybrid situation | What usually applies |
|---|---|
| Biennial registration | Hybrids 8 model-years or newer are exempt from the biennial smog check. |
| Newer vehicle registration | Hybrids that are six model-years and newer remain exempt from the biennial requirement and pay a smog abatement fee instead. |
| Change of ownership | Hybrids four model-years or newer are exempt from the smog check at title transfer. Older vehicles need testing for transfer. |
Owners often get tripped up. They hear one exemption and assume it applies to every situation. It doesn't. Registration renewal and vehicle transfer are separate triggers, and the age cutoffs aren't identical in every summary you'll see online.
What matters most for owners
When I explain this at the counter, I keep it simple:
- Renewal notice in hand: Follow what the DMV is asking for.
- Selling or buying a hybrid: Check whether the vehicle is old enough that a transfer smog is required.
- Newer hybrid: Don't assume “new enough” means exempt forever. It just means the exemption window is still open.
If you're unsure which rule applies, look at the reason for the smog requirement first. Is it registration renewal, title transfer, or another DMV action? That usually clears up the confusion fast.
Why the rules feel confusing
Hybrids sit between two worlds. They aren't gas-only cars, and they aren't EVs. California's rules reflect that. The state recognizes the hybrid's design, but it still expects emissions compliance because the gasoline side of the powertrain is still part of the vehicle.
That's why the right question isn't “Are hybrids exempt?” The right question is, “Is my hybrid currently in an exempt category for this specific DMV transaction?”
Once you frame it that way, the rules start making sense.
The Hybrid Smog Test Process What to Expect
You pull into the station expecting a long test, a tailpipe probe, and a lot of waiting. For most hybrids, that is not how it goes.
California's hybrid inspection is usually a short, diagnostics-based visit. As noted earlier from AAA, the process is generally quicker than an older-style gasoline smog test because the inspection centers on the vehicle's onboard systems and emissions equipment rather than a traditional tailpipe procedure.
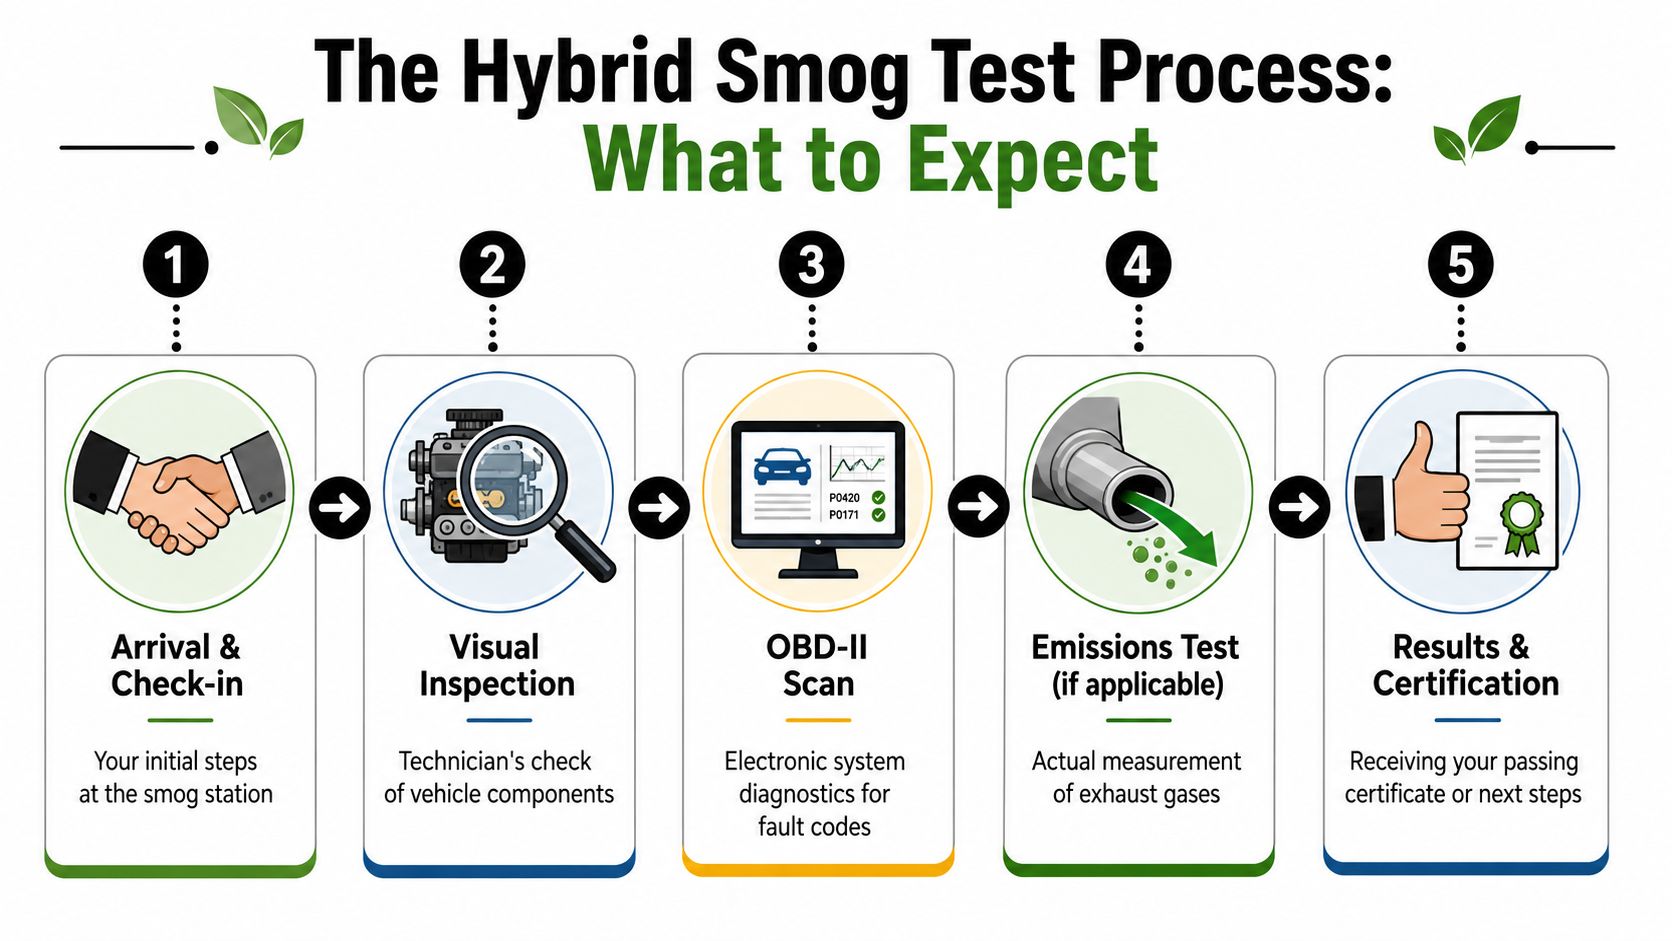
What happens during the appointment
At the shop, the process is straightforward:
Check-in and vehicle verification
The technician confirms the VIN, plate, and basic vehicle information, then starts the inspection in the state system.Visual inspection of emissions equipment
The car is checked for required emissions-related components and obvious tampering. This is one place hybrid owners get surprised, especially if the vehicle has aftermarket parts that were installed without much thought about California compliance.OBD scan and readiness check
The technician connects to the vehicle's onboard diagnostics system to look for stored trouble codes, command status, and readiness monitors. On hybrids, this is the core of the test.Result submission
If the vehicle passes, the certificate is transmitted electronically to the DMV. If it does not, the technician should tell you what stopped the certification so you are not left guessing.
That last part matters. A good station does not just hand over a fail sheet. It explains whether the issue is a warning light, incomplete monitors, or an emissions-related part problem. If you want a clearer picture of the problems that commonly stop certification, review these common smog check fail reasons before your visit.
How the hybrid test differs in practice
Hybrid owners often ask me the same question at the counter: “Are you going to run it like a regular gas car?” In most cases, the answer is no.
The inspection usually focuses on two things. First, whether the required emissions components are present and properly installed. Second, whether the car's computer shows any emissions faults or incomplete self-checks. That is why the appointment often feels simpler than people expect.
The confusion usually comes from hearing mixed advice online. Some drivers assume hybrids are treated like full EVs. Others assume every hybrid gets the same old tailpipe routine as a gas-only car. Neither assumption helps much at the station. What matters is whether the emissions equipment checks out and whether the OBD system is ready to report cleanly.
What to bring and how to avoid a wasted trip
Bring your registration paperwork if you have it, and show up with the car in normal driving condition.
A few practical tips make a difference. Do not disconnect the battery right before the test. Do not clear codes to shut off a warning light and then drive straight to the station. That often leaves the monitors incomplete, which can stop the inspection even if the car seems to be driving fine.
If your hybrid has recent modifications, mention them up front. That saves time, and it can keep you from paying for a test when an emissions-related part is obviously going to be a problem. This is one area where a local smog technician can save you a lot of frustration, because we see the same preventable issues over and over and can usually spot them before they turn into a failed visit.
Common Hybrid Smog Check Failures and How to Pass
A driver comes in with a hybrid that runs fine, no strange noises, no obvious drivability problem, and still fails the smog check. In my experience, the cause is usually simple. The car either has an active fault, the monitors are not ready, or an aftermarket part creates a compliance problem.
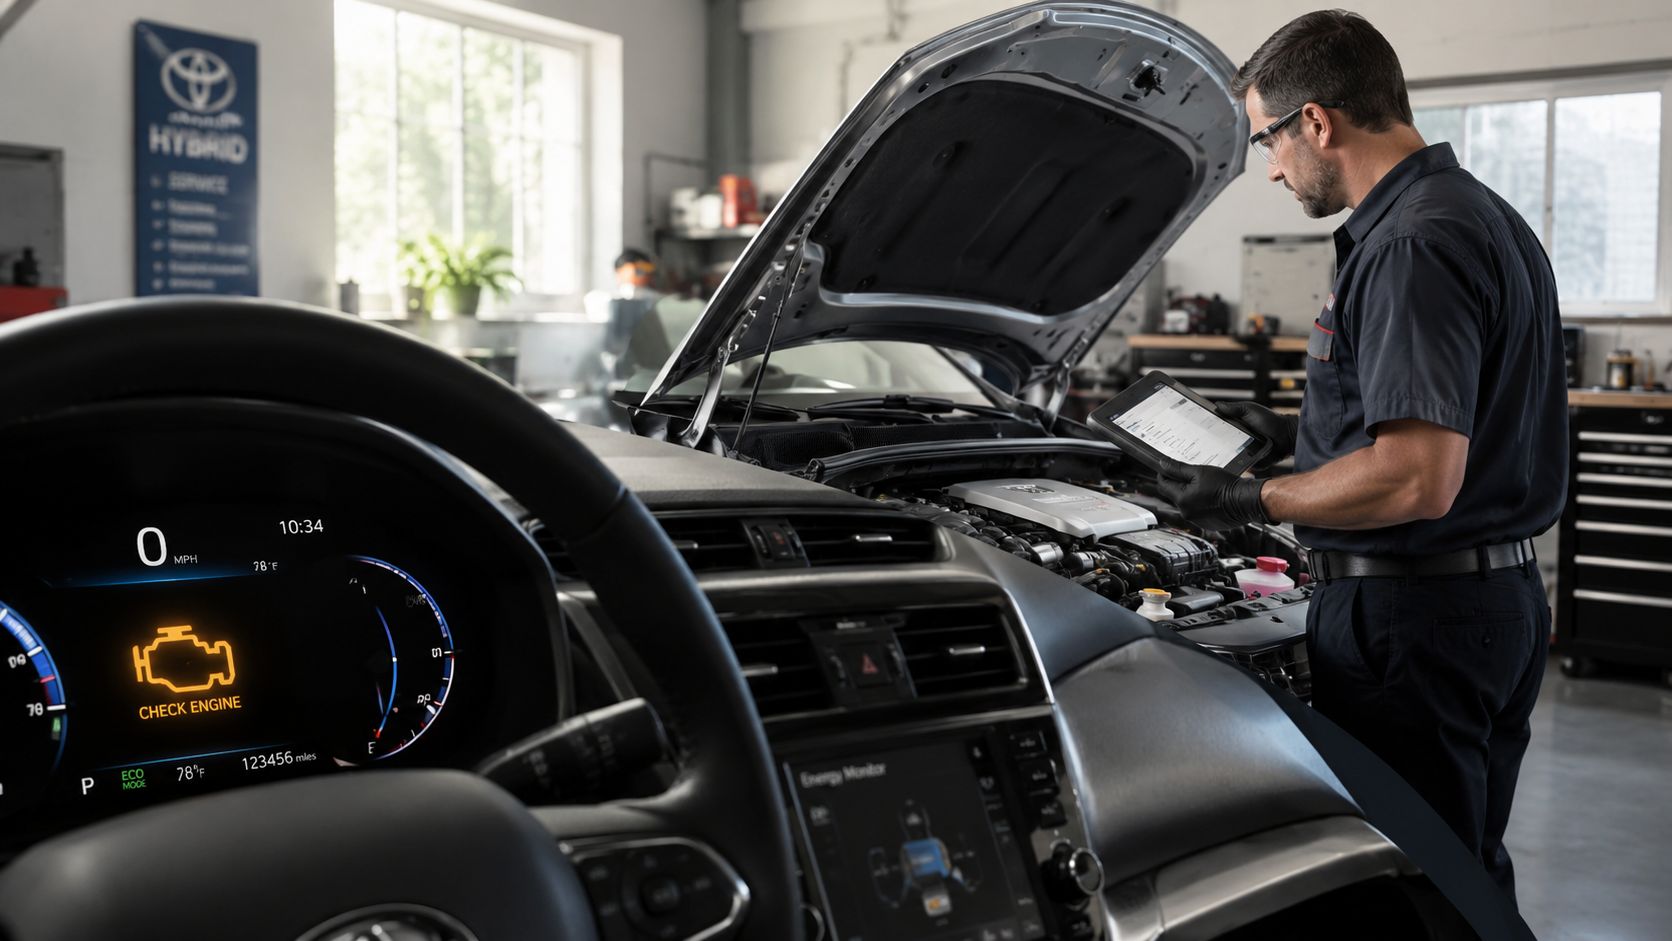
The biggest point of confusion is modifications. A hybrid does not fail just because it has aftermarket parts. It fails when an emissions-related part is missing, installed incorrectly, triggers a fault, or lacks the right California approval. That distinction saves people a lot of wasted trips.
What usually causes trouble
The Check Engine light is still the first thing I look at. If that light is on, the inspection usually stops there because the OBD system is reporting an emissions problem.
Readiness monitors cause a lot of repeat visits. If the 12-volt battery was disconnected, codes were cleared, or recent repair work reset the system, the car may show incomplete monitors. The hybrid can feel perfectly normal and still not be ready for testing.
Aftermarket parts are another common problem, especially intakes, catalytic converters, engine software changes, and other emissions-related components. Some hybrid owners also assume any battery upgrade or plug-in conversion automatically means failure. The issue is whether the change affects emissions compliance or creates a fault in the system. If the part needs CARB approval, it needs to be approved and properly documented.
I also see failures after do-it-yourself repairs. A loose connector, an unplugged sensor, or a cover left off after service can create a problem that the owner never notices until test day.
For a broader look at the issues that stop vehicles from passing, this guide to common smog check fail reasons covers the patterns we see at the station every week.
Hybrid smog failures are usually straightforward. The car is telling you something is wrong, or the emissions setup no longer matches what California requires.
A simple pre-test checklist
Before you schedule a smog check for a hybrid, check these items first:
- Check the dash: Handle any Check Engine light before testing.
- Give the monitors time to reset: If power was disconnected or codes were cleared, drive the vehicle through normal use before coming in.
- Review any modifications: Confirm that emissions-related aftermarket parts are legal for California and installed correctly.
- Look over recent repair work: Make sure hoses, connectors, and covers are back in place.
- Ask before you test: If you are unsure about a modified part, call a local smog station and ask. A quick answer can save you the cost and hassle of a failed visit.
A quick visual check at home helps more than people expect. You are not trying to diagnose the whole car. You are looking for obvious signs that something was recently changed, removed, or left unfinished.
Here's a helpful visual walkthrough of the kind of inspection mindset that matters before test day:
What works and what doesn't
What works is simple. Fix the warning light problem, drive the car enough to complete its self-checks, and verify that any emissions-related parts are California-compliant before you book the test.
What does not work is clearing codes right before the appointment and hoping the system stays quiet long enough to pass. Hybrids are checked through their onboard reporting, so incomplete or inconsistent data gets flagged fast.
If you are unsure whether your hybrid needs a repair, more drive time, or a closer look at an aftermarket part, a local technician who sees California smog failures every day can usually sort that out quickly. That clarity is what a lot of online guides miss. The failure is rarely mysterious. The cause is usually right in front of you.
Understanding STAR Certification and Finding a Local Smog Station
Not every station operates under the same expectations. If your DMV paperwork says you need a STAR station, you need to pay attention to that wording and not just show up anywhere.
When STAR matters
A STAR Certified station meets higher performance standards set by the Bureau of Automotive Repair. For drivers, that mostly means confidence that the inspection process is being handled in a way the state recognizes for the situations where STAR is required.
That doesn't make non-STAR stations “bad.” It just means STAR designation matters when the DMV specifically calls for it, or when you want the extra reassurance that the station is operating at that higher benchmark.
For a straightforward explanation of what that designation means, this guide on what a Smog STAR station is lays it out in simple terms.
What to look for in a station
If you drive a hybrid, I'd focus less on flashy marketing and more on whether the shop feels organized and comfortable handling OBD-based testing cleanly. A good station should be able to answer simple questions without making the process sound mysterious.
A few signs you're in the right place:
- Clear communication: They can explain the hybrid test in plain language.
- Efficient workflow: Check-in, inspection, and certification move without confusion.
- Comfort and convenience: A decent waiting area matters more than people admit.
- No drama about hybrids: The staff should treat your vehicle type as routine, not unusual.
A reliable smog station doesn't just run the test. It helps you understand what the result means and what to do next if there's a problem.
For East Bay drivers, that local factor matters. You want a shop that knows how California compliance works, handles DMV-facing inspections every day, and respects your time.
Hybrid Smog Check FAQs
Do I need to warm up a hybrid before the test
Usually, no. Hybrid smog checks are generally based on the vehicle's onboard diagnostics, so there is no special warm-up routine like people remember from older tailpipe tests.
What matters more is that the car has been driven normally and hasn't had the battery disconnected or codes cleared right before the inspection. If the system monitors are set and no warning lights are on, you're in good shape.
Will a battery upgrade or plug-in charger kit fail smog
A hybrid does not fail just because it has been modified. The question is whether the part affects emissions compliance, triggers a fault, or lacks approval where approval is required.
Owners frequently face challenges. Factory-style replacement parts are usually straightforward. Aftermarket electronics, charger kits, intake parts, and other add-ons can create problems if they interfere with the car's emissions systems or set diagnostic trouble codes. I see more failures tied to the side effects of modifications than to the idea of a hybrid itself.
What happens if my hybrid fails
Start with the reason for the failure. That sounds obvious, but many drivers leave with a printout and still are not sure whether the problem is a check engine fault, incomplete readiness monitors, or an issue related to a recent repair.
Do not clear codes and hope for the best. That often resets the monitors and creates a second problem. A better move is to have the fault diagnosed, complete the repair, and then return for a retest under the station's policy.
How long does the result stay valid
If your hybrid passes, the electronic smog certificate is valid for 90 days. That is usually enough time to finish your DMV registration or title transfer without rushing.
Are hybrids easier to test than gas cars
In many cases, yes. The process is often quicker because the inspection usually centers on the onboard system instead of an older-style tailpipe procedure.
Still, “easier” does not mean automatic. Hybrids fail for real reasons, and the common ones are usually preventable. Check engine lights, unset monitors, and emissions-related aftermarket parts cause far more trouble than the hybrid powertrain itself.
If you need a hybrid smog check in the East Bay, Speedy Smog in San Leandro is a STAR Certified station that makes the process easy. Drivers choose it for fast inspections, a comfortable waiting room, clear pricing, and friendly service that keeps the visit simple from check-in to DMV certification.

You open your registration renewal, scan for the amount due, and then see the line that changes your whole errand list: smog certification required. For a lot of Pleasanton drivers, that's the moment the questions start. Is this a routine test? Do you need a STAR station? Will the check engine light sink the whole visit? Can you knock it out fast without bouncing between shops?
That's where most local guides fall short. They list addresses, maybe mention coupons, and leave out the part that matters: how the inspection works, what causes avoidable failures, and why the right station choice can save a wasted trip. If you're searching for smog check Pleasanton CA, the smart move isn't always the closest shop. Sometimes it's the one that handles your vehicle type correctly the first time.
Table of Contents
- Your DMV Notice Says Smog Check Required Now What
- California Smog Rules for Pleasanton Drivers
- STAR Certified Or Regular Smog Station Which Do You Need
- How to Prepare for and Pass Your Smog Check
- Smog Check Options Near Pleasanton And Why We Recommend Speedy Smog
- Get Your Smog Certificate And Get Back On The Road
Your DMV Notice Says Smog Check Required Now What
A common Pleasanton scenario goes like this. Your tags are due soon, you've got work, school pickup, and errands stacked up, and now the DMV wants a smog check before registration can move forward. Most drivers aren't worried about the test itself. They're worried about wasting half a day on something that should've been simple.
The good news is that a smog check usually becomes stressful for predictable reasons. People go in with the check engine light on, they show up right after a battery replacement, or they don't realize their vehicle needs a different type of station than the one down the street. Those are the mistakes that turn a short visit into a repeat visit.
Practical rule: Treat your smog check like a compliance inspection, not a casual oil change stop. A little prep matters.
If you're looking up smog check Pleasanton CA, you probably need answers to three things right away:
- What the state is asking for
- How to avoid an automatic fail
- Where to go so the result counts the first time
For most drivers, the process is manageable once the jargon gets translated into plain English. You don't need to become an emissions expert. You just need to know whether your car is routine or STAR-directed, whether your onboard system is ready, and whether the shop you choose handles your vehicle type well.
That's especially important for newer vehicles, hybrids, and cars with any recent repair history. Those are the vehicles that often look fine to the owner but still trigger issues at inspection time.
California Smog Rules for Pleasanton Drivers
Pleasanton drivers are dealing with California rules, not a special city program. That matters because the test isn't just a local shop preference. It's part of a statewide emissions compliance system tied to registration and certain ownership events.
The program was adopted in 1984 to address significant smog sources from vehicle emissions, and it requires identification and repair of vehicles emitting excess smog-forming pollution, particularly during registration renewal or transfer events, as explained by AAA's overview of California smog requirements.
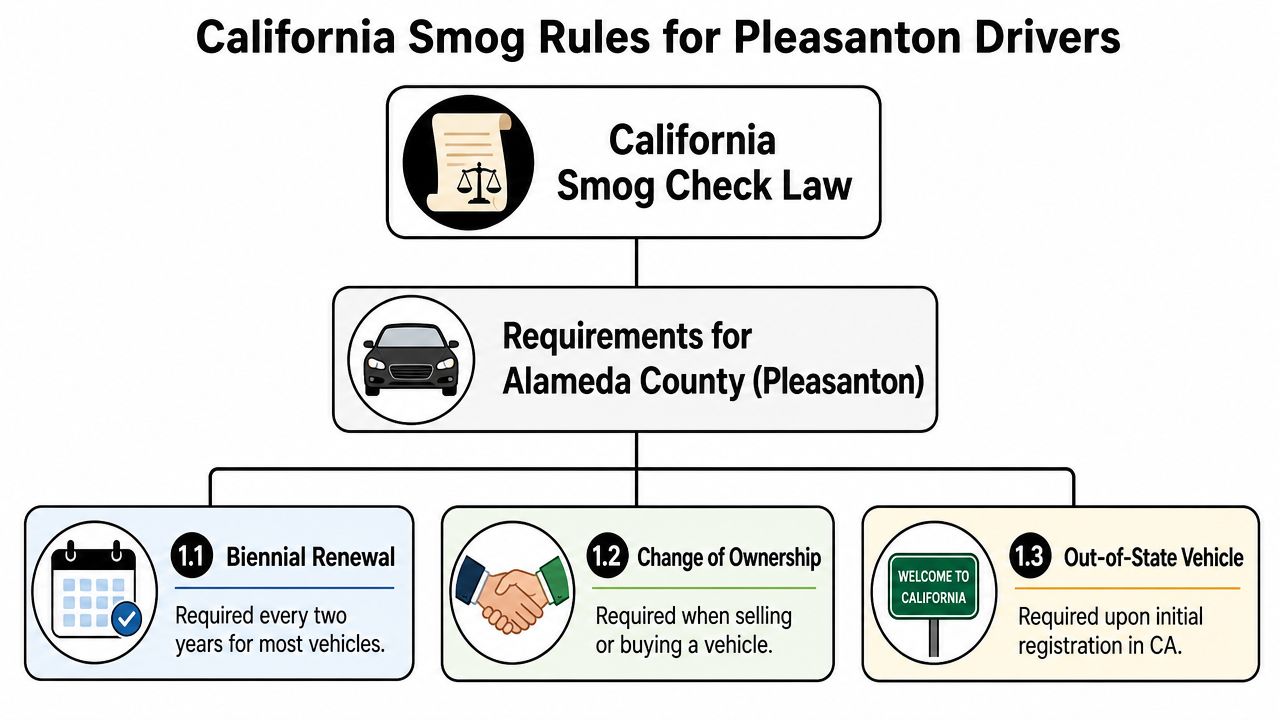
Why California takes this seriously
Pleasanton sits in the East Bay, where air quality rules aren't abstract policy. Vehicle emissions are one of the things the state actively regulates to keep pollution below required limits. That's why the notice from DMV isn't optional paperwork. It's a compliance step tied directly to whether your registration can move forward.
If you want a plain-English breakdown of the framework, this guide to California smog check rules is a useful companion.
When drivers usually get flagged
In real life, Pleasanton drivers most often run into smog requirements in a few familiar situations:
- Registration renewal: The renewal notice tells you a smog check is required before the DMV completes the process.
- Vehicle transfer: A change in ownership often triggers the need for a valid inspection.
- California entry: If a vehicle is being registered in California, emissions compliance becomes part of that first-state process.
What works is checking the DMV notice early and handling the inspection before the deadline gets close. What doesn't work is assuming every vehicle follows the same path. Some cars move through a standard inspection smoothly. Others are flagged for stricter station requirements, and that distinction catches people off guard.
Drivers usually get into trouble when they treat smog as a last-minute errand instead of a registration requirement with technical rules attached.
That's why a simple search for smog check Pleasanton CA should lead to more than a list of nearby addresses. The smarter question is whether the station you choose matches what your vehicle needs.
STAR Certified Or Regular Smog Station Which Do You Need
Many drivers lose time assuming a smog station is a smog station. It isn't. California separates standard testing from STAR Certified testing, and that difference matters if your DMV paperwork directs you to a STAR location.
The STAR Certified designation identifies facilities audited by the Bureau of Automotive Repair that demonstrate superior accuracy in detecting emissions failures, and STAR stations are specifically required for vehicles identified by the DMV as high emitters or those with a history of failed inspections, according to this California STAR station guide. That same source notes the cost for this inspection in California ranges from $30 to $70.
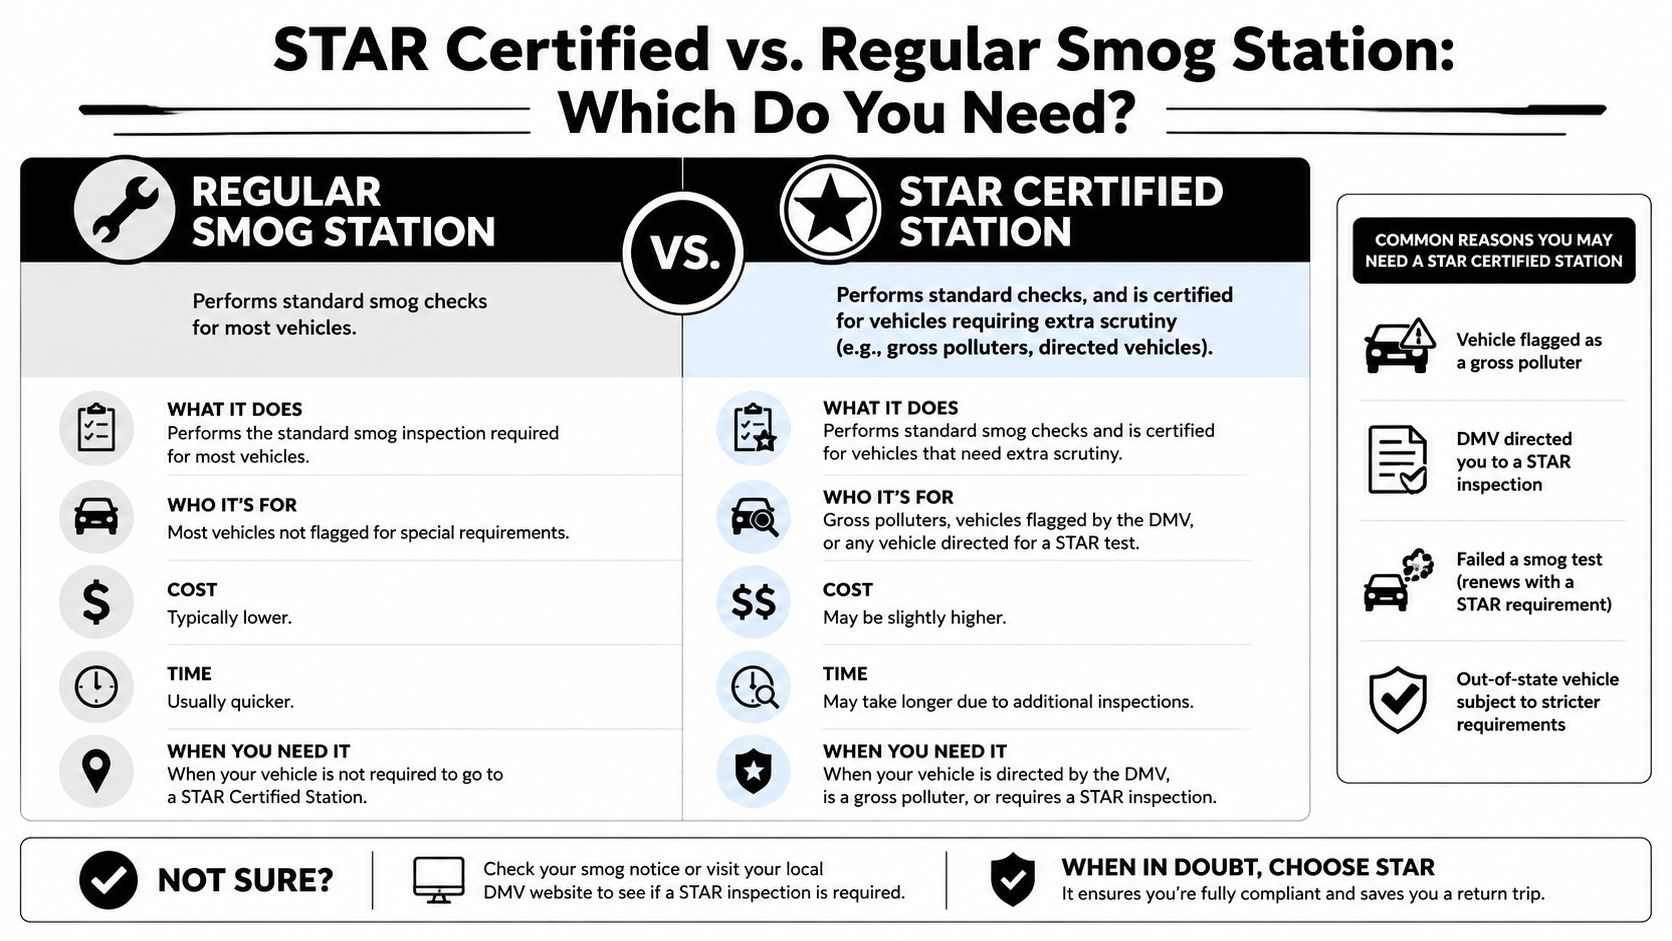
What STAR actually means
A STAR station isn't just using a nicer sign. It's a facility held to a higher performance standard. That's the practical takeaway for drivers. If your DMV notice directs you to STAR and you go somewhere else, you haven't saved time. You've started over.
Here's the simplest comparison:
| Station type | Best for | Risk if you choose wrong |
|---|---|---|
| Regular smog station | Vehicles not specifically directed to STAR | You may still need to retest elsewhere if your vehicle requires STAR |
| STAR Certified station | Standard vehicles and vehicles specifically directed by DMV to STAR | Lower risk of choosing a station your paperwork won't accept |
A useful explainer on what a smog STAR station is can help if that notice language feels vague.
A quick way to decide
Use this decision logic:
- Your DMV notice says STAR required: Go to a STAR station. No debate.
- Your vehicle has a history of emissions trouble: A STAR station is usually the smarter call.
- You own a newer model or hybrid and want fewer surprises: Specialized testing experience helps.
- You just want the broadest compliance option: Choosing STAR removes one common point of failure.
The trade-off is straightforward. A regular station may be convenient if your vehicle clearly qualifies for routine testing and you know that for sure. A STAR station is often the safer choice when the notice is unclear, the car has prior issues, or you don't want to gamble on whether the inspection will count.
That's why experienced drivers don't just ask who's closest. They ask who can complete the right inspection for their specific vehicle the first time.
How to Prepare for and Pass Your Smog Check
You get the DMV notice, book a test, drive over from Pleasanton, and expect to be in and out. Then the car fails for a reason that had nothing to do with how it felt on the road. That is the part that frustrates drivers most. Smog failures often come from readiness status, warning lights, or emissions equipment issues that show up only during inspection.
A California smog check usually includes three parts: a visual inspection of emissions-related components, a functional inspection of the OBD-II system, and an emissions measurement. If the check engine light is on or an OBD-II readiness monitor is not set, the vehicle fails, as explained in Geotab's California smog check guide.
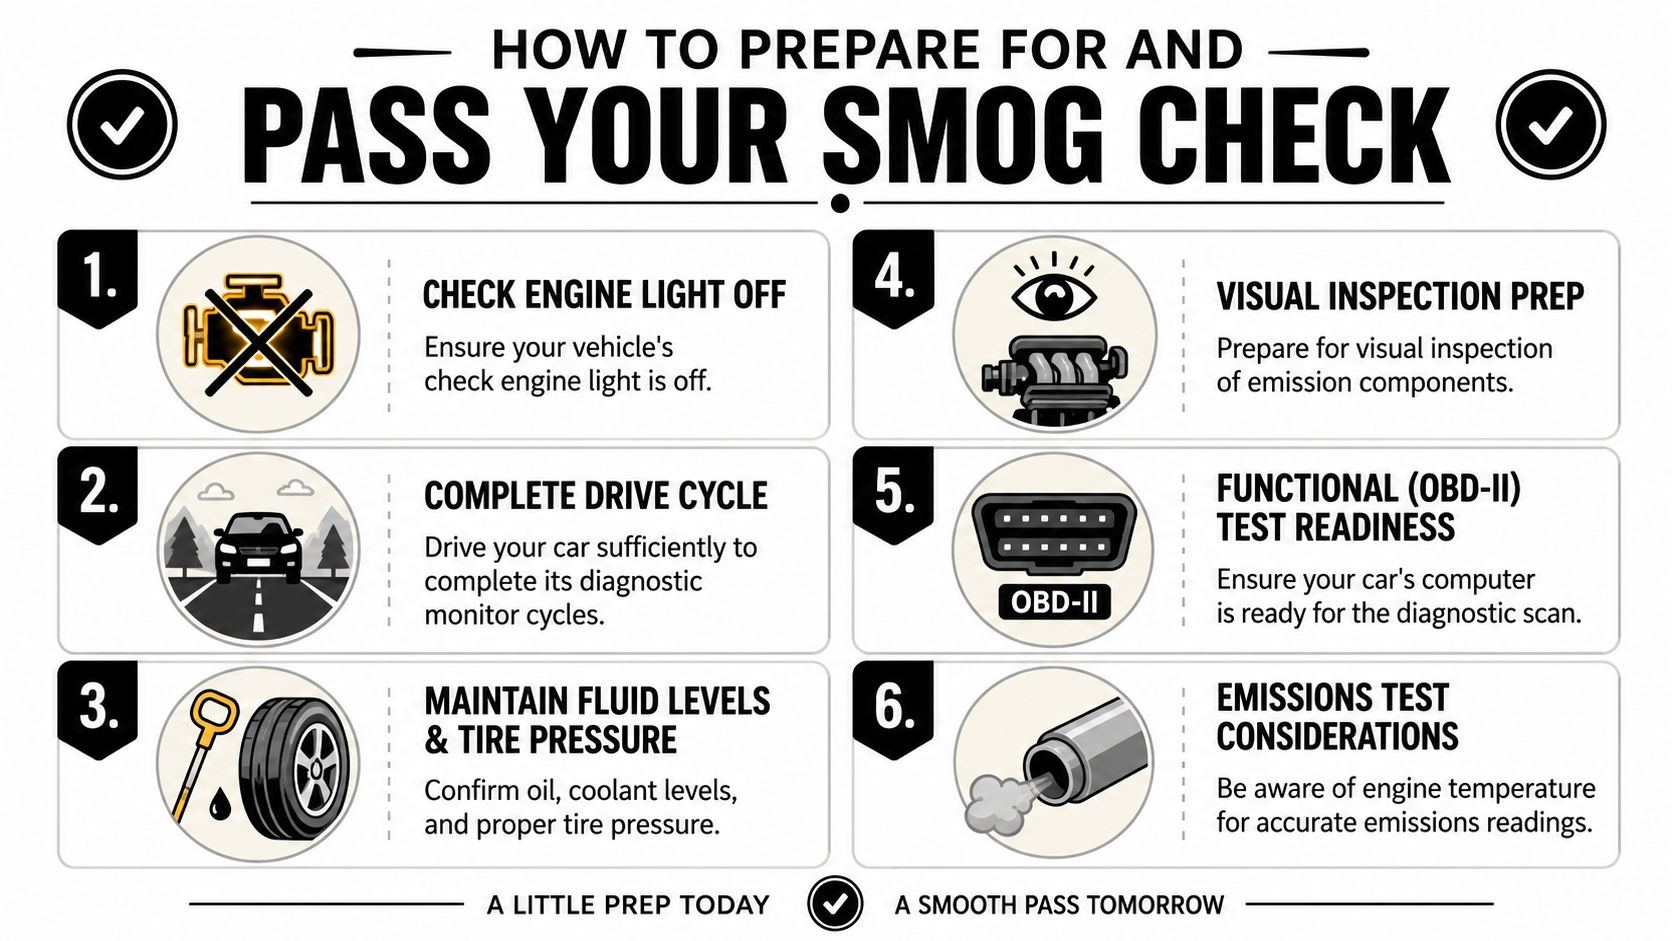
What the inspector is looking for
The visual check covers parts such as the catalytic converter, EGR valve, and fuel cap. The functional check confirms the onboard computer is ready to report valid emissions data. The emissions portion measures pollutants such as Hydrocarbons (HC), Carbon Monoxide (CO), and Nitrogen Oxides (NOx), according to that same source.
This catches a lot of people off guard. A car can drive fine and still fail.
I see this all the time with newer vehicles and cars that recently had battery work. The owner fixed one problem, cleared a code, or disconnected power, then shows up before the readiness monitors have completed their drive cycle. Geotab notes that after battery replacement, vehicles may need normal driving time before all monitors reset.
What helps before the appointment
A little prep saves a lot of hassle, especially if you want one trip instead of two.
- Drive the car long enough to fully warm it up: A cold engine is not ideal for testing.
- Check for warning lights before you leave home: If the check engine light is on, deal with that first.
- Do not disconnect the battery right before the test: That often resets monitors and creates an automatic problem.
- Ask whether the shop offers a pre-inspection: If something looks questionable, it is better to catch it before the official test starts.
- If the vehicle has tuned or modified software: Put it back to manufacturer settings or a CARB-approved version before testing, because BAR states modified software can trigger a failure.
If you want a practical list of common smog check fail reasons, review that before booking the test.
For Pleasanton drivers, this is one reason a short drive to a specialized STAR station can make sense. Shops that handle these inspections all day are usually better at spotting readiness issues, recent-repair problems, and equipment concerns before you waste time on an official fail.
Later in the process, it helps to see the inspection flow in action:
What does not work
These are the mistakes that cause avoidable failures and repeat visits:
- Clearing codes the day of the test: That often leaves monitors unset.
- Ignoring recent repairs: Battery, alternator, or module work can affect readiness.
- Assuming a newer car will pass automatically: On many late-model vehicles, OBD-II status is the whole story.
- Picking a shop based only on price or distance: If the station is not the right fit for your vehicle, the cheap test gets expensive fast.
The fastest smog check is the one you only have to do once.
Smog Check Options Near Pleasanton And Why We Recommend Speedy Smog
Pleasanton has smog check options, and for some drivers a nearby location will work fine. But convenience on a map isn't the same as the best choice for compliance, speed, or technical fit.
That matters more than many drivers realize. Local listings often blur the line between standard testing and STAR-directed testing, and that creates bad recommendations. The source material provided here notes that Bureau of Automotive Repair data shows STAR stations are held to higher performance standards and are the only authorized sites for STAR-directed vehicles, while many local listings fail to explain that going to a non-STAR station when STAR is required leads to an automatic fail and a retest, as discussed in this Pleasanton smog listing analysis.
The local shop problem most drivers don't spot
A lot of shop pages sound interchangeable. They say they do smog checks, mention a special, and leave out the operational detail that protects the customer. If your vehicle is STAR-directed, a non-STAR stop doesn't just slow you down. It sends you back out for another inspection.
Hybrid owners and owners of newer vehicles should be especially careful. Those vehicles often need a shop that pays attention to the inspection steps rather than rushing the process or oversimplifying what's required.
Why a short drive can be the better move
For East Bay drivers, making a short drive to a specialized STAR station can be the smarter option when you want accuracy, a smoother visit, and fewer compliance surprises. That's especially true if your vehicle is newer, hybrid, diesel, or anything with a recent emissions-related issue in its history.
There's also a practical value issue. A fast, properly handled visit at a specialized station beats a “closer” visit that turns into a retest. Drivers who search smog check Pleasanton CA are usually trying to solve a time problem, not just a distance problem. The best answer is the station that gets the test done correctly and gets your DMV record updated without drama.
If a shop doesn't clearly explain whether it handles STAR-directed vehicles, that's already a warning sign.
Get Your Smog Certificate And Get Back On The Road
You get the test done, the station submits the result electronically, and you can finish your registration without chasing paper forms around town. That is the part Pleasanton drivers want. A clean, one-visit smog check that does not turn into a second errand.
The easiest path is usually simple. Show up with the right station for your vehicle, bring a car that is ready to test, and confirm your DMV notice before the inspection starts. That small bit of prep prevents the problems I see all the time, especially after recent battery disconnects, check engine light repairs, or visits to a shop that was not set up for the vehicle in front of them.
If your car passes, the certificate goes straight into the system and remains usable for your registration for a limited window, as noted earlier. You do not need to babysit the paperwork.
That is one reason a short drive from Pleasanton to a specialized STAR station can make sense. The goal is not just finding the closest shop. The goal is getting the right test, done correctly, once. For drivers with newer vehicles, hybrids, diesels, or STAR-directed notices, that can save time compared with rolling the dice on a generic local option.
If you want a fast, accurate inspection from a STAR-certified team, book with Speedy Smog. They're located at 15275 Washington Ave, San Leandro, CA 94579, open Monday through Saturday, and they specialize in efficient testing for most vehicles, including newer models, older cars, diesels, and hybrids. Many 2000+ vehicles are completed in about 10–15 minutes, and the clean waiting area, transparent pricing, and periodic coupon offers make the short drive worthwhile for East Bay drivers who want to get certified and move on with their day.
You open a DMV notice, see “brake and light inspection”, and assume you need the same old certificate everyone talks about. Then you call a shop, hear a different term, and wonder whether you're about to book the wrong service and lose a day chasing paperwork around Oakland.
That confusion is real. The official term for revived salvage vehicles is now Vehicle Safety Systems Inspection (VSSI), and California's Bureau of Automotive Repair says the old Brake & Lamp Inspection wording is legally outdated even though some paperwork still uses it. If you ask for the wrong thing, you can end up with the wrong appointment and a registration problem instead of a solution. You can review that terminology change on the California BAR safety systems page.
This guide on brake and light inspection Oakland is meant to save you time, money, and repeat trips. It uses the common phrase people still search for, but keeps the official jargon straight so you know what to request, what gets checked, and how to show up prepared.
Table of Contents
- Introduction Navigating Oakland's Brake and Light Inspection
- What Is a California Vehicle Safety Systems Inspection
- Common Reasons for a Brake and Light Inspection Failure
- Your DIY Pre-Inspection Checklist Before You Go
- What to Expect at an Oakland Inspection Station
- Finding a Certified VSSI Station in the East Bay
- Conclusion Pass Your Inspection with Confidence
Introduction Navigating Oakland's Brake and Light Inspection
Most drivers don't start this process because they want to. They start because the DMV, a rebuilder, or a title issue puts the inspection on the to-do list and the wording is inconsistent from the first phone call.
The first thing to know is simple. In everyday conversation, people still say brake and light inspection. In official California use for revived salvage vehicles, you should be asking about a Vehicle Safety Systems Inspection, or VSSI.
That distinction matters because the certificate has to match what the DMV expects. A shop may understand what you mean when you say brake and lamp, but you still want to confirm they perform the current inspection required for your vehicle category and paperwork.
Practical rule: When you call a station, say, “I need a Vehicle Safety Systems Inspection for a revived salvage or rebuilt vehicle. My paperwork may still say brake and lamp.”
That one sentence clears up most of the confusion before it becomes a wasted trip.
What Is a California Vehicle Safety Systems Inspection
A California Vehicle Safety Systems Inspection is a state-required safety inspection tied to putting certain repaired vehicles back on the road. California requires reconstructed vehicles or vehicles involved in a significant accident to pass this inspection before they can be legally registered with the DMV, and technicians must hold the proper certification to sign off on it, as explained in this California brake and lamp certification overview video.
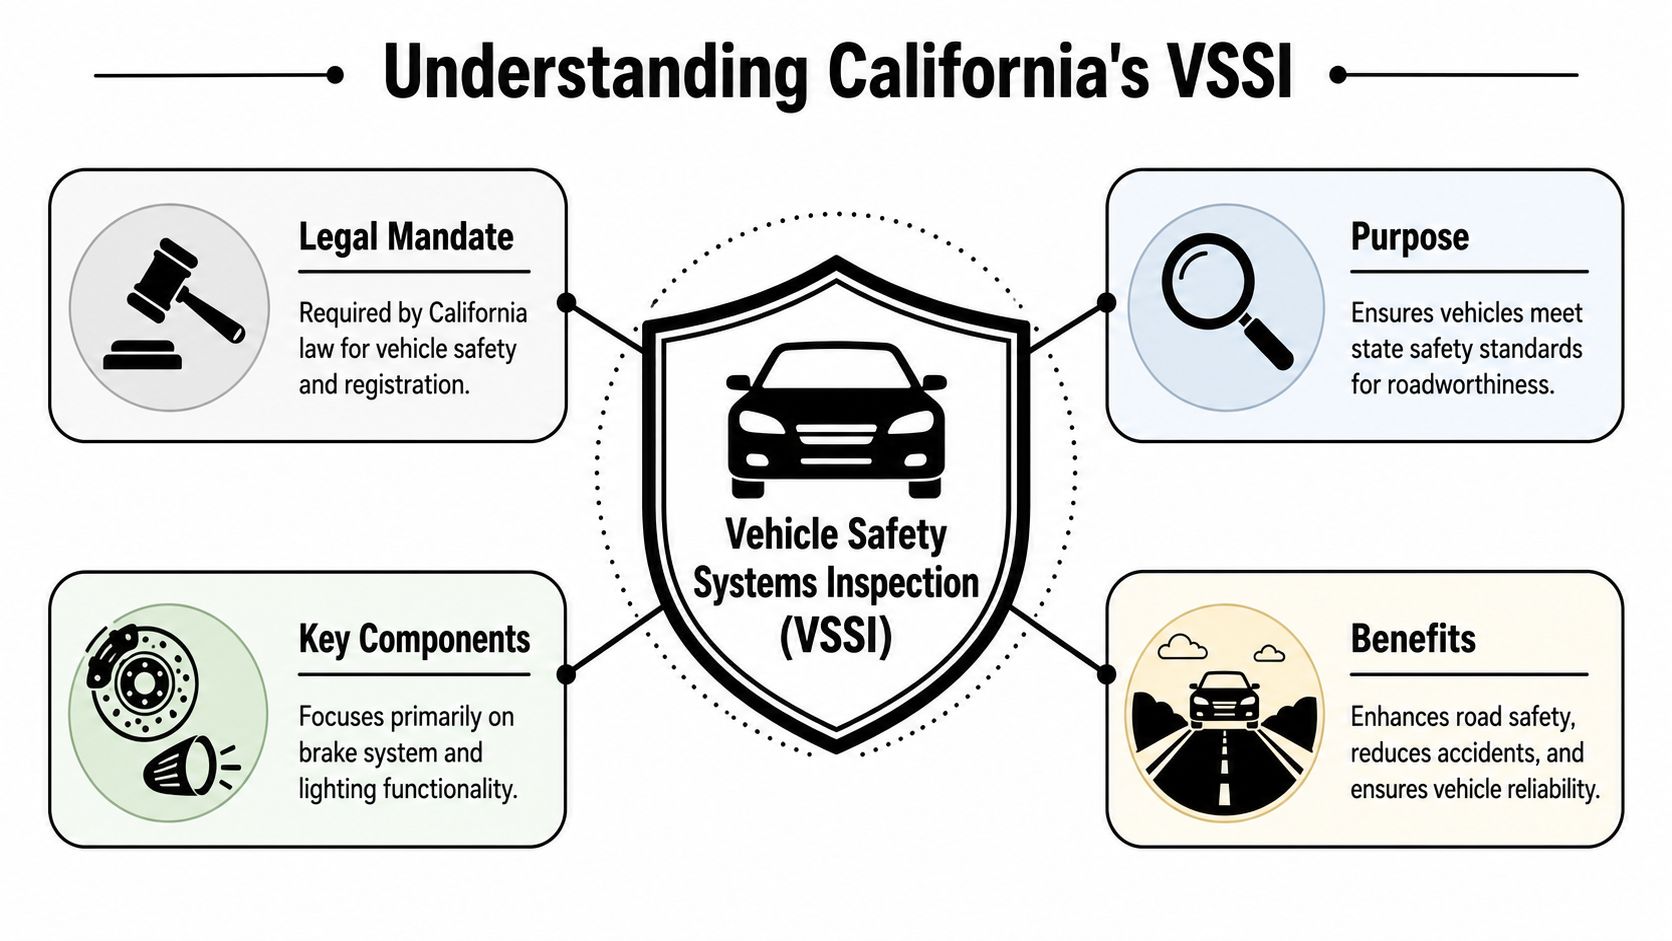
This inspection functions as a post-repair safety signoff, not a routine annual check. The state isn't asking whether the car merely starts and drives around the block. The state wants confirmation that the critical systems tied to stopping and visibility were restored to a roadworthy condition after major damage or reconstruction.
Who actually needs one
This inspection is typically part of the path back to registration for vehicles that have been salvaged, rebuilt, or heavily repaired after a serious incident. If you're dealing with title revival, reconstructed status, or DMV follow-up after major repairs, this is the lane you're probably in.
Regular maintenance customers often confuse VSSI with a smog test or a quick safety look-over. It isn't the same thing. It sits in a different bucket, with different paperwork and different legal consequences.
For a broad overview of how inspection services fit into vehicle compliance, this vehicle inspection service guide gives helpful general context.
Why the state treats it differently
The reason is public safety. When a vehicle has had major structural or collision-related work, the state needs more than verbal assurance that “everything was fixed.” Brakes and lighting are basic survival systems on the road. If either one was repaired poorly, the risk doesn't stay with the owner alone. It affects everyone around that vehicle.
A proper VSSI is also narrower than many drivers expect. It focuses on the systems that determine whether the vehicle can stop correctly and communicate correctly to other drivers. That's why the inspection can feel strict. It should.
A revived vehicle doesn't get the benefit of the doubt. It has to earn its way back onto the road with documentation.
Common Reasons for a Brake and Light Inspection Failure
Most failed inspections come down to things that are mechanical, visible, or both. The inspector isn't grading style or making a guess. They're checking whether specific parts work the way the standard requires.
For brakes, the inspection has to verify the performance of the pads, rotors, and hydraulic system. A functioning brake warning lamp is also required unless the vehicle has ABS, and failure can result from problems such as brake pad thickness under 3mm, according to this VSSI brake and lamp inspection reference.
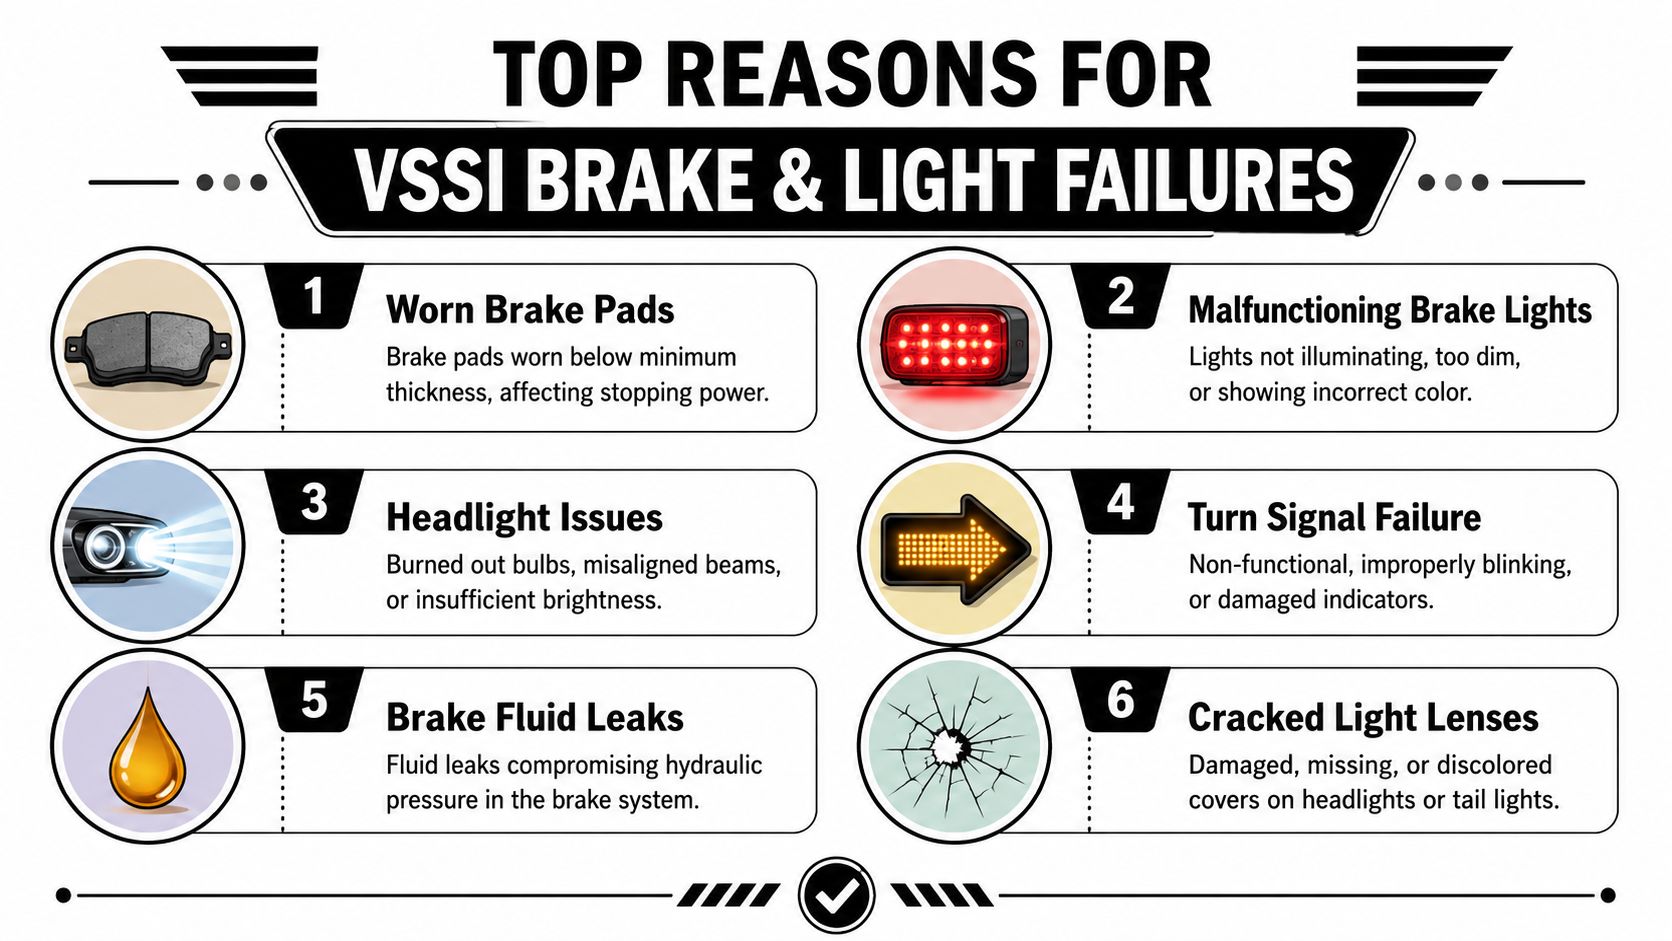
Brake system failures
Here's what tends to knock a car out on the brake side:
- Pads worn too thin. If friction material is below the standard, the vehicle won't pass.
- Rotor condition issues. Rotors that are excessively damaged or inconsistent in operation can raise a red flag.
- Hydraulic leaks or weakness. If the system can't maintain pressure correctly, the inspection stops there.
- Brake warning lamp problems. On vehicles where that lamp is required, it must function because it alerts the driver to hydraulic pressure loss or master cylinder trouble.
Balanced braking matters too. If one side grabs harder than the other and the vehicle pulls during a hard stop, that points to a real safety defect rather than a minor annoyance.
Lighting issues that stop the process
Lighting failures often look small until paperwork is involved. A cracked lens, dim output, wrong color, or a signal that works only sometimes can be enough to send you back for repairs.
Common light-related problems include:
- Brake lamps that don't activate consistently
- Turn signals with erratic blinking or no output
- Headlights that are burned out or visibly compromised
- Damaged lamp covers or lenses
- Rear lighting that doesn't present clearly to traffic behind you
If a light only fails once in a while, assume the inspector will find it on the appointment day.
What doesn't work is treating a flickering bulb or a soft brake pedal like a cosmetic issue. On a VSSI, those are exactly the kinds of faults the process is built to catch.
Your DIY Pre-Inspection Checklist Before You Go
The best way to lower your chance of a failed appointment is to catch the obvious stuff in your driveway first. You don't need a scan tool or a lift to spot many of the issues that derail a brake and light inspection in Oakland.
A good pre-check is basic, but it works. If you're methodical for ten minutes at home, you can avoid paying for a professional inspection only to fail on something simple.
A simple check you can do at home
Use this quick sequence:
- Walk around the car with the lights on. Check headlights, tail lights, turn signals, and brake lights. If possible, have another person step on the brake pedal while you watch.
- Look at every visible lens. Cracks, heavy discoloration, moisture inside the housing, or a loose lamp assembly deserve attention.
- Check the brake fluid reservoir. You're not diagnosing the whole hydraulic system here. You're looking for an obviously low level or signs that something isn't right.
- Pay attention to pedal feel. A brake pedal that feels unusually soft, sinks, or behaves inconsistently should be inspected before your VSSI appointment.
- Notice how the car behaves when stopping. Pulling to one side, shuddering, or unusually weak braking is not something to “see if it passes.”
For more practical prep habits before an inspection appointment, these essential vehicle inspection tips for every driver are worth reviewing.
When to fix it before booking
Some problems are easy yes-or-no items. Burned-out bulb. Broken lens. Brake light out. Handle those before you book.
Other problems need a shop first:
- Soft pedal feel
- Visible fluid leak
- Brake warning light concerns
- Uneven stopping
- Recent salvage repair with unfinished electrical work
This walkthrough can also help you think through common inspection-ready checks before your visit:
Don't use the official inspection as your diagnostic appointment. Use it as your certification appointment.
That mindset saves both money and frustration.
What to Expect at an Oakland Inspection Station
The biggest surprise for many drivers is cost. A California Vehicle Safety Systems Inspection in Oakland typically ranges between $250 and $300, and it's separate from a smog check, according to this discussion of California VSSI pricing in the Oakland market. It usually costs more than a standard emissions test because the inspection requires specialized certification.
That doesn't mean every station feels the same to deal with. Some are organized and clear about paperwork. Others are vague on what they provide. Before you drive over, confirm that the station performs the current VSSI required for your DMV situation.
Cost and paperwork
Bring more paperwork than you think you'll need. The exact documents can vary by vehicle history, but drivers usually save themselves trouble by bringing ownership-related paperwork, DMV forms, and records tied to the repairs or rebuild.
Here's a practical snapshot:
| Item | Typical Expectation |
|---|---|
| Inspection type requested | Ask for Vehicle Safety Systems Inspection (VSSI) |
| Price expectation | $250 to $300 in Oakland for VSSI |
| Smog included | No, it's a separate requirement |
| Technician qualification | The station should have properly certified personnel |
| Documents to bring | DMV paperwork, ownership documents, and repair-related records |
| Best phone question | Confirm they perform VSSI for revived salvage or rebuilt vehicles |
How the appointment usually feels
At the counter, the useful conversation is straightforward. What vehicle is it, what's the title status, what paperwork do you have, and what inspection are you requesting. If the staff has to “figure out what you mean” after you say brake and lamp, slow down and confirm they can issue the right certificate.
A smooth appointment usually comes from doing three things first:
- Use the current term. Say VSSI, even if your paperwork says brake and lamp.
- Show up organized. Loose forms and missing receipts create delays.
- Fix obvious defects first. Inspection stations certify condition. They don't erase problems.
Finding a Certified VSSI Station in the East Bay
Many drivers often lose time at this point. Not every general repair shop, smog station, or quick-service garage is authorized and prepared to handle this kind of inspection correctly.
If you're shopping only on price, you can end up with a station that isn't the right fit for a rebuilt vehicle, especially if the car is older or has more complicated systems. That's a poor place to save money.
Not every shop can do this inspection
The right question isn't just “How much do you charge?” Ask these instead:
- Do you perform VSSI for revived salvage vehicles?
- Do you have the proper certified personnel for this inspection?
- What documents should I bring for my specific registration situation?
Those questions tell you very quickly whether the station does this work regularly or whether you're about to become their practice run.
If you're also comparing East Bay stations for regulated vehicle testing more broadly, this STAR-certified emissions testing station overview helps show what a compliance-focused shop looks like.
Why certification matters more on difficult vehicles
For older, diesel, or hybrid vehicles, thoroughness matters more than bargain advertising. Data from 2025 indicates that STAR-certified stations detect 40% more latent defects in advanced braking systems than non-certified shops, according to this report on brake and lamp inspection value and certification differences.
That doesn't mean every non-certified shop does poor work. It does mean certification is a meaningful signal when you're dealing with a vehicle that already has higher risk, more complex systems, or a rebuilt history.
Cheap is only cheap if you pass once, register cleanly, and don't uncover missed problems later.
For a brake and light inspection in Oakland, the smart move is to choose a station that understands the paperwork, the terminology, and the inspection standard well enough to get it right the first time.
Conclusion Pass Your Inspection with Confidence
The hardest part of this process is usually the confusion before the appointment, not the inspection itself. Once you know the official name, the purpose, and the common failure points, the path gets much simpler.
Keep the essentials straight. Ask for a Vehicle Safety Systems Inspection if your vehicle falls into the revived salvage or rebuilt category. Do a quick home check before you book. Bring organized paperwork. Choose a properly qualified station instead of chasing the lowest number you hear over the phone.
That approach saves headaches because it matches how the DMV process works. It also protects you from the two most common problems. Booking the wrong service and showing up with a vehicle that still has obvious defects.
A brake and light inspection in Oakland can feel like one more bureaucratic hurdle. In practice, it's the final confirmation that a repaired vehicle can return to the road safely and legally. If you treat it that way, you'll walk into the appointment far more prepared than most drivers.
If you need a compliance-focused East Bay shop, Speedy Smog is a practical place to start. As a STAR Certified station in San Leandro, it's known for fast, friendly testing and clear communication, which is exactly what drivers want when DMV requirements already feel complicated.
Your DMV renewal notice is sitting on the counter. You know a smog check is next. Then someone tells you, “Get an oil change first.” Someone else says that's old advice and doesn't matter anymore.
Both can be right.
The answer depends on what kind of smog test your vehicle gets. For some older cars, an oil change before a smog check can help. For many 2000 and newer vehicles in California, it usually won't change the outcome much at all. What matters more is whether the car's computer is ready, whether the Check Engine Light is off, and whether you drove it properly before the test.
If you want a quick refresher on how California testing works, this simple guide to how a smog check works lays out the basics in plain English. For East Bay drivers, that distinction matters because wasting money on the wrong prep is common, especially when registration deadlines are close.
Table of Contents
- Do I Really Need an Oil Change Before My Smog Check
- When an Oil Change Is Your Secret Weapon
- The Modern Car Myth Why Oil Changes Rarely Matter Now
- Your Complete Pre-Smog Checklist to Pass the First Time
- Expert Tips for Passing at Speedy Smog in San Leandro
- Frequently Asked Smog Check Questions
Do I Really Need an Oil Change Before My Smog Check
You pull into the station with a 2012 Camry, fresh oil sticker on the windshield, and the check engine light turned off last week. Then the car fails because the monitors are not ready. We see that all the time in the East Bay.
The short answer is no, not for every car.
A lot of the old advice came from an earlier smog world, where tailpipe numbers played a bigger role and a worn engine could sometimes benefit from clean oil right before the test. On many 2000 and newer vehicles, the test is far more about what the car's computer reports. If the OBD-II system shows a stored fault, a recent battery disconnect, or incomplete readiness monitors, fresh oil will not fix that. If you want a quick overview of how that process works, our guide to how a California smog check works for modern vehicles lays it out clearly.
That is why drivers get mixed advice. One customer with an older, high-mileage car may see lower emissions after basic maintenance. Another with a newer Honda or Toyota spends money on an oil change and still fails for an EVAP monitor, catalyst issue, or hidden code.
Bottom line: An oil change can help in specific cases, but it is not the reason most modern cars pass.
California smog rules cover a wide range of vehicles, and the test method is not the same across all of them. The California Bureau of Automotive Repair Smog Check Program explains the program scope and inspection framework. For local drivers, the practical takeaway is simple. If the oil is overdue on an older vehicle, changing it is reasonable maintenance and may help at the margins. If your car is 2000 or newer, put your attention on check engine lights, readiness monitors, recent repairs, and whether the car has been driven enough since the battery was disconnected.
When an Oil Change Is Your Secret Weapon
For the right car, this advice still holds up.
Older vehicles, especially ones that are a little worn and still get a tailpipe-oriented emissions evaluation, can benefit from an oil change before a smog check. Old oil doesn't just lubricate less effectively. It also collects combustion byproducts and unburned fuel. It's akin to a sponge that's already soaked up everything it can hold. Once it's saturated, it stops helping and starts contributing to the mess.
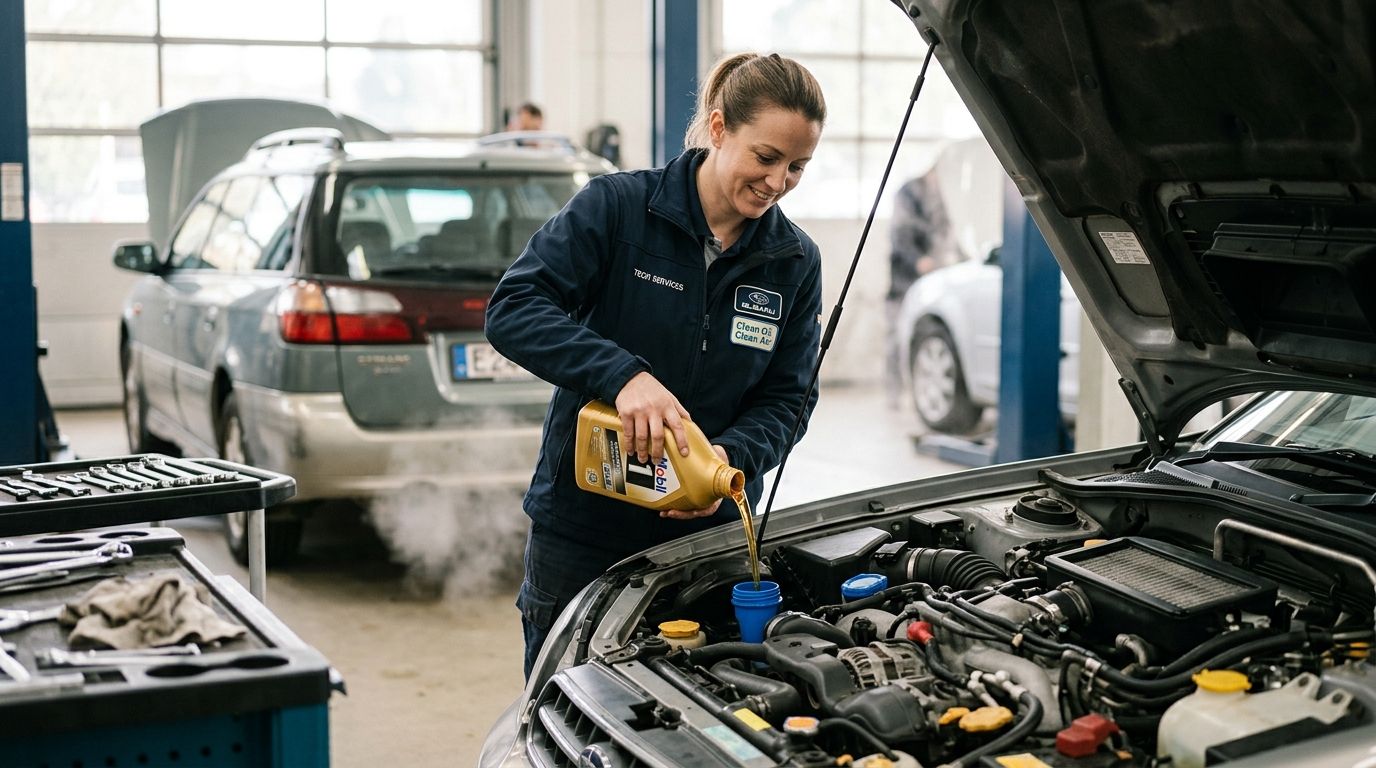
Why dirty oil can raise emissions
The key pollutant here is hydrocarbons, or HC. According to a discussion cited by Car Talk, fresh oil can create a better seal between piston rings and cylinder walls and may lower HC output by about 10 to 15% in marginal engines, with results varying from 5% to 30% depending on engine age and contamination in this oil change and HC explanation.
That fits what technicians see in the bay. Dirty oil can feed extra fumes into the PCV system, and those fumes get burned in the engine. If the oil is badly contaminated, that can push HC emissions higher than you want right before a test.
Road Runner Auto Repair also notes that if oil hasn't been changed for the last 5,000 miles, poor oil quality can contribute to smog trouble for California vehicles, especially when that old oil is loaded with pollutants and unburned fuel in this article on passing a California smog check with a 2000 or newer car.
Who should actually do it
In this situation, the advice needs to be selective, not automatic.
- Older vehicle owners: If you drive a pre-2000 car, or a vehicle with higher mileage that tends to run dirtier, an oil change before a smog check can be a smart move.
- Overdue maintenance cases: If the oil is clearly overdue, don't overthink it. Fresh oil helps the engine operate cleaner.
- Borderline emitters: If the car has failed before on hydrocarbon numbers, this is one of the lower-cost maintenance steps worth doing.
If you're trying to narrow down the likely cause of a failed inspection, this page on common smog check fail reasons is useful because it puts oil in context with the other usual culprits.
Fresh oil can help an older car that's close to the line. It won't fix a bad sensor, a missing catalyst, or a fault code.
The Modern Car Myth Why Oil Changes Rarely Matter Now
For most East Bay drivers in newer cars, this is the part that saves time and money.
A lot of people still treat smog prep like it's 1998. They hear “dirty oil raises emissions” and assume that means every car needs an oil change before test day. That's not how most modern California smog checks work.

What the computer is checking
For 2000 and newer vehicles, the important issue is usually the car's onboard diagnostics. A widely shared technician discussion makes the core point clearly: the belief that an oil change is a guaranteed pass fix is a misconception because modern OBD smog checks for 2000+ vehicles focus on system readiness, not tailpipe hydrocarbons, as described in this post about the difference between OBD checks and older testing.
That means the machine is looking for things like:
| What matters on a modern test | Why it matters |
|---|---|
| Check Engine Light status | If the system sees an emissions fault, that's a problem immediately |
| Readiness monitors | The car has to show it completed its self-checks |
| Stored or recent fault history | Clearing codes right before the test often backfires |
It does not mean fresh oil is useless maintenance. It means fresh oil usually isn't the deciding factor on pass or fail for a modern car whose smog result depends on computer status.
Where people waste money
The expensive mistake is doing maintenance that doesn't address the underlying issue.
If your 2012 Camry, 2016 Accord, or 2021 RAV4 has a Check Engine Light on, an oil change won't solve the reason the computer is unhappy. If you disconnected the battery, recently cleared codes, or had work done and then drove straight to the station, the car may not be ready even though it runs fine.
The modern smog check is mostly a conversation with your car's computer. If that computer says “not ready,” clean oil won't change the answer.
This is also why blanket advice from older drivers can steer newer-car owners wrong. The old logic was based on reducing tailpipe pollutants directly. The newer logic is based on proving that the vehicle's emissions systems have run their tests and passed them internally.
For a modern car, spend your attention on readiness, fault codes, and proper warm-up. Treat the oil change as maintenance, not magic.
Your Complete Pre-Smog Checklist to Pass the First Time
You pull in for a smog, the car seems fine, and then it fails for something that started days earlier. That is the pattern I see more than anything in the East Bay. The miss usually is not dirty oil. It is poor timing, incomplete monitors, or a simple issue nobody checked before the appointment.

Start with the fastest pass or fail item
If the Check Engine Light is on, stop there and sort that out first. Clearing codes right before the test can make things worse because the car may show up with incomplete readiness monitors.
A practical prep guide from Jiffy Lube notes that California BAR requires driving 100 to 200 miles after battery replacement or major maintenance to reset readiness monitors, and it also says 30% of smog failures for 2002+ vehicles are due to incomplete monitor readiness in this piece on passing emissions tests.
That catches a lot of drivers. They handle a repair, swap a battery, or disconnect power in the driveway, then head straight to the station. On older tailpipe-test advice, that might sound fine. On a modern OBD-II test, it can set you up for a fail even if the car feels normal.
Shop rule: If the battery was disconnected or codes were cleared recently, give the car time to complete its drive cycle before testing.
If you want a quick last-minute review, this California smog checklist covers the common items to check before you head out.
Drive it long enough to be fully warmed up
Show up with the engine at full operating temperature. A cold start and a five-minute errand run are not ideal prep.
For many cars, a solid mixed drive does more good than any last-minute maintenance. Highway time helps the engine and emissions system settle into normal operation, and it gives monitors a better chance to complete if they are close. That matters far more on most 2000+ vehicles than changing oil the night before.
A quick video can also help if you want a visual refresher before heading out:
Simple checks people skip
These are basic, but they save trips back to the station.
- Check the gas cap. Make sure it is tight and not cracked or obviously worn.
- Look under the hood. Loose hoses, unplugged sensors, and obvious vacuum line issues are worth catching before the test.
- Check fluid and maintenance basics. If the oil is badly overdue, change it. If it was changed recently, do not expect that alone to fix a smog problem.
- Inspect the air filter if drivability has felt off. A badly clogged filter can contribute to poor running.
- Do not wait until the registration deadline. If the car needs more driving or diagnosis, a little margin saves a lot of stress.
The practical trade-off is simple. Spend money on maintenance the car needs. Do not spend it on rituals that do not address why a modern smog test fails.
Expert Tips for Passing at Speedy Smog in San Leandro
You pull in on a lunch break, registration notice in hand, and the first question is simple. Will this test go through cleanly, or are you about to lose an hour over something avoidable?
Around San Leandro, the smoothest smog visit usually comes down to two things. Go to the right kind of station for your vehicle, and tell the technician anything that could affect readiness or the inspection result.
Why a STAR station matters
Some vehicles must be tested at a STAR Certified station. If your registration notice says STAR, follow it. Otherwise, you can end up paying for time and still need to redo the inspection at the proper station.
That catches East Bay drivers all the time. They focus on the car, which makes sense, but the station requirement matters too. Getting that part right is one of the easiest ways to avoid a repeat trip.
What to tell the technician when you arrive
A good check-in saves headaches. Before the test starts, mention anything that changes how ready the car is for inspection.
- Say if the battery was disconnected recently. That often means monitors may not be set yet.
- Mention recent repairs or maintenance. Catalyst work, EVAP repairs, sensor replacement, and battery service can all matter.
- Bring up a recent failed test. The last report gives useful clues fast.
- Be honest about warning lights. Even if the light turned off, the history can still matter.
For many 2000 and newer vehicles, the process is pretty quick when the car is ready. That is the main advantage for modern OBD-II smog checks. If the computer status is right and there are no emissions-related faults, the visit is usually straightforward. If the monitors are incomplete or a code is lurking, an oil change coupon will not save the test.
If you are not sure whether your car is ready, say so before the test starts. A good technician would rather hear that upfront than after a preventable fail.
Frequently Asked Smog Check Questions
Does this apply to hybrids and diesels
Yes, but the test procedure depends on the vehicle.
California smog rules cover gasoline cars and hybrids model year 1976 and newer, plus diesel vehicles model year 1998 and newer. The advice in this article fits hybrids pretty well because many of them still go through the same modern computer-based readiness check. Diesels are different enough that it helps to confirm the station handles diesel inspections before you make the trip.
That matters in the East Bay. A hybrid owner with a 2008 Prius usually does not need to treat an oil change like a last-minute smog strategy. A diesel owner may be dealing with a different inspection process altogether.
What if I fail
Start with the failure report. It usually points you in the right direction fast.
A readiness failure often means the car is not done with its drive cycle yet. A fault-code failure means something in the emissions system still needs diagnosis and repair. On older vehicles that still struggle with tailpipe numbers, routine maintenance, including an oil change, can help if it lines up with the reason the car is running dirty.
Guessing gets expensive. One repair aimed at the wrong problem can cost more than the smog check itself.
Should I get a pre-test mindset before I show up
Yes. That saves a lot of repeat visits.
Ask yourself three questions:
- Is the Check Engine Light off?
- Has the car been driven enough after any recent battery disconnect or repair?
- Am I arriving with the engine fully warmed up?
For 2000 and newer vehicles, that short checklist matters more than fresh oil in most cases. Modern smog inspections usually come down to what the car's computer sees: stored faults, pending problems, and whether the monitors are set. If you drive an older car that is overdue for service, an oil change may still be worth doing. If you drive a newer car with an unset monitor or an emissions code, oil is usually not the issue.
Can fresh oil help me pass
Sometimes.
I have seen it help on older, poorly maintained cars that were close to the line on emissions output. Dirty oil can contribute to higher hydrocarbons if the engine is already worn or burning oil. On a newer OBD-II car, though, the computer check is the bigger gatekeeper. If the monitors are incomplete or the Check Engine Light is on, an oil change will not fix the reason for the failure.
Should I clear codes right before the test
No. That usually creates a different problem.
Clearing codes often resets the readiness monitors to "not ready." Then the vehicle shows up for smog before it has completed the required drive cycle, and it fails for that reason instead. Fix the cause first, then drive the car enough for the monitors to reset properly.