
The Bureau of Automotive Repair puts a typical smog check at about 30 minutes, while many 2000-and-newer vehicles at efficient stations are completed in roughly 10 to 15 minutes. The exact time depends on the vehicle and the visit, so the quickest advertised test isn't necessarily the right estimate for your whole appointment.
The familiar advice to “just allow a few minutes” leaves out an important distinction: inspection time and total visit time aren't the same thing. A technician must complete the procedures that apply to your vehicle, and you may also need time for check-in or a queue. You can make a much better estimate by identifying your vehicle's testing pathway before you arrive.
Table of Contents
- The Short Answer for Most Drivers
- What Happens During Each Inspection Stage
- Factors That Stretch or Shorten Your Visit
- How Vehicle Age and Type Change the Timeline
- Choosing a Station That Keeps Your Visit Short
- Practical Steps to Avoid Delays on Test Day
- Planning Your Visit and Taking the Next Step
The Short Answer for Most Drivers
A smog check takes about 30 minutes by the Bureau of Automotive Repair's typical estimate; qualifying newer vehicles may take roughly 10 to 15 minutes to test, while your total visit also depends on eligibility and any wait.
Those figures describe different testing pathways, much like a short route and a longer one to the same destination. A qualifying newer vehicle may need a simpler set of checks. Other vehicles require additional procedures. The estimate for testing does not include time spent waiting for a technician or completing check-in.
Ask What the Estimate Includes
When you call a station, ask whether its estimate means hands-on testing time or arrival-to-departure time. An advertised completion window may not account for vehicles ahead of you. A short test estimate also does not mean required checks are skipped.
Ask these questions to match the estimate to your visit:
- Vehicle eligibility: Does the estimate apply to your model year and fuel type?
- Station availability: Can testing begin when you arrive, or is there a queue?
- Inspection scope: Does your vehicle need procedures beyond the station's usual test for newer vehicles?
- Unexpected findings: What happens if the technician identifies a problem?
Planning rule: Match the testing estimate to your vehicle, then allow separately for the station's current wait.
For an East Bay driver fitting an inspection between errands, that distinction helps set a realistic schedule. If you need to leave by a certain time, tell the station and ask whether it can meet that window. The answer depends on your vehicle's testing pathway and whether a technician is ready when you arrive.
What Happens During Each Inspection Stage
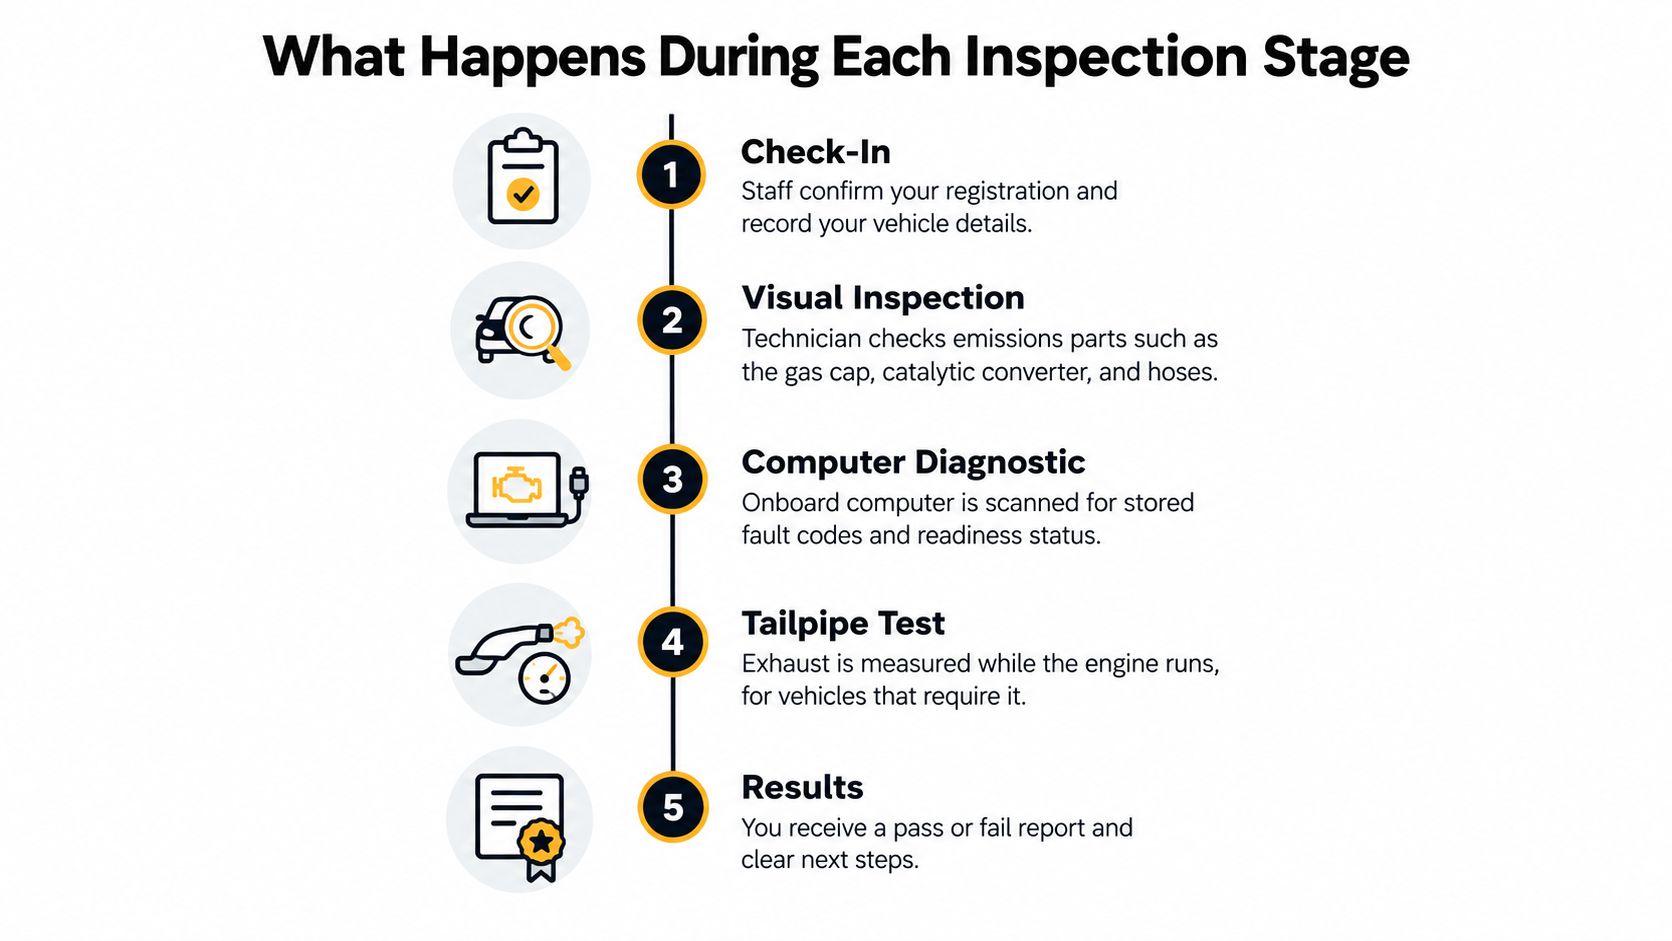
A smog check is a sequence of steps, not one reading. The exact route depends on the vehicle, so some drivers will not need every procedure shown in the diagram.
Check-In and Vehicle Review
First, staff confirm your vehicle details and identify the inspection that applies. Have your registration information ready, and mention recent repairs or concerns at check-in. This gives the technician context before testing begins.
Applicable Visual and Functional Checks
Next, the technician carries out the visual or functional checks required for your vehicle. These checks are separate from reading the vehicle's computer or measuring exhaust. The exact combination depends on the vehicle and applicable test pathway. For a plain-language overview, see what technicians check during a smog inspection.
Computer or Tailpipe Testing
For most gasoline vehicles from model year 2000 onward, the inspection includes an on-board diagnostic system check, or OBD check. The technician connects testing equipment to review emissions-related computer information, including readiness monitors. Other vehicles may follow a pathway that includes tailpipe testing. That can involve preparing the vehicle and observing its exhaust under the required conditions, so it is more than just inserting a probe.
California BAR outlines the smog inspection requirements, including procedures that apply to different vehicles (California BAR Smog Check information). Computer checks, visual and functional checks, and tailpipe procedures serve different purposes. A vehicle receives the checks required for its pathway, not necessarily every type of test.
California's statewide program began in 1984, and inspection methods have changed as vehicle technology has developed. Newer OBD-equipped vehicles can provide emissions information electronically, while older vehicles may require different equipment or procedures (Bay Area Air District history).
Results and Next Steps
At the end, the technician records the outcome and explains what it means. If the vehicle passes, you receive the inspection result. If it does not, ask which part of the test it did not meet and what the next step involves. That conversation is the final stage of the visit, and its length depends on whether you need an explanation or follow-up guidance.
Factors That Stretch or Shorten Your Visit
A car can have a straightforward test and still spend longer at the facility because the technician is finishing another vehicle. Conversely, an empty waiting room doesn't guarantee an immediate finish if your vehicle requires additional procedures. Queue time and technical time need separate allowances.
A useful planning formula is:
Total visit time = check-in + waiting + applicable inspection procedures + discussion of results.
Repairs belong outside that basic estimate. If the vehicle needs diagnosis, repair, and another inspection, you're planning a different process, not merely a slightly slower version of an ordinary passing test.
Factors That Change Smog Check Visit Length
| Factor | Effect on Visit Length | Driver Can Control It |
|---|---|---|
| Station workload | May add a wait before testing starts | Partly, by checking availability |
| Vehicle type | Determines which inspection procedures apply | No, but you can identify it beforehand |
| Required test method | May involve additional equipment and operating steps | No |
| Vehicle condition | Problems may require follow-up beyond the inspection | Partly, through advance diagnosis |
| Repairs and retesting | Add work and potentially another visit | Partly, by addressing known concerns |
| Check-in preparation | Missing information can interrupt intake | Usually |
| Questions about results | May require a longer conversation before departure | Partly, by allowing time for discussion |
The table separates predictable planning factors from things you can't fully control. You can bring the right paperwork and describe your vehicle accurately. You can't reasonably expect the station to shorten a mandated procedure because you have another appointment.
Consider two hypothetical drivers with similar cars. One arrives when a technician is available; the other arrives behind a queue. Even if their actual tests take comparable time, their departure times won't match.
The same distinction applies to a failure. A technician may finish the inspection and explain a failed result without having completed any repair. Ask what the estimate covers so you don't confuse “test finished” with “vehicle repaired and ready to pass.”
How Vehicle Age and Type Change the Timeline
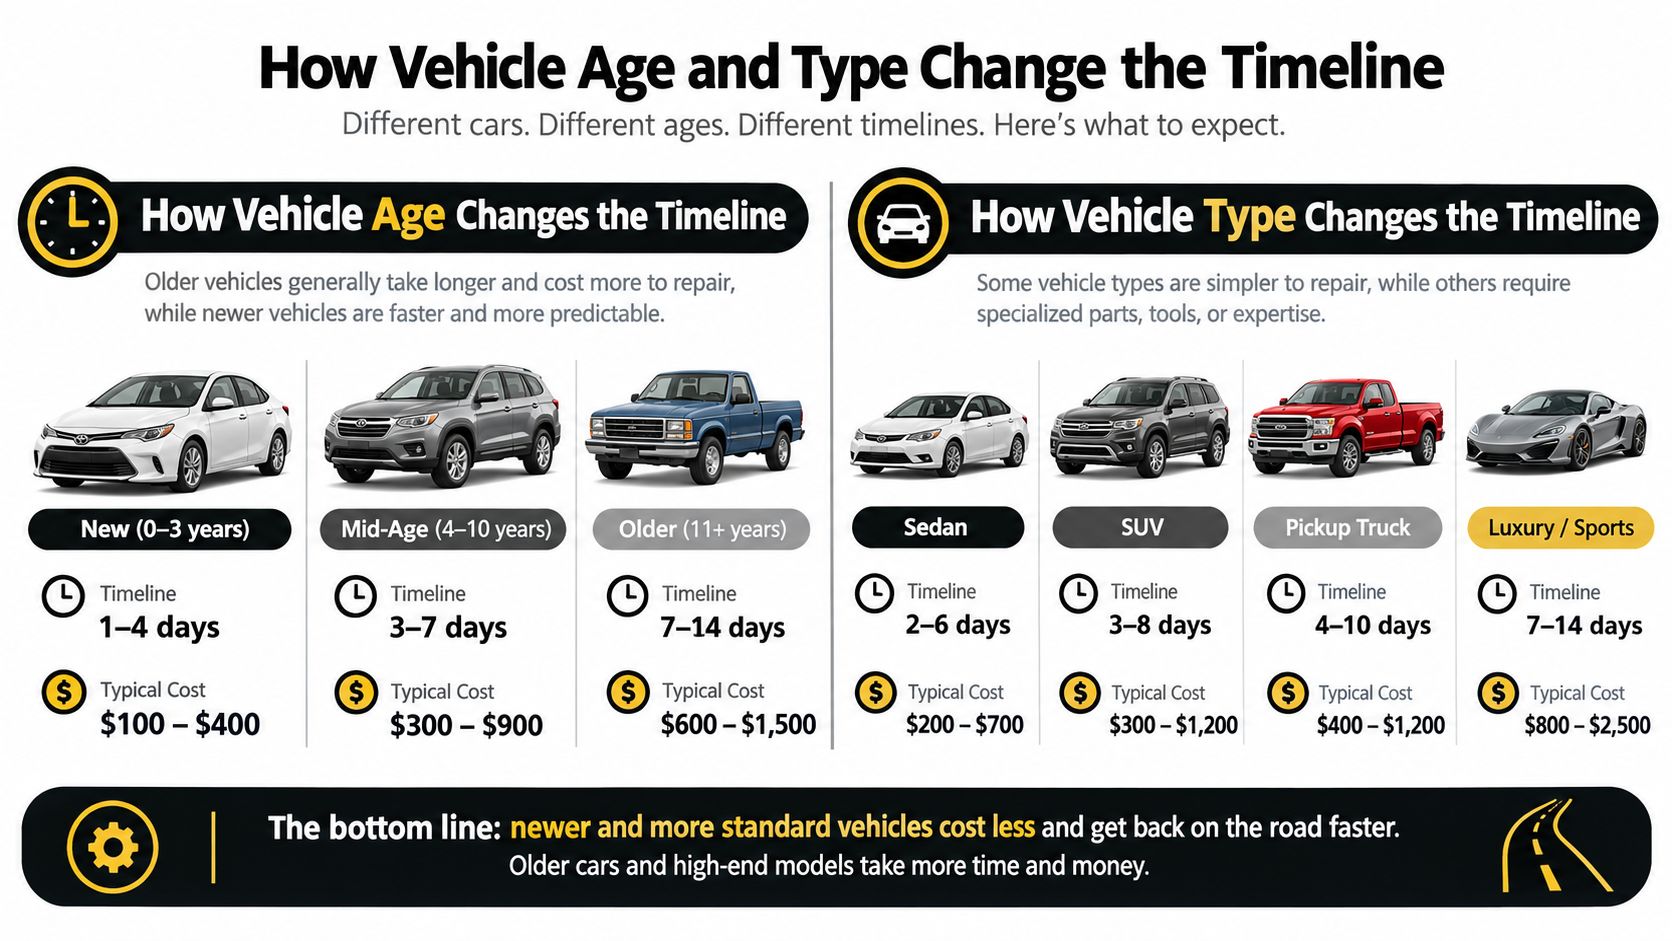
A single advertised average can hide different test procedures. The vehicle's age and powertrain help determine which steps apply, so use them to estimate your own visit rather than assuming every smog check follows the same path.
A Newer Gasoline Car Versus an Older Vehicle
A newer gasoline car that qualifies for the standard computer-based inspection is generally closer to the official benchmark than a vehicle requiring additional checks. It may follow a shorter testing pathway, though the exact visit time still depends on the station's process and wait.
An older gasoline vehicle may need added tailpipe or equipment checks, which can put its inspection beyond that benchmark. Ask the station which test applies to your model year and how much time to allow. An added step means a longer procedure, not necessarily a problem with the car.
Inspection time does not predict the result. A shorter test can still find an issue, and a longer one does not mean the vehicle will fail.
A Diesel Truck Versus a Hybrid
For diesel vehicles, first confirm whether a test is required. California DMV guidance exempts diesel vehicles from the Smog Check program if they are model year 1997 or older, or if their gross vehicle weight rating is over 14,000 pounds. Diesel vehicles outside those exemptions may be subject to testing. The DMV also confirms that hybrids are subject to Smog Check requirements (California DMV vehicle information).
A diesel truck's inspection time depends on the applicable test pathway, so ask the station to confirm the procedure before you book. Share the model year, fuel type, and gross vehicle weight rating. The guide to smog checks for diesel trucks explains what information to have ready.
A hybrid's electric operation does not by itself determine whether an emissions inspection is required. Tell the station it is a hybrid so staff can identify the right inspection and give you a relevant time estimate.
Before booking, gather the details that determine the pathway:
- Model year: Use the vehicle's model year, not the year you bought it.
- Fuel and powertrain type: Specify gasoline, diesel, or hybrid.
- Weight information: Have the gross vehicle weight rating ready if diesel eligibility is in question.
- Inspection request: Check your registration paperwork and describe what it asks you to complete.
Those details help the station match your vehicle to the required test, giving you a more useful estimate than a general average.
Choosing a Station That Keeps Your Visit Short
Compare stations by how clearly they explain the visit, not just how briefly they advertise it. A useful estimate identifies the eligible vehicle, the expected test duration, and any current wait.
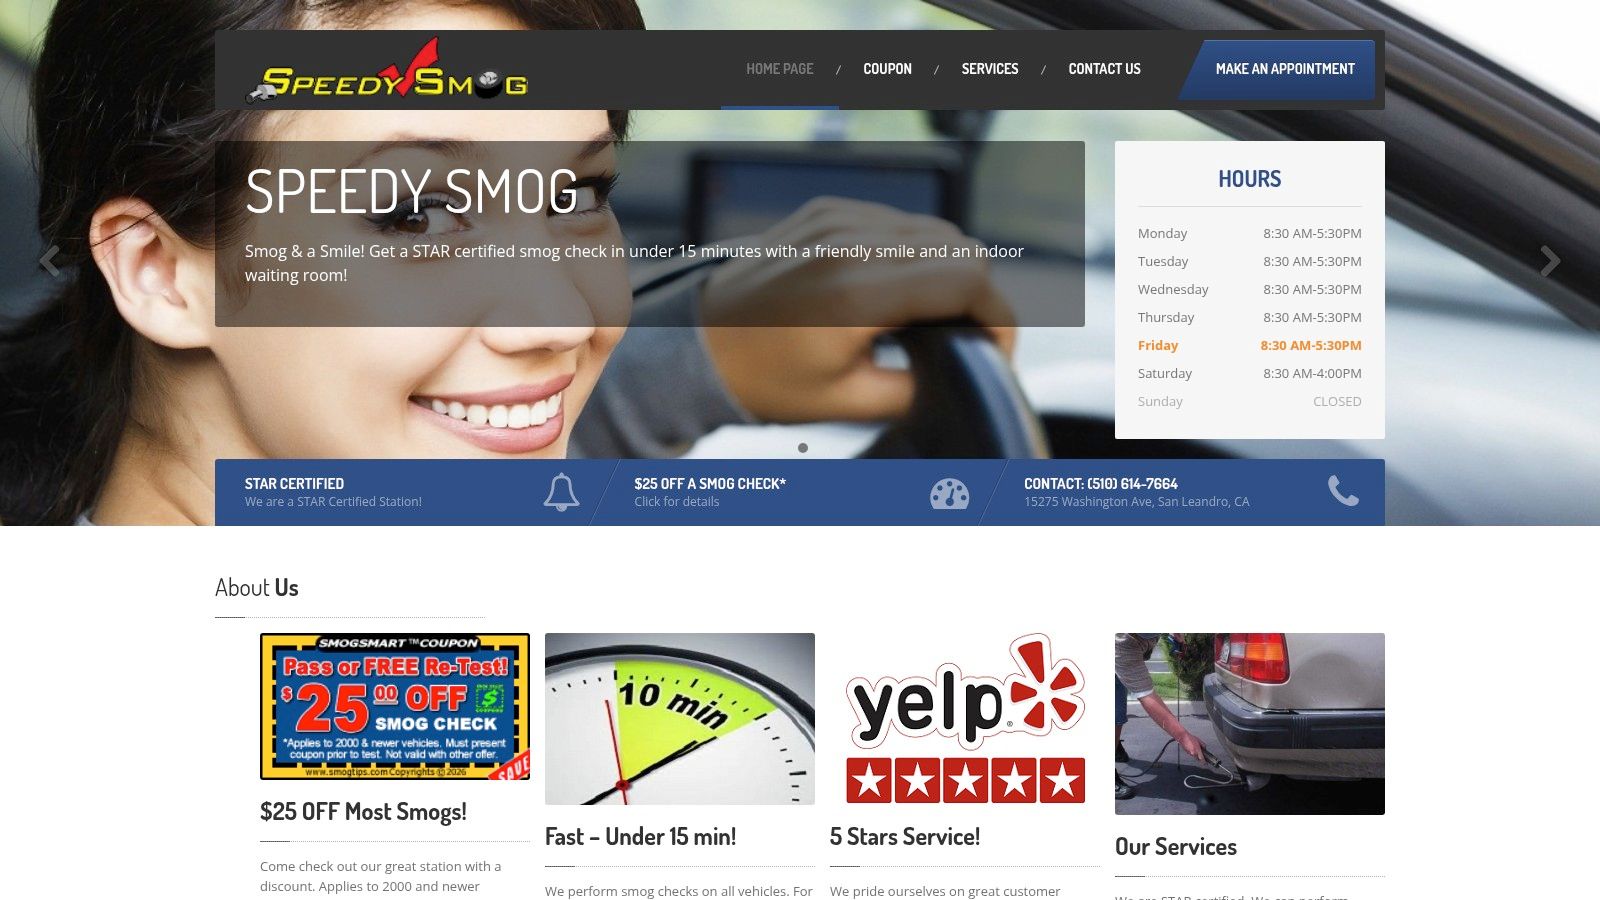
The station information shown below provides a starting point for checking services and visit details.
Compare the Details That Affect Your Appointment
STAR certification, suitable testing equipment, and clear pricing are more useful selection criteria than a speed claim alone. Ask whether the station can handle your particular vehicle and whether any stated price or promotion applies to it.
A comfortable waiting area is another practical consideration. It doesn't change the required test, but it gives you somewhere to wait if the technician is occupied or your vehicle needs a longer procedure.
| What to Compare | A Useful Question |
|---|---|
| Certification | Can you perform the inspection requested for my vehicle? |
| Vehicle coverage | Do you test my model year and powertrain type? |
| Timing | Is that the test duration or the whole visit? |
| Pricing | What does the quoted price include? |
| Promotions | Does the current offer apply to my vehicle? |
| Waiting arrangements | Is there an indoor area if testing can't begin immediately? |
Evaluate the Local Option Without Assuming a Guarantee
The publisher's San Leandro station describes its services as STAR-certified testing for newer and older vehicles, diesels, and hybrids, with transparent pricing and a clean indoor waiting room. Those are useful details to confirm when comparing it with other East Bay stations.
Treat advertised coupons and hours as items to verify before traveling. A promotion may have eligibility conditions, and a station's regular opening hours don't tell you its current workload. Ask for both the applicable price and the likely arrival-to-departure experience.
For another look at the service, the video below provides additional context.
A reliable timing conversation should end with a clear answer about your car, not an unsupported promise that every vehicle will leave equally quickly.
Practical Steps to Avoid Delays on Test Day
Preparation isn't about finding a trick to pass. It's about arriving with the right information and avoiding preventable uncertainty. Use this checklist before setting out, especially if the vehicle has known issues or recent repair work.
- Confirm the inspection pathway. Give the station your model year, fuel type, and any weight information needed to determine diesel eligibility. Ask whether it can perform the required inspection.
- Discuss an illuminated check engine light. If the light is on, arrange diagnosis rather than assuming a quick inspection will resolve the concern. Tell the station about it before requesting a routine appointment.
- Mention recent repairs or battery work. Readiness is part of the computer check described earlier. If you're unsure whether the vehicle is ready, ask for guidance before arriving rather than assuming the absence of a warning light answers everything.
- Allow for normal operating temperature. Where applicable, driving to the station can help the engine warm up. Don't assume that a short drive guarantees readiness or eliminates required testing procedures.
- Bring your documents. Have registration information and relevant repair records available. They give staff useful context without requiring you to remember every detail.
- Ask about a quieter arrival time. Contact the station before leaving if your schedule is tight. Current availability is more informative than guessing which part of the day will be quiet.
- Address known mechanical concerns. An older car with unresolved problems may benefit from diagnosis before inspection. Keep repair planning separate from the inspection appointment.
Arriving prepared won't guarantee a pass, but it helps the technician start with the right information.
For a convenient preparation reference, review what to do before a smog check. If something about your vehicle is unusual, explain it when you contact the station rather than waiting until check-in.
Planning Your Visit and Taking the Next Step
Build your estimate around the applicable inspection plus the conditions at the station. For a qualifying newer gasoline car, ask whether the shorter testing window discussed earlier applies. For an older vehicle, diesel, or hybrid, have staff confirm the pathway before using any advertised average.
Then add the parts that aren't testing: intake, any queue, and time to understand the result. You don't need to assign invented minute values to each item. You need to know whether they're likely to fit around your next commitment.
Leave Room for Uncertainty
Use the broader official benchmark when you don't yet know your vehicle's requirements. Even then, remember that an inspection estimate isn't a guarantee about waiting, diagnosis, or repairs. If you have a firm deadline, tell the station before you travel.
Your next step is simple: gather the vehicle details, confirm eligibility and availability, and ask for an estimate that includes the whole visit. That conversation gives you a more dependable plan than assuming the fastest advertised test applies to every car.
Speedy Smog offers STAR-certified emissions testing in San Leandro for newer and older vehicles, diesels, and hybrids. Visit Speedy Smog to confirm your vehicle's testing requirements, current availability, and expected visit length before heading in.
You've got the DMV renewal notice on the counter, a registration deadline getting closer, and one practical question. Do you need a Smog Check in Oakland, CA, what kind of station can test your vehicle, and is the car ready to pass when you get there? Answer those three questions in order and the visit stops feeling like a gamble. It becomes a short workflow you can control.
Table of Contents
- Start With Your Oakland Smog Check Decision
- Determine Whether Your Vehicle Needs Testing
- Choose the Right Smog Station in Oakland
- Prepare Documents and Your Vehicle
- What Happens During a Typical Smog Check
- Understand Common Smog Check Failures
- Choose Your Next Step After a Failure
- Use a Smog Check Visit Checklist
Start With Your Oakland Smog Check Decision
An Oakland driver finishing a commute opens that renewal envelope and sees smog certification requested. The car runs fine, so the first instinct is to search for the closest station and drive over. That's the wrong order. You need to decide whether a test is required, where your vehicle must be tested, and whether it's ready before you pick a shop.
Boarding a flight is a useful comparison. The destination doesn't matter if you've brought the wrong document or your bag can't clear the scanner. Your DMV notice is the boarding pass here. It controls the route for this transaction, and it tells you more than a generic search result can.
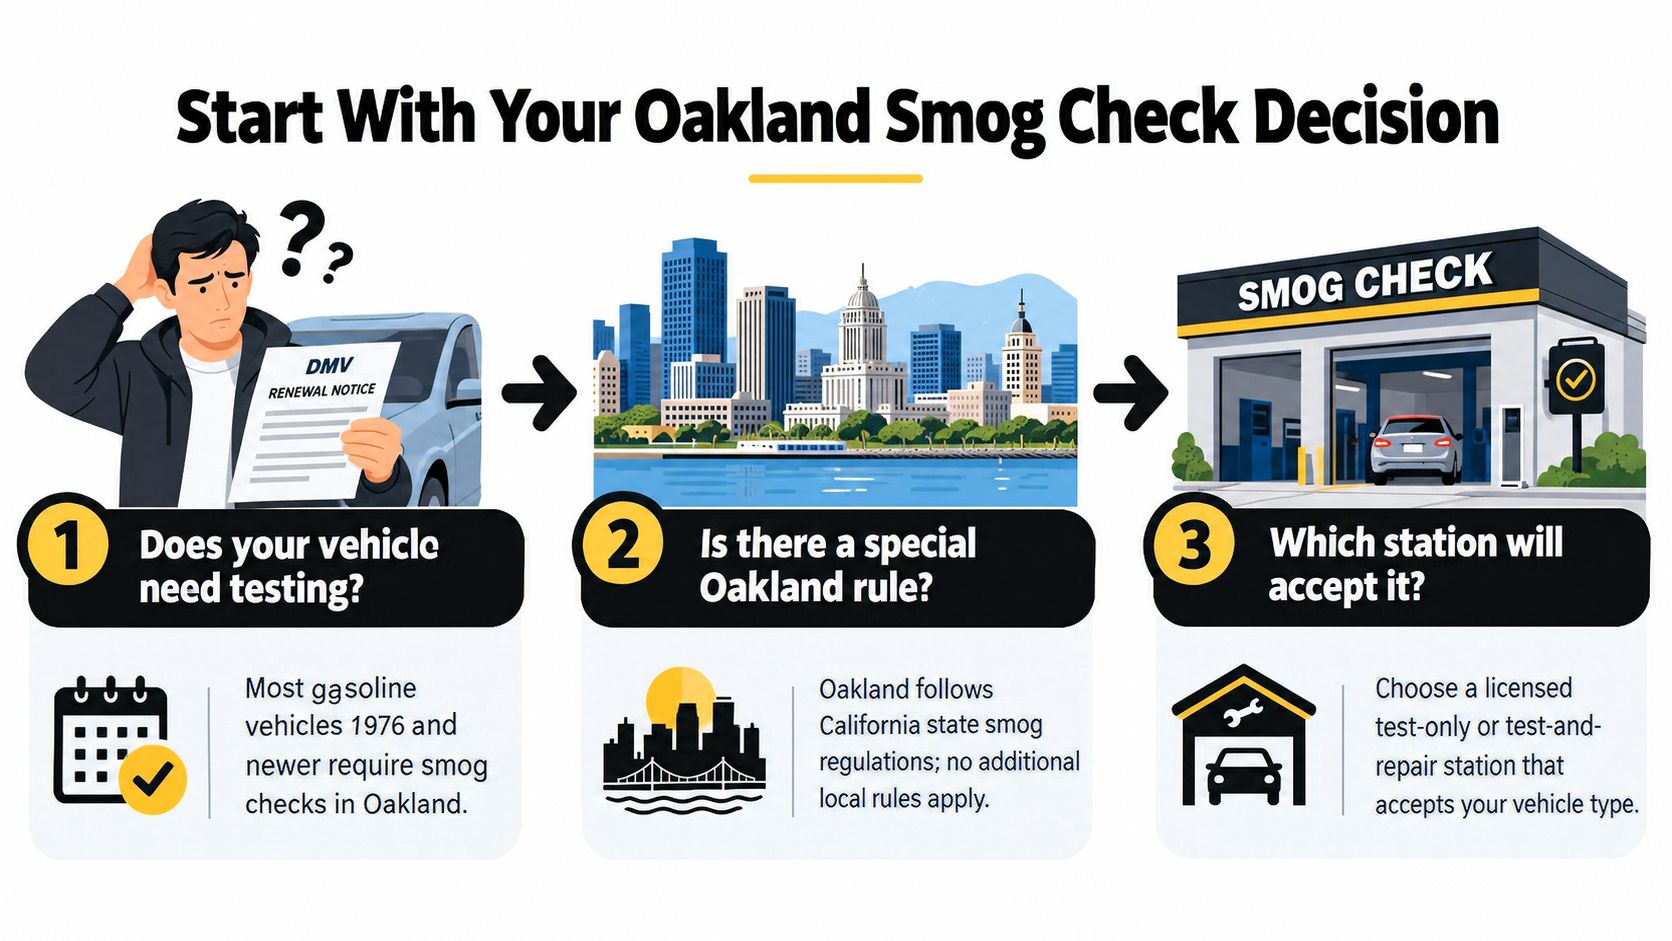
Why Oakland Follows a State System
Oakland doesn't run its own separate smog program. California established its Smog Check program as a statewide emissions-control system in the 1980s, and in its first year approximately 4 million vehicles were inspected under the mandatory biennial law, with about 70% passing without repairs. Vehicles that failed and were repaired showed an average 17% reduction in hydrocarbon and carbon-monoxide emissions right after repair, per that same early reporting.
That history explains the present workflow. A test isn't an optional maintenance add-on you can skip because the car feels fine. It's tied to specific registration transactions, and the result has to match the vehicle and transaction the DMV has on file.
There's also a difference between a routine renewal and other triggers. A biennial renewal is the familiar case, but a first California registration or a change of ownership can also put you in line for certification. Don't assume the rules from your last car carry over to this one.
Practical rule: Start with the paper in your hand, not the station map. If the notice, model year, and fuel type don't line up with your assumptions, resolve that first.
Expect the visit itself to vary. A newer gasoline car with complete diagnostic monitors is a different appointment from an older vehicle, a diesel, or a hybrid that follows another inspection path. Getting the decision right up front saves you a second trip, which is where most wasted time goes.
Determine Whether Your Vehicle Needs Testing
Don't classify your vehicle by age alone. That's the most common mistake East Bay drivers make, and it leads to the false idea that anything old is exempt. Age matters, but so do fuel type, model year, weight, and the type of registration transaction you're completing.
Match Model Year to Fuel Type First
Start with the broad categories, then check exemptions against them. Official California guidance places gasoline, hybrid, and alternative-fuel vehicles from model year 1976 onward generally within the program, while diesel vehicles from model year 1998 onward generally require testing. That same guidance identifies gasoline vehicles from 1975 or earlier, diesel vehicles from 1997 or earlier, electric vehicles, and certain heavy vehicles as exempt.
Read those two sentences together and the logic becomes clear. A 1999 diesel isn't exempt just because it feels old. A hybrid isn't automatically out of the program because it uses less gasoline. The category comes first, and the exemption, if one applies, has to override it clearly.
- Gasoline, hybrid, and alternative-fuel vehicles: Generally covered from 1976 onward, so a recently purchased older car in this group usually still needs attention.
- Diesel vehicles: Generally covered from 1998 onward, which catches many older trucks owners assume are grandfathered out.
- Electric vehicles: Listed as exempt, so don't book a test you don't need.
- Certain heavy vehicles: Treated as exempt under the DMV categories, but weight details matter, so don't guess from vehicle size alone.
Check the Transaction, Not Just the Calendar
Your vehicle can need certification even when it's not renewal time. Certification is also generally required when an affected vehicle is first registered in California or changes ownership. That covers a driver moving into Oakland with an out-of-state car, and it covers a private sale in San Leandro or Oakland where the buyer assumes the car is ready to register because the tags look current.
Imported and recently purchased vehicles trip people up. The relevant question isn't whether the previous owner tested it recently for their own renewal. It's whether your transaction triggers a requirement now. Those are different events, and the DMV treats them on their own terms.
If you're working through the broader rules before you call a station, the California smog check rules overview is a useful place to confirm how these categories fit together. Use it as a cross-check, not a replacement for your notice.
Let the Notice Resolve Conflicts
When your memory of the rules conflicts with the notice, the notice wins. Match the vehicle information on it to your actual model year and fuel type, then look for any instruction about station type. Some vehicles may use any licensed station, while others are directed to a STAR station.
If anything still doesn't add up, call the station before you travel and describe the vehicle and transaction. A two-minute verification beats arriving with the wrong expectation and being turned away. Bring the notice with you either way, so the station can transmit the correct vehicle information for your record.
Choose the Right Smog Station in Oakland
A STAR station isn't mandatory for everyone, and a regular station isn't a lesser choice if your notice doesn't direct you otherwise. What matters is matching the station to three things. Your DMV instructions, your vehicle type, and the transaction you're completing determine the right fit, in that order.
STAR certification is a performance distinction set through the Bureau of Automotive Repair. Some DMV notices direct specific vehicles to a STAR station, and when yours does, that instruction isn't optional. When it doesn't, you have more flexibility, and convenience, pricing clarity, and vehicle capability can carry more weight.
Compare the Two Routes Side by Side
| Consideration | Regular Station | STAR-Certified Station | Reader Action |
|---|---|---|---|
| DMV direction | Works when your notice doesn't specify STAR | Required when your notice directs you there | Read the notice before calling anyone |
| Certification recognition | Valid for transactions that accept any licensed station | Recognized for directed vehicles and general testing | Confirm the result will be transmitted for your transaction |
| Vehicle capability | Varies by station and equipment | Varies too, so don't assume every vehicle is accepted | Ask about your fuel type and model year in advance |
| Convenience trade-off | May be the closest option in Oakland | May mean a short drive elsewhere in the East Bay | Weigh travel time against a possible second trip |
| Pricing clarity | Ask for the full amount up front | Same standard applies | Don't compare stations on a partial quote |
That last trade-off deserves emphasis. The closest station to your house is only convenient if it can inspect your vehicle and its result counts for your transaction. A slightly longer drive to a station that handles your vehicle class correctly is faster than two short drives.
For a clearer explanation of what the designation means in practice, review the STAR certified smog station details before you decide. Then ask any station you're considering the same short set of questions. Can you test my fuel type and model year, does my notice require STAR, and will you transmit the certification electronically?
As one transparent East Bay example, Speedy Smog operates as a STAR Certified station at 15275 Washington Ave in San Leandro, 94579, not in Oakland itself. It serves Oakland-area drivers, handles 2000 and newer models, 1999 and older vehicles, diesels, and hybrids, and states that typical inspections for 2000-and-newer vehicles take about 10 to 15 minutes. Treat those specifics as a checklist for evaluating any station, not just this one. A good station should be able to state its status, its supported vehicle categories, and a realistic time window just as plainly.
Don't shop for a smog station the way you'd shop for a car wash. Proximity helps, but recognition for your specific transaction comes first.
Prepare Documents and Your Vehicle
Most avoidable failures and repeat trips happen before the technician touches your car. Preparation splits into two jobs. You need the right document in hand, and you need the vehicle's computer ready to report complete information.
Bring this checklist image to mind as you work through the steps below.
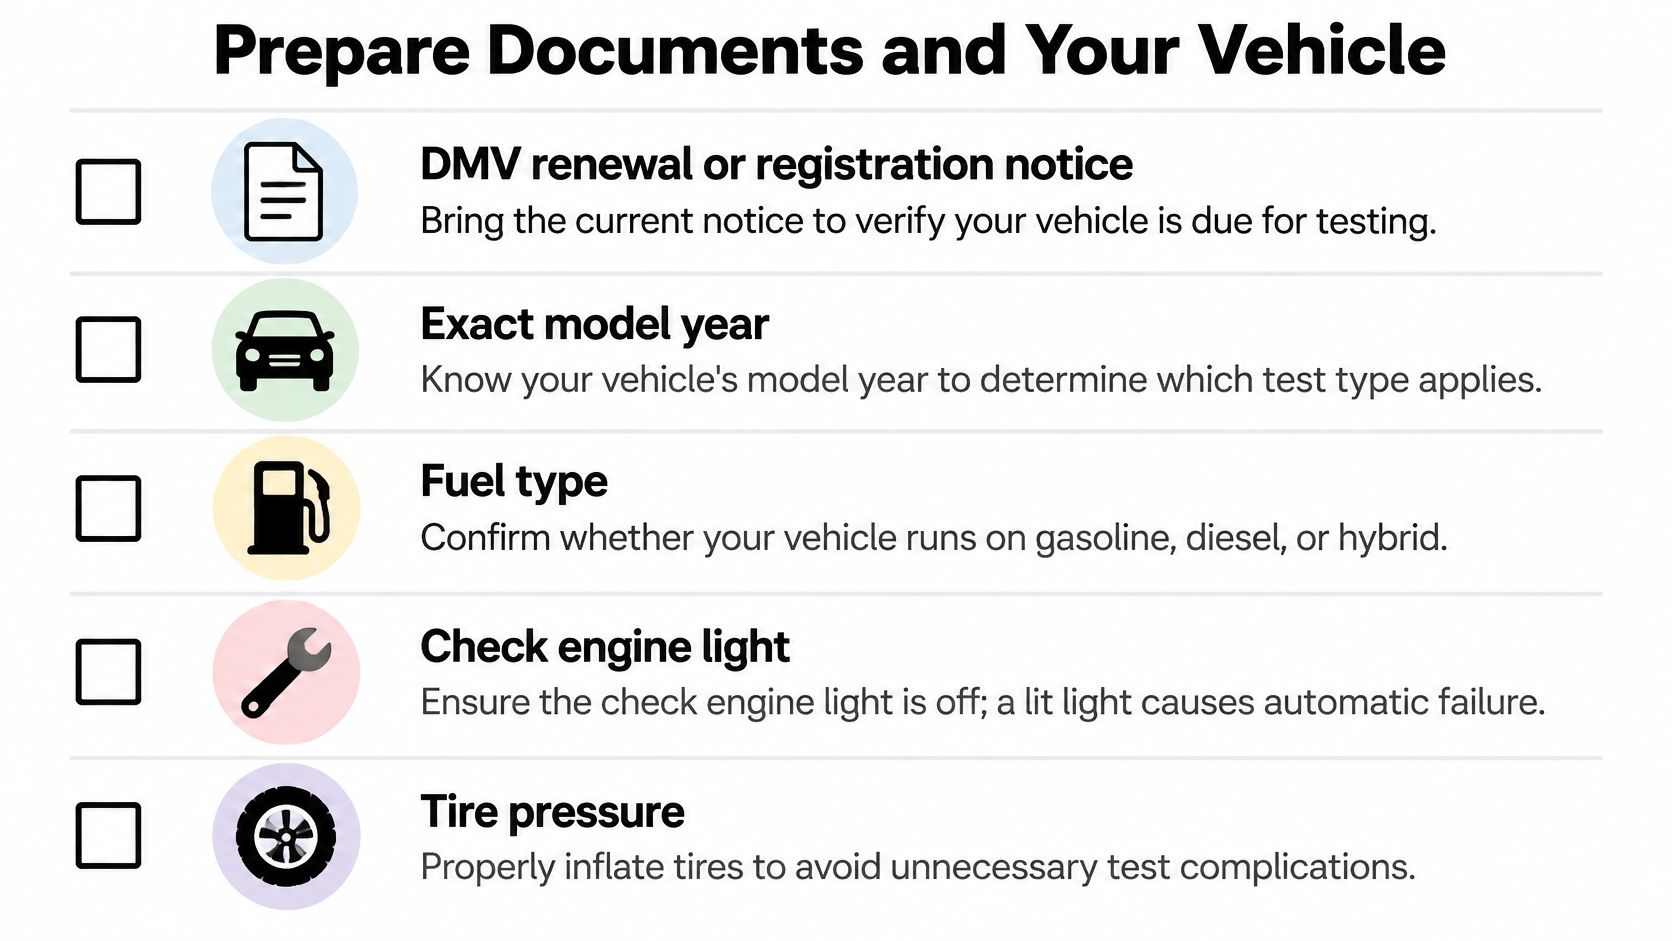
Assemble the Paperwork and Vehicle Facts
- DMV renewal or registration notice: Bring the current notice, since it's the document that defines your transaction and any STAR direction.
- Exact model year: Know it precisely, because a one-year difference can change which rule applies.
- Fuel type: Confirm gasoline, diesel, hybrid, or alternative fuel before you call, so the station can confirm it can test you.
- Registration status: Be ready to explain whether this is a renewal, a first California registration, or an ownership change.
For a fuller walkthrough of pretest steps, the guide on what to do before a smog check covers the preparation sequence in more detail. Read it before you schedule, not in the parking lot.
Get the Onboard Computer Ready
For gasoline vehicles from model year 1996 onward and diesel vehicles from model year 1998 onward, the inspection relies heavily on the On-Board Diagnostics system. That check verifies the malfunction indicator lamp works correctly, looks for diagnostic trouble codes, and evaluates whether required emissions monitors are complete. It's closer to a computer health report than a simple tailpipe sniff.
Don't clear codes or disconnect the battery right before your appointment hoping to erase a warning. That resets the readiness monitors and leaves the computer without enough operating data. You're trading a known fault for an incomplete report, and both can stop you from passing. Repair the underlying problem instead, then complete the manufacturer-specific drive cycle so the monitors rebuild their data through normal driving.
This short video walkthrough shows what readiness preparation looks like in practice.
If your check engine light is on, treat that as a stop sign. Get the fault diagnosed before you test, because showing up hoping it won't matter wastes the trip. Also allow time for the vehicle to cool after driving, and confirm the station can inspect your vehicle class before you head out. None of this guarantees a pass, and any station promising one in advance isn't being straight with you. That removes the preventable reasons for failure.
What Happens During a Typical Smog Check
Follow a representative 2000-and-newer sedan through a visit and the whole process looks manageable. The driver arrives with the renewal notice, the station verifies the vehicle record against that document, and only then does the inspection begin. That record check isn't bureaucracy for its own sake. It's what ensures the result attaches to the right vehicle and transaction.
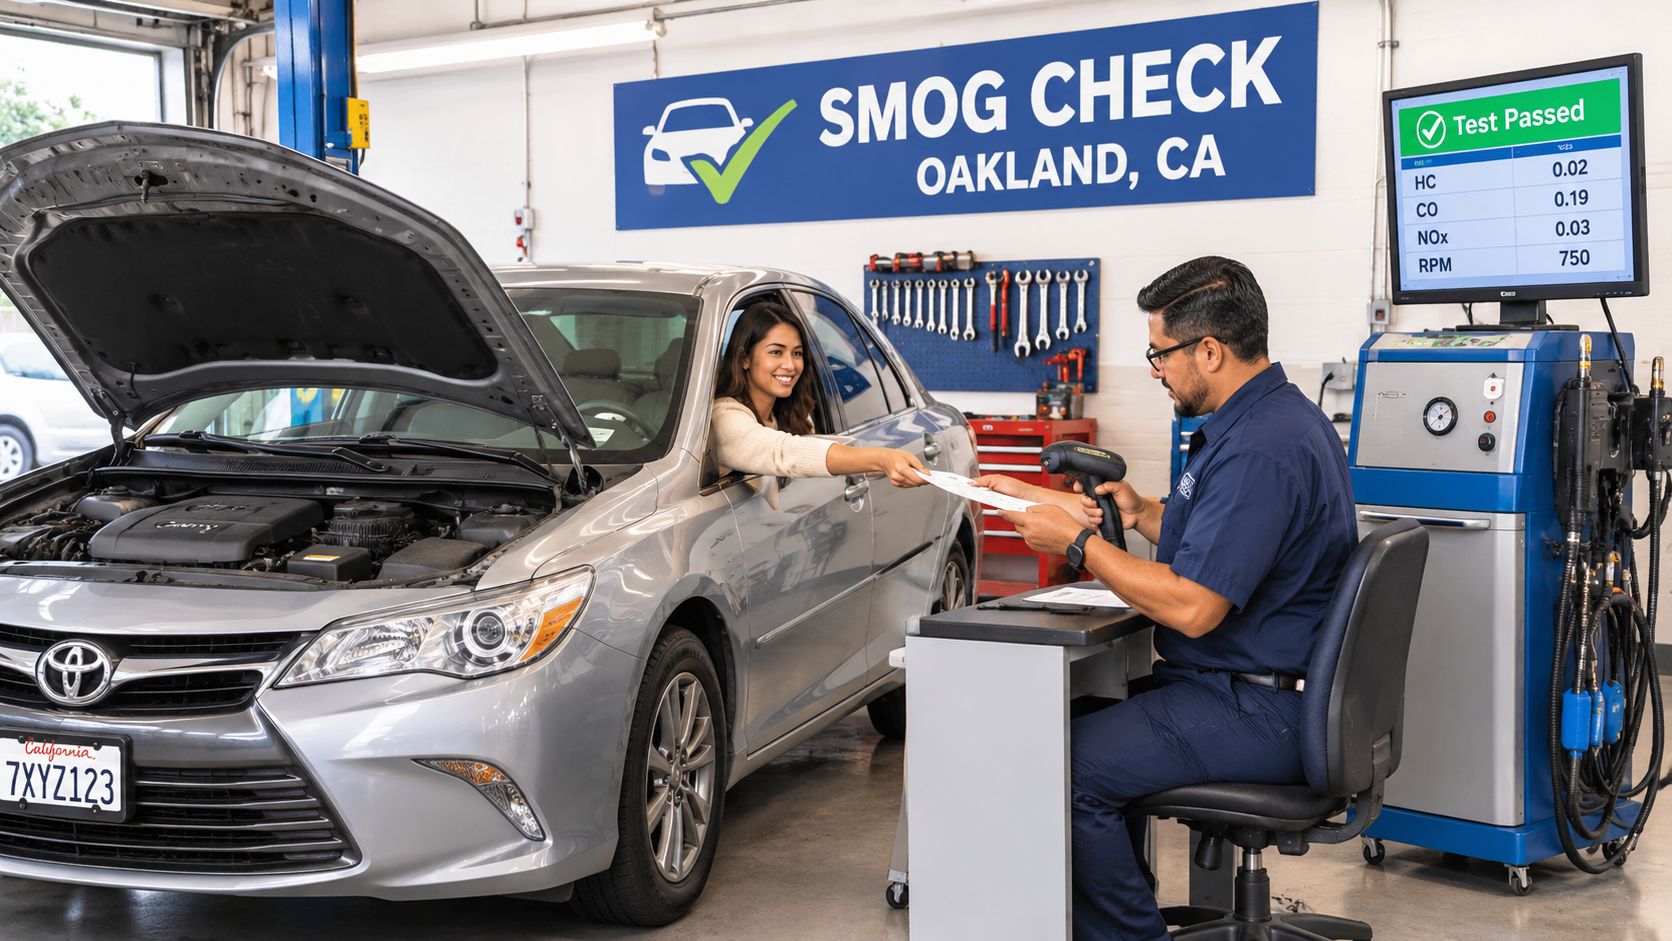
From Check-In to Result
Here's the sequence most drivers of newer vehicles experience.
- Arrival and verification: You hand over the notice, the station confirms model year, fuel type, and any STAR requirement.
- Inspection: The technician runs the test path appropriate to your vehicle, which for a newer model centers on the diagnostics described in the section above.
- Result handling: On a pass, the certification is transmitted electronically, so you aren't carrying a paper certificate to the DMV yourself.
For planning purposes, a typical inspection for 2000-and-newer vehicles takes about 10 to 15 minutes at the East Bay example mentioned earlier. Read that as a typical window, not a guarantee. A station can be busy, a vehicle can need extra attention, and your own arrival paperwork can add time. Budget a buffer around the test itself rather than scheduling something tight immediately after.
Where the Experience Changes
Older gasoline vehicles, 1999-and-older vehicles, diesels, and hybrids may follow different inspection paths. If yours falls into one of those groups, don't assume the newer-car timeline applies to you. Ask the station when you book how your category is handled and how long you should allow.
The surroundings matter less than the process, but they aren't irrelevant on a workday. A clean indoor waiting room makes a short wait easier, and transparent pricing stated before the test starts prevents an awkward surprise at the counter. Limited promotional offers exist at some stations, but don't let a discount distract you from the basic questions. Is this station right for my vehicle, and will its result count for my transaction? Those answers matter more than a few dollars saved on a test you'd have to redo.
Before you leave after a pass, confirm the result has been sent. That's your final step at the station, and it closes the loop between the inspection and your registration.
Understand Common Smog Check Failures
A failure doesn't automatically mean your engine is falling apart. On a modern vehicle, it often means the computer reported a problem, or hadn't collected enough data to report at all. Reading the result correctly is the difference between a targeted repair and throwing parts at the car.
Read the Result Like a Traffic Light
Use a simple comparison. The dashboard warning light is the signal you can see. Stored diagnostic trouble codes are the reason the signal changed. Readiness monitors are whether the system has run long enough to trust its own report. You need all three pieces before you can interpret a failure, not just the light.
That structure also explains why a vehicle can fail even when its tailpipe emissions look acceptable. If the OBD system reports an emissions-related fault or shows insufficient monitor readiness, the inspection can't certify the vehicle on tailpipe behavior alone. The computer's evidence and the exhaust evidence are separate checks, and either one can stop a pass.
The scale here is worth knowing. In statewide 2024 to 2025 data, approximately 19 million model-year-2000-and-newer vehicles were tested and about 1.3 million, roughly 7%, failed, with OBD-related failures at approximately 6.8% of OBD inspections. You're not dealing with a rare edge case when diagnostics cause a failure. It's the central failure path for newer vehicles.
Know the Usual Technical Causes
Four causes come up repeatedly in diagnostic failures.
- Catalytic-converter inefficiency: The converter isn't cleaning exhaust to the expected level.
- Evaporative-emissions leaks: Fuel vapor escapes where it should stay contained.
- Oxygen-sensor faults: The sensor feeding the computer bad data throws off the whole emissions picture.
- Misfire detection: The engine isn't firing consistently, and the computer catches it.
These range from relatively contained repairs to expensive ones, which is exactly why you shouldn't guess. The failure information narrows the diagnosis, and a proper diagnosis narrows the parts list.
After a failure: Keep the inspection details, don't reset anything, and diagnose from the codes before you buy a single part.
Clearing codes on the drive home undoes that advantage. You erase evidence and reset monitors at the same time, leaving the next technician and the next test with less to work from. Preserve the data and let it guide the next step.
Choose Your Next Step After a Failure
Repair immediately is bad default advice. Sometimes it's right. Sometimes you're about to spend real money on a vehicle where repair isn't the sensible path, and California runs a program specifically because that situation is common. Lay out your three actual options before you commit.
Compare Repair, Assistance, and Retirement
Diagnose and repair on your own suits a vehicle you intend to keep, with a contained fault and no history of repeated failures. Program-supported repair suits an income-eligible driver whose needed work qualifies. Vehicle retirement suits an older vehicle where repair costs and repeat failures have started to outweigh the car's remaining value to you.
The financial structure is specific. California's Consumer Assistance Program can provide income-eligible drivers up to $1,450 toward emissions-related repairs, while qualifying owners may receive up to $2,000 to retire a vehicle. The retirement option generally requires household income at or below 225% of the federal poverty level and, for the higher incentive, a failed Smog Check. A vehicle that passes may still qualify under a separate retirement pathway if the inspection occurred within the required 180-day window.
Those numbers change the math for a lower-income East Bay driver. A repair that looks unavoidable on your own budget may be partly covered, or retiring the vehicle may return more value than one more repair cycle on a car that keeps failing.
Respect the Eligibility Limits
Don't assume every mechanic's bill qualifies. Assistance is limited to eligible emissions-related work, requires program approval, and depends on income rules and documentation. Apply and get approved through the proper channel before you authorize work expecting reimbursement. Work done outside those conditions is your expense, whatever the total comes to.
There's a reason older vehicles deserve extra scrutiny in this decision. Lawrence Berkeley National Laboratory research using 1999 data estimated that one inspection-and-repair cycle reduced daily emissions by approximately 97 tons of hydrocarbons, 1,690 tons of carbon monoxide, and 81 tons of nitrogen oxides, with automobiles more than 10 years old accounting for over 90% of the hydrocarbon and carbon-monoxide benefits despite being only about half of vehicles tested. Older vehicles carry the greatest emissions-control deterioration risk. That doesn't make yours unsalvageable, but it does mean a single repair may not be the last one.
Sequence your decision this way. Get the diagnosis, check whether you qualify for assistance, compare the realistic repair path against retirement, and watch your registration timing throughout. A failed test doesn't force the cheapest-looking choice. It forces an informed one.
Use a Smog Check Visit Checklist
Run this sequence once and you've covered the article's decisions in order.
- Confirm the trigger: Renewal, first California registration, or ownership change, and check whether your notice specifies STAR.
- Verify vehicle fit: Make sure your station handles your fuel type and age group.
- Assemble information: Bring the notice, exact model year, fuel type, and registration status.
- Protect readiness: Repair known faults, complete the drive cycle, and don't clear codes or disconnect the battery.
- Budget time: Allow extra room around the test, especially for older, diesel, or hybrid vehicles.
After a pass, confirm the result was transmitted electronically before you leave. After a failure, keep the details and don't commit to a quick repair until diagnosis and assistance options are clear. Verify anything specific to your vehicle with your chosen station before you travel.
If your notice calls for a STAR inspection or you're testing a diesel, hybrid, older vehicle, or 2000-and-newer model, Speedy Smog can confirm your vehicle fit, explain the process in plain language, and complete the inspection for your DMV transaction. Bring your renewal notice, verify your vehicle is diagnostically ready, and visit to get tested and back on the road without a second trip.
Car registration renewal in California isn't complete until the required smog certification is filed, and the DMV won't finalize the sticker just because you paid the fee. If your smog result is still missing, the renewal can stay stuck even after payment.
That's the part most drivers miss, especially when the notice looks simple and the online form seems to accept the payment. In practice, car registration renewal California is a compliance workflow, not just a checkout page, and the order matters if you want the renewal to clear on time.
Table of Contents
- The Two Parts of California Vehicle Renewal
- Do You Need a Smog Check
- Renewal Options and Timelines
- Finding a Reliable STAR Station
- Smog Check Failure Rates and Planning
- Common Issues and Final Steps
The Two Parts of California Vehicle Renewal
A common failure pattern goes like this. The driver pays online, assumes the job is done, then discovers the renewal is still blocked because the smog record never cleared, a citation is open, or insurance isn't verified.
Payment is not the same as completion
California's DMV says renewal is not finalized until required smog certification is completed, and it also says there's no grace period for annual registration fees, so the payment has to land on or before the expiration date or penalties apply. That makes timing important, but sequencing matters just as much. The right order is simple, confirm the notice calls for smog, finish the inspection, make sure the result is transmitted, then pay the renewal before the deadline. DMV registration fees and renewal processing
Practical rule: If the smog result hasn't cleared, the payment is only half the job.
What usually stalls a renewal
The DMV lists smog certification, unpaid citations, and insurance gaps as barriers to renewal. That means you should treat the notice as a checklist, not an invoice.
The workflow that avoids surprises is straightforward:
- Check the renewal notice first. If it calls for smog, don't pay and hope for the best.
- Complete the test at an authorized station. A passed inspection is what gives DMV the clearance it needs.
- Verify transmission or retention. The record has to be available for DMV processing, not sitting in your glove box.
- Pay before the expiration date. Missing the deadline creates avoidable penalties.
Drivers who handle the steps in that order usually avoid the worst bottleneck, the false sense that a receipt equals a finished renewal.
Do You Need a Smog Check
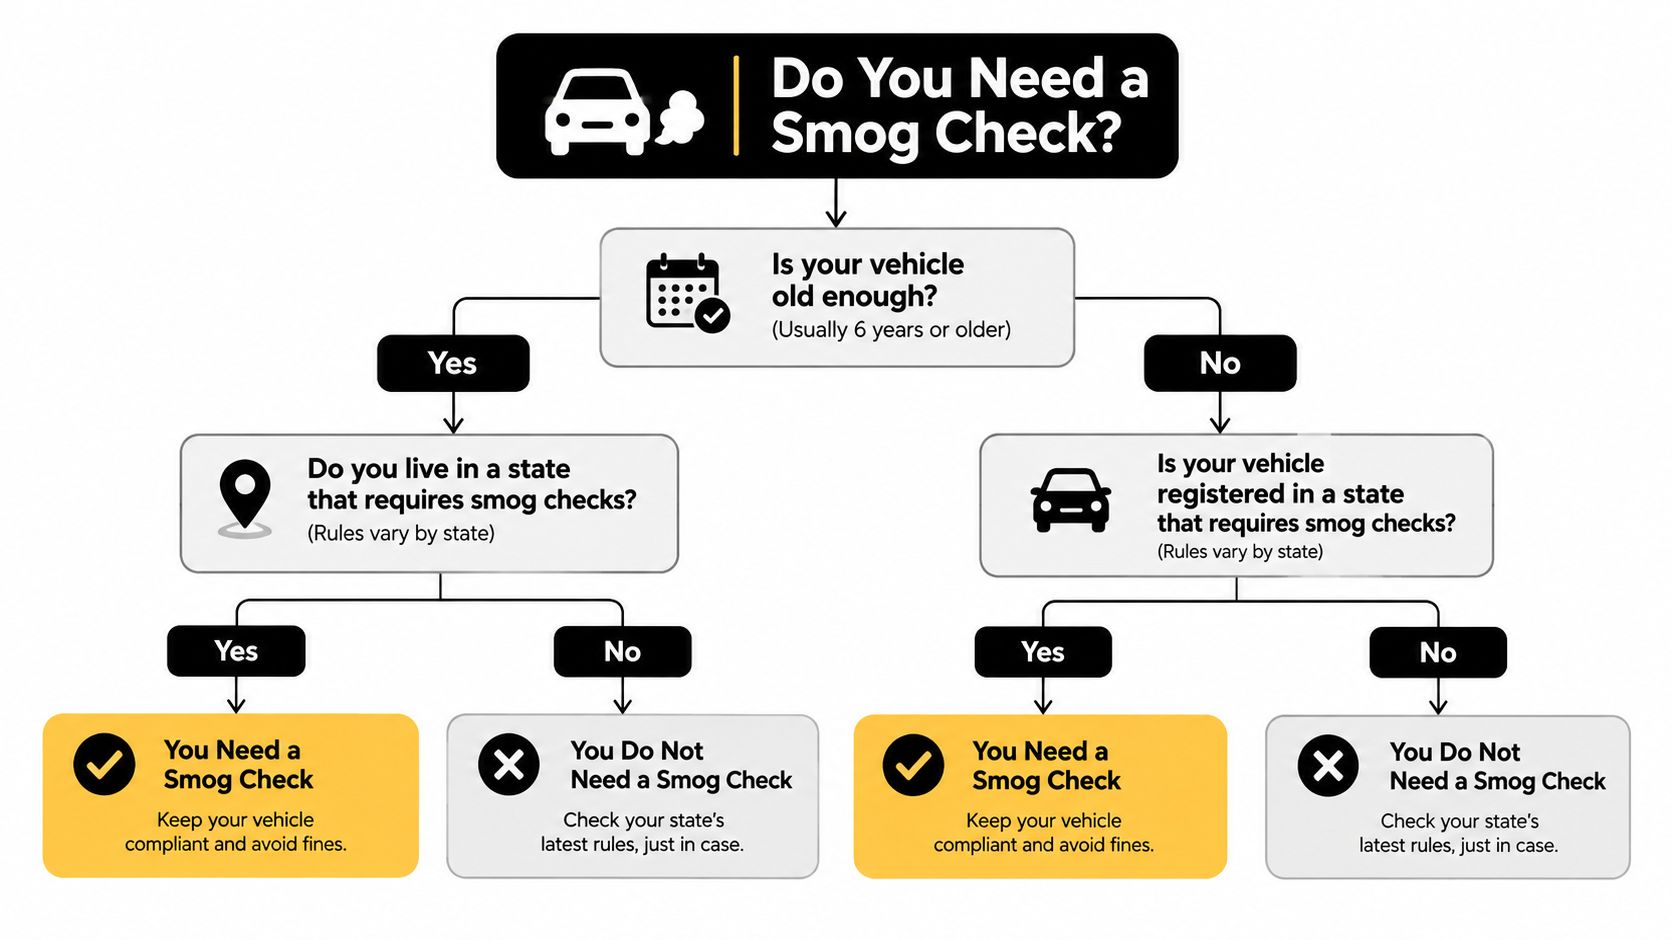
Not every vehicle sits in the same lane. California uses age-based rules, fuel-type rules, and registration timing to decide whether a car needs an inspection, so the fastest way to waste time is to assume everyone gets treated the same.
The exemption paths that matter
Gasoline-powered vehicles that are 1975 model year or older are exempt. Diesel vehicles that are 1997 and older are exempt, and electric vehicles are exempt as well. California also says gasoline-powered vehicles that are less than eight model years old do not need a smog inspection. California DMV smog inspections
That means a lot of newer drivers never need to book a test, while a lot of older daily drivers do. The middle of the fleet is where the compliance burden sits.
Where very new cars fit
California also notes that for vehicles less than four model years old, owners may pay a smog abatement fee instead of getting an inspection for the first 8 years the vehicle is registered. That's a niche path, but it matters if you bought a newer car and are trying to understand why your renewal notice doesn't look like your neighbor's.
If you're not sure which category you fall into, read the registration notice before booking anything. A clear notice saves a trip, and a wrong assumption can cost you a day.
For drivers comparing options, the key distinction is simple. Exempt vehicles can move toward renewal more directly, while inspection-required vehicles need the smog step cleared first. If you're checking a San Leandro or Oakland car, a local station that handles renewal-linked tests can remove some friction, including the process explained at Speedy Smog's registration renewal guide.
Renewal Options and Timelines
Once you know whether the smog requirement applies, choose the renewal method based on your deadline and the condition of your DMV record. Paying the fee starts the transaction, but it does not finish registration if a smog result, hold, or other requirement remains unresolved.
The channel you choose changes the clock
The DMV states that online and phone renewals take about one week, while mail takes about two weeks. A DMV kiosk can process the transaction instantly when every requirement is already satisfied. That timing makes the kiosk the fastest option, while online and phone renewal offer convenience with a short processing wait. California DMV vehicle registration renewal
Online renewal is practical when the record is clear and the expiration date is not pressing. It becomes a poor choice when you are still waiting for a smog result to post or for a hold to clear. The payment may go through while the registration remains incomplete.
The fastest path is the one that matches your actual renewal status.
How to pick the right method
Use the channel that fits both your record and your remaining time:
- Kiosk: Choose this when all requirements are satisfied and you need immediate processing.
- Online: Use it for a clean renewal when a short wait is acceptable.
- Phone: Expect timing similar to online renewal, with no office visit.
- Mail: Use it when convenience matters more than speed. It is a poor fit near expiration.
Check the renewal notice before submitting payment. If it indicates a smog requirement, confirm that the inspection has been completed and transmitted. If the account shows a hold, resolve that issue first. A kiosk cannot bypass a missing smog record or another unresolved requirement.
One practical East Bay habit
East Bay drivers often lose time by paying first and investigating the record afterward. The more reliable sequence is simple: read the notice, confirm the smog status, clear any hold, then submit through the method that fits the deadline.
For the inspection side of that workflow, Speedy Smog's STAR station overview explains how station selection connects with renewal planning. The practical point is to treat registration as a compliance workflow, not just an online payment.
Finding a Reliable STAR Station
A smog station is not just where a test gets plugged in. For renewal work, the station has to do more than inspect the car. The result must be valid, transmitted, and accepted without extra follow-up, or you can still end up stuck even after paying the fees.
Why STAR certification changes the experience
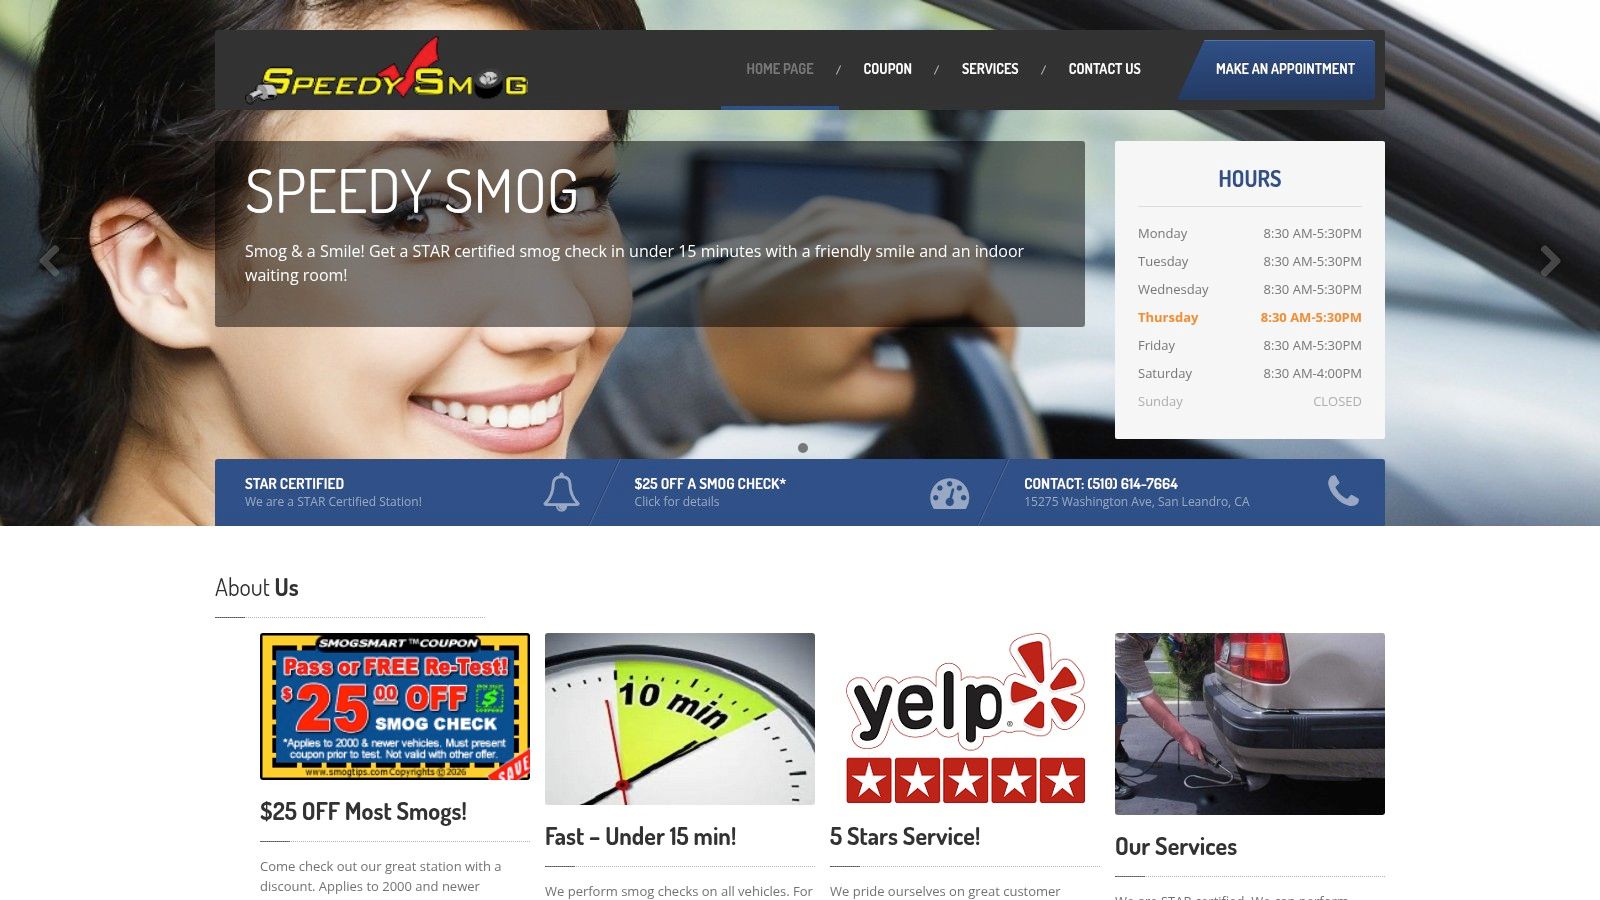
California's BAR sets higher performance standards for STAR Certified stations, which makes them the safer choice when a renewal cannot afford a bad inspection. In San Leandro, Speedy Smog operates as a STAR Certified station at 15275 Washington Ave, and it handles inspections for most vehicles, including 2000 and newer models, 1999 and older vehicles, diesels, and hybrids. Typical tests for newer vehicles are completed in about 10 to 15 minutes. Speedy Smog station information
That speed helps, but predictability matters more. A clean test and proper transmission keep the renewal moving instead of leaving you in DMV limbo with a paid fee and an unfinished record.
What to look for before you drive over
A reliable station should make the process boring in the best way. Clear intake, a clean waiting area, and staff who know which vehicles need which inspection path save time and avoid rework.
Before you go, check a few basics:
- Confirm STAR status. Use it if your renewal notice requires a STAR station.
- Ask about electronic transmission. The result should go to DMV without extra handling.
- Check vehicle fit. Diesel, hybrid, older, and newer cars can have different testing needs.
- Ask about pricing up front. You want the cost explained before the test starts.
The East Bay advantage is simple. You do not need a statewide scavenger hunt for a valid inspection. A nearby station that understands renewal timing can reduce the friction that turns a normal renewal into a delay.
For drivers who want to understand how station type affects the process, what a smog STAR station is gives the practical context.
Why nearby beats “good enough”
A station can be technically valid and still be the wrong choice if it adds delay. If you are trying to beat an expiration deadline, the key question is whether the station gets you through the compliance step fast enough to keep the renewal moving. A clean inspection, prompt transmission, and a simple checkout beat a longer drive to a place that complicates the process.
Smog Check Failure Rates and Planning
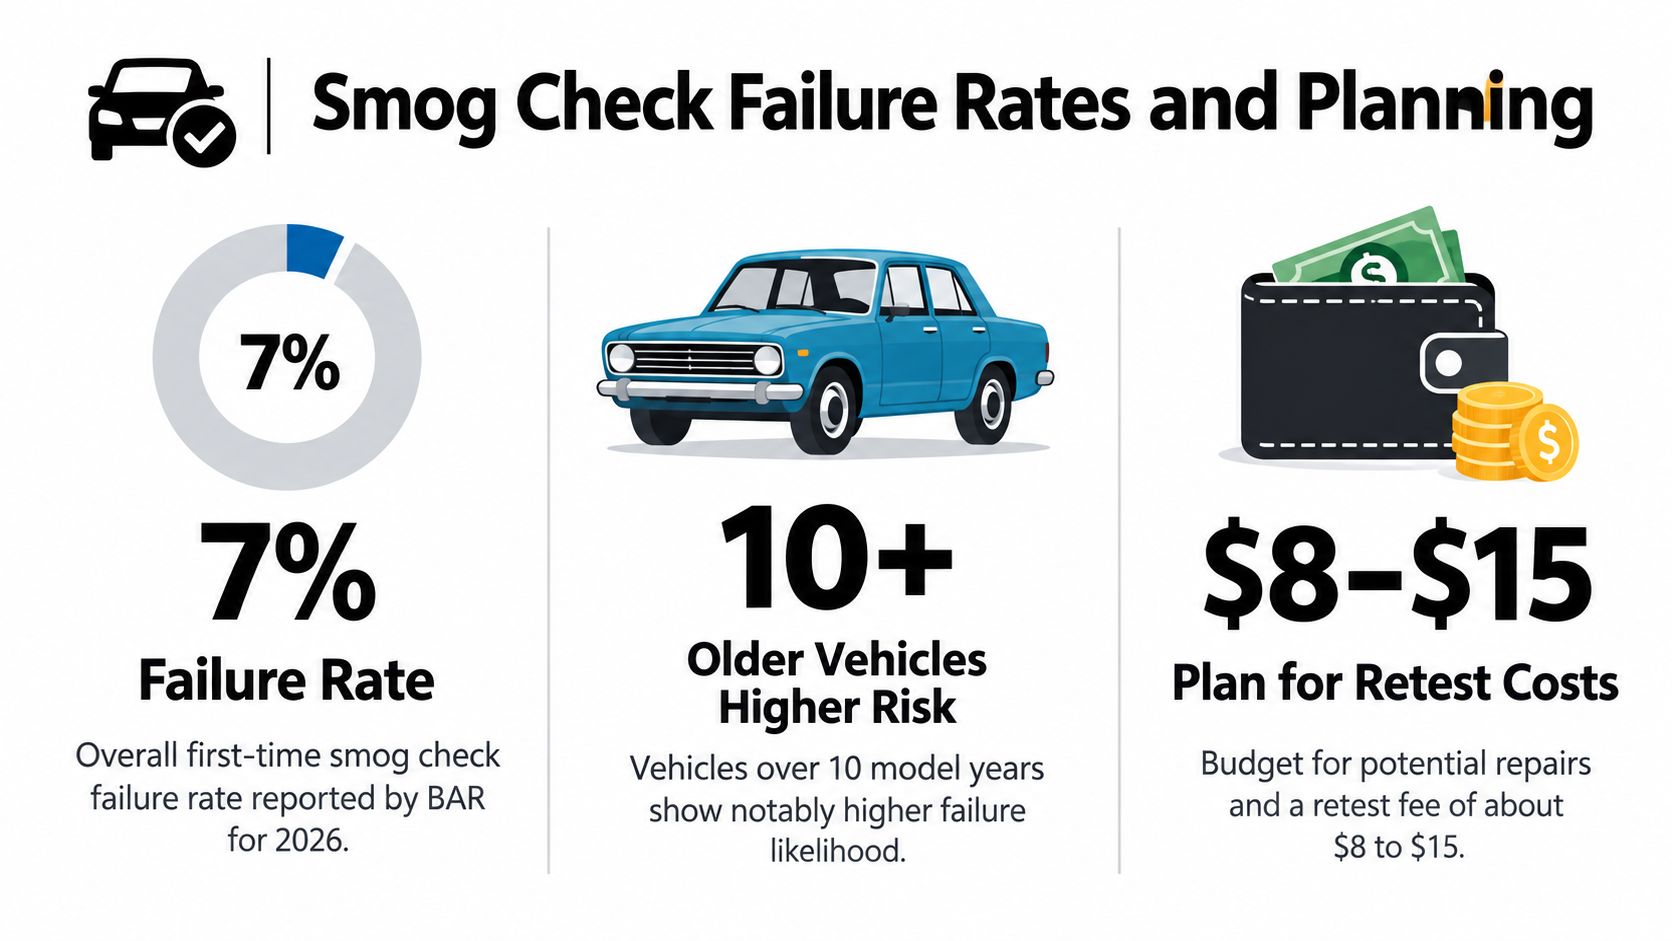
Older cars are not just more likely to need a smog check, they are more likely to slow down renewal. That is why planning before the inspection matters. A failed test can stall the whole compliance chain, and the risk rises as the vehicle ages. BAR smog check performance report
What the failure pattern tells you
BAR's 2026 performance report says about 1.3 million of 19 million 2000-and-newer vehicles tested in CY 2024-2025 failed Smog Check, roughly 7%, while roadside inspection failure averaged about 14% statewide in 2024-2025. Its 2024 report also shows failure rates rising sharply with age, from about 4% for 8-year-old vehicles to 15% for 23-year-old vehicles.
That age pattern matters. If your car is older, the odds of a delay go up, and your renewal plan should reflect that.
What to do before the test
Preparation will not fix a real emissions problem, but it can keep you from failing for avoidable reasons. Warm the vehicle before inspection, and treat a check engine light as a real fault until diagnostics prove otherwise. If you suspect a problem, verify the repair before you pay for the official test.
A practical pre-test checklist looks like this:
- Warm the car up properly. A cold car can give you a bad read.
- Inspect the dash. A check engine light usually means diagnostics first.
- Verify recent repairs. Do not assume a cleared code means the issue is gone.
- Use the right station. A station that understands your vehicle type reduces avoidable confusion.
For a local breakdown of common failure causes, Speedy Smog's smog fail guide is a useful starting point.
Planning beats panic
Older vehicles should be treated as a project, not a gamble. If you go in expecting a clean pass without checking the basics, you are betting your renewal on luck. If you confirm the obvious issues first, you give yourself a much better shot at getting through the compliance step in one visit.
Common Issues and Final Steps
A renewal can still stall after the smog step is done. The usual blockers are operational. An unpaid citation, an insurance gap, or a missing clearance can keep the file from moving even after you think everything is complete.
What to verify before you submit
If your renewal notice shows a smog requirement but you believe you qualify for an exception, check the vehicle's model year, fuel type, and registration status against the California DMV vehicle registration renewal page before you assume the notice is wrong.
Use this checklist before you submit:
- Smog status is correct. If a test is required, it has been completed and transmitted.
- Citations are clear. Any open violation can stop renewal.
- Insurance is active. A coverage gap can hold the file.
- Payment is on time. California does not give a fee grace period.
- The channel matches the deadline. If time is tight, do not choose a slow method.
California also allows a temporary operating permit for failed-smog cases for a $50 fee, which gives drivers a way to keep the vehicle legally usable while repairs are finished. It is not a free pass. It only buys time to complete the compliance work.
What a finished renewal actually looks like
A finished renewal means the record is clear, not just paid. The notice is satisfied, the smog result is accepted if required, and the DMV can complete the transaction without a hold. That is the standard to use before you assume the sticker is on the way.
For East Bay drivers, the practical move is to separate the payment step from the compliance step. If the account has a hold, or the smog data has not posted yet, paying online does not finish the job. Handle the missing piece first, then confirm the record has cleared.
If you want the inspection side handled without extra friction, Speedy Smog can handle official smog certification for renewal-linked cases and move the result through the process quickly. Visit Speedy Smog to get the smog step handled and keep your car registration renewal on track.
A STAR certified smog check in California typically runs $50 to $90 total at the counter. The $8.25 certificate fee is fixed by the state, while the rest of the bill is set by the station.
You're probably asking because a registration notice, DMV renewal, or vehicle sale has put a deadline in front of you. You call one shop and hear a low advertised price. Another shop quotes more. Then someone mentions that your vehicle must visit a STAR station, and the whole process starts sounding more expensive than it should.
As a San Leandro shop owner, I've seen the same confusion for years. Drivers often treat STAR as a premium brand or assume the state controls the entire bill. It doesn't. The certificate fee is regulated. The inspection price is not. Your vehicle's year, fuel type, inspection category, and the station's own pricing policy determine the rest.
Table of Contents
- What You Actually Pay at the Counter
- Why STAR Certification Exists and How It Shapes the Inspection
- The Three Factors That Drive STAR Pricing Up or Down
- San Leandro and East Bay Pricing in Real Situations
- Hidden and Surprise Charges Worth Watching For
- Discounts, Coupons, and Smart Ways to Lower the Final Bill
What You Actually Pay at the Counter
Standing at the counter, ask for one number: the total amount due if the vehicle passes. Don't settle for an advertised starting price until the employee explains what that price includes.
The California Bureau of Automotive Repair states that the Smog Check certificate fee is fixed at $8.25, and a station must charge it when the vehicle passes inspection. BAR also says inspection prices themselves aren't regulated, so each station can set its own charge. That distinction is the foundation of the California smog check price guide.
The station's charge pays for the actual inspection service. Depending on the vehicle, that can include the visual emissions inspection, an OBD system check, required emissions testing, technician labor, and electronic reporting. The $8.25 certificate fee doesn't pay for the technician's time or the equipment used to inspect your car. It pays for the state certificate attached to a passing result.
BAR's statewide reporting shows why the final bill usually sits far above the certificate fee. In one 2026 reporting period, STAR Test-and-Repair inspections averaged $77.93, while STAR Test Only inspections averaged $66.70. BAR's 2025 summary listed a STAR Test-and-Repair inspection-only average of $75.79 and an overall average of $69.22 when transactions were combined. Those figures cover the market-driven inspection portion and demonstrate how much more the station charge can be than the certificate itself. (California BAR Smog Check information)
| Cost Component | Amount | Who Sets It | What It Covers |
|---|---|---|---|
| State certificate fee | $8.25 | California BAR | The certificate issued after a passing inspection |
| Station inspection charge | Varies by station and vehicle | The station | Inspection labor, equipment, and required testing |
| Optional transaction charges | Varies | The station, subject to applicable rules | Possible electronic transmission or related service charges |
| Final customer bill | Commonly falls in the $50 to $90 range | The combined pricing structure | The complete amount paid at the counter |
Practical rule: Ask, “What is my total price, including the certificate fee and every required charge, if the car passes?”
A reputable shop should answer before starting the inspection. If the employee only repeats “starting at” pricing, ask what changes the price for your exact vehicle. That question usually tells you more than the STAR label on the sign.
Why STAR Certification Exists and How It Shapes the Inspection
STAR certification isn't a premium inspection brand. It's a performance-based designation created by the California Bureau of Automotive Repair for qualifying Test Only and Test-and-Repair stations.
BAR ties the designation to measurable performance requirements. A station seeking STAR certification must meet thresholds that include a Similar Vehicle Failure Rate of at least 50% of the industry-wide failure rate for similar vehicles, a Gear Shift Incident rate no greater than 2%, and an Excessive Test Deviation Rate of no more than one. BAR also requires a Follow-up Pass Rate score of at least 0.40 before a station becomes eligible. (BAR STAR certification requirements)
Those figures matter because they show what STAR is designed to control. The program evaluates whether a station performs inspections consistently and identifies vehicles that need attention. It doesn't create a separate retail price schedule, and it doesn't mean every STAR station charges the same amount.
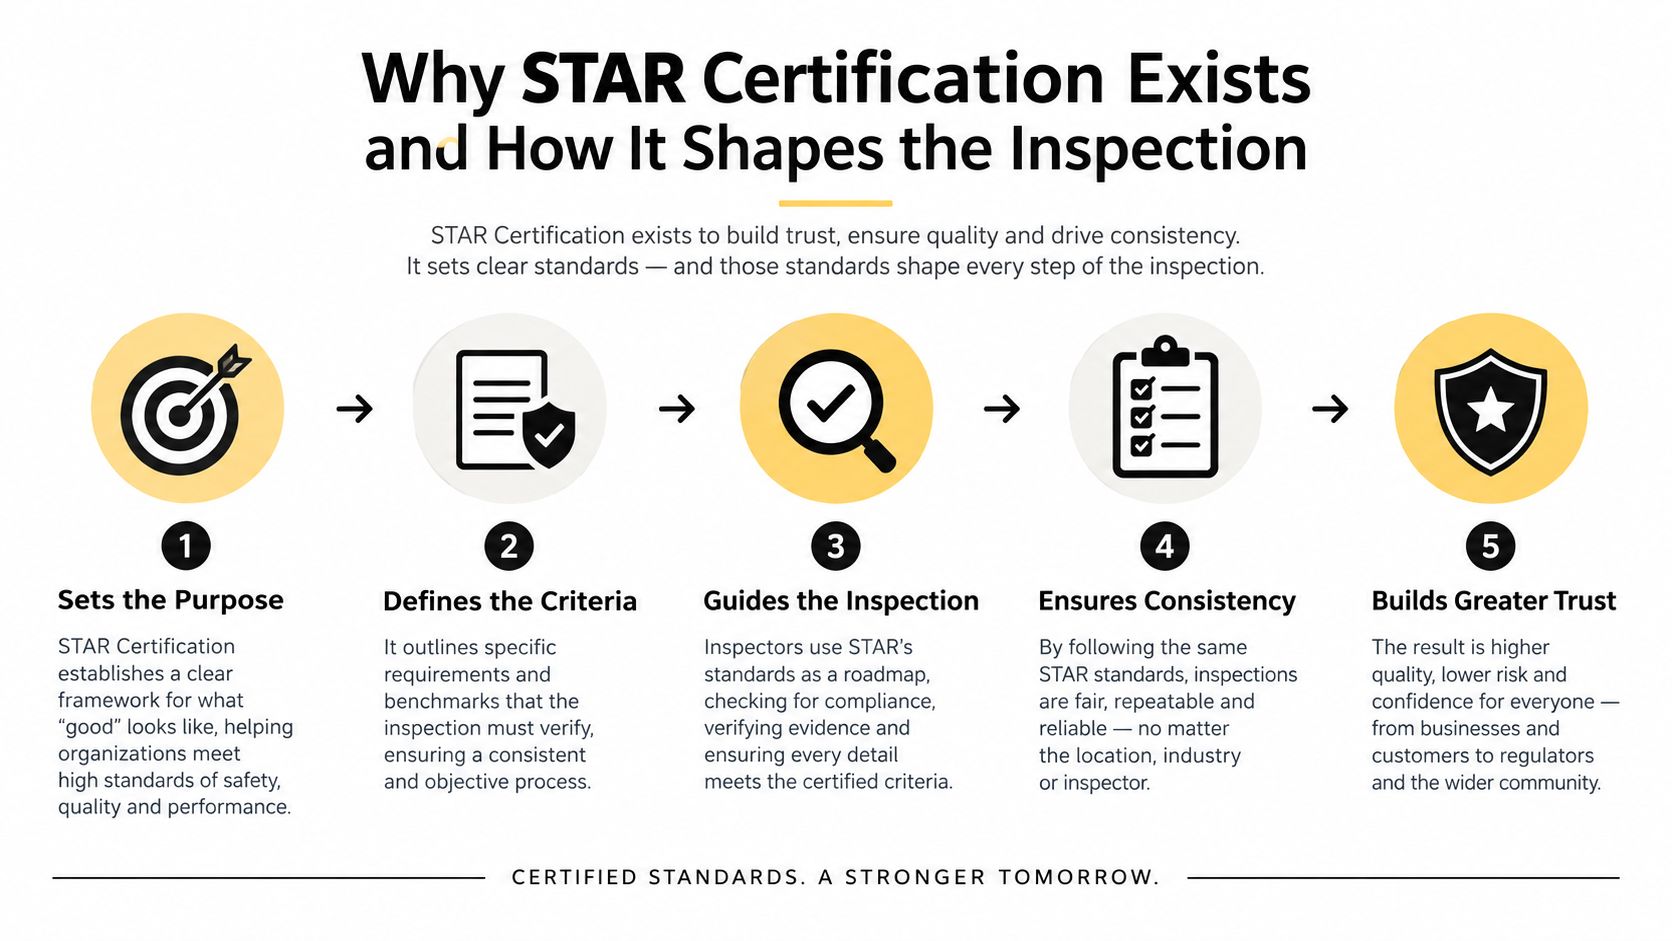
Some vehicles are directed to STAR stations by the DMV or BAR because they need a compliance-sensitive inspection. In that situation, STAR isn't optional. The station must be approved for the required inspection category, and the driver should follow the instructions on the notice rather than choosing a cheaper station that can't issue the needed certificate.
What changes for the driver
The core testing steps will look familiar. A technician still checks the vehicle's emissions equipment and runs the required computerized or emissions test. STAR adds a stricter oversight framework around the station's work, not a mysterious new type of engine test.
That's why I tell customers to separate inspection quality from retail price. A STAR station can charge a reasonable market price, but the designation itself doesn't guarantee a discount. Before booking, confirm that the station accepts your vehicle's inspection requirement and ask for the out-the-door price.
For a plain-language explanation of the designation, see what a STAR smog station does. The most useful question isn't “Is STAR more expensive?” It's “What does this station charge for my vehicle and inspection type?”
The Three Factors That Drive STAR Pricing Up or Down
A STAR badge does not set one flat price. At the counter, the total usually comes from three separate factors: vehicle age, vehicle type, and station classification. The state certificate fee is regulated, while the station's inspection charge is not. Your vehicle and the required test determine whether the STAR premium is justified or mostly a marketing label.
Vehicle year affects the work involved
Newer gasoline vehicles commonly receive an OBD-based inspection. Older vehicles may require a more involved process, with different equipment, procedures, and technician time. Those differences can raise the station's charge even when the required certificate is the same.
For newer vehicles, independent listings show some stations advertising $40 to $70. The advertised amount may include the certificate fee, or it may leave that state charge out. Ask for the complete total before booking, including the $8.25 certificate fee. Example STAR station pricing information
A low advertised price is useful only when you know what it covers.
Fuel type changes the quote
Diesel vehicles should not be priced from a gasoline-car advertisement. Diesel inspection requirements and equipment can differ, so call with the fuel type, model year, and vehicle classification before driving to the station. A gasoline promotion may exclude diesel testing.
The same rule applies to hybrids. A hybrid may use an OBD-based inspection, but the station must confirm that it can perform the required test for that vehicle. Ask whether the quoted price covers the exact vehicle and inspection category rather than assuming a standard gasoline offer applies.
Station classification matters
BAR reporting separates STAR Test Only stations from STAR Test-and-Repair stations. In the cited 2026 report, STAR Test Only averaged $62.36, with a $50.86 25th percentile and a $58.06 median. BAR cautions that reported customer-paid costs may include discounts and may not represent the full inspection cost, so a coupon can change the final bill. (BAR March 2026 executive summary)
| Cost Driver | Low-End Price | High-End Price | Why It Changes |
|---|---|---|---|
| Newer gasoline vehicle | Advertised listings commonly $40 to $70 | Station-specific; confirm whether the $8.25 certificate fee is included | OBD-based testing can be priced differently from older testing |
| Older gasoline vehicle | Varies | Varies | Equipment, labor, and inspection procedure can differ |
| Diesel vehicle | Quote required | Quote required | Fuel type and inspection requirements affect station workload |
| STAR Test Only | BAR-reported median of $58.06 | BAR-reported average of $62.36 | Test Only stations perform inspections without repair work |
| STAR Test-and-Repair | BAR-reported statewide averages above Test Only in the cited periods | Varies by station | Station category and transaction mix affect pricing |
Give the station the full vehicle details first. That means fuel type, model year, vehicle classification, and whether the DMV directed the inspection. A firm quote that ignores those details is incomplete. Ask for the out-the-door price and confirm that the regulated certificate fee is included.
San Leandro and East Bay Pricing in Real Situations
Customers often want a city-by-city price map. The East Bay doesn't work that neatly. San Leandro, Oakland, Hayward, Fremont, and nearby communities have independent stations with different equipment, workloads, coupons, and inspection categories. A station a few miles away may charge more or less for reasons unrelated to the city name.
Consider two appointment types without pretending that either has a guaranteed price.
A newer gasoline hybrid arriving with a routine renewal usually belongs in the more straightforward OBD-based conversation. The driver should ask whether the station's advertised price includes the $8.25 certificate fee, whether any discount applies, and whether the vehicle has a special DMV direction. A STAR requirement may come from the vehicle's registration situation, not from the car being costly to inspect.
A much older diesel truck is a different appointment. The driver should provide the model year, fuel type, and vehicle classification before arriving. The station may need different equipment or procedures, and a gasoline-car promotion may not apply. The correct price is the one quoted for that exact truck, not the price printed for a standard newer vehicle.
| Vehicle Type | San Leandro | Oakland or Hayward | Fremont | Walnut Creek |
|---|---|---|---|---|
| Newer gasoline vehicle | Ask for a total including the certificate fee | Compare the complete quote | Compare the complete quote | Compare the complete quote |
| Hybrid | Confirm STAR eligibility and applicable offer | Confirm vehicle-specific pricing | Confirm vehicle-specific pricing | Confirm vehicle-specific pricing |
| Older gasoline vehicle | Expect a vehicle-specific quote | Expect a vehicle-specific quote | Expect a vehicle-specific quote | Expect a vehicle-specific quote |
| Diesel vehicle or truck | Call before arrival | Call before arrival | Call before arrival | Call before arrival |
The BAR data gives a better anchor than neighborhood folklore. STAR Test Only pricing in the March 2026 report ranged from the reported 25th percentile of $50.86 to the statewide average of $62.36, with discounts potentially affecting the customer-paid amount. That spread exists inside the STAR category itself.
A cheap advertised price is useful only when you know whether it includes the certificate fee and applies to your vehicle.
Map your own situation using three facts: vehicle year, fuel type, and inspection category. Then request the full total from two or three stations. That process is more reliable than assuming every East Bay location follows the same price sheet.
Hidden and Surprise Charges Worth Watching For
The most common misunderstanding starts with the certificate fee. Some drivers see a low inspection price and assume the state charge is included. Others see $8.25 added at the bottom and think the station invented it. BAR says the certificate fee is fixed and must be charged when the vehicle passes. The station's inspection price is separate and unregulated.
Electronic transmission or transaction charges may also appear. BAR's pricing information notes that additional electronic transmission fees can affect the final bill, but the amount isn't a statewide fixed figure in the verified data. Ask whether the quoted total includes every required electronic reporting charge.
Ask about these items before authorization
- Certificate fee: Ask, “Is the $8.25 state certificate fee already included in the quoted total?”
- Electronic transmission charge: Ask whether the station adds a separate fee for submitting the result electronically.
- Retest policy: Ask whether a failed first inspection qualifies for a reduced retest price and what conditions apply.
- VIN verification: Ask whether incomplete paperwork, an unreadable VIN, or a separate verification request creates another charge.
- Pre-inspection or diagnostic work: Ask whether the shop will charge you for checking the vehicle before performing the official inspection.
- Vehicle-specific pricing: Confirm that the price applies to your year, fuel type, hybrid system, or truck classification.
- Coupon restrictions: Ask whether the discount includes the certificate fee, applies to STAR inspections, and covers a directed vehicle.
A station can set its inspection price, but that doesn't mean every fee deserves a vague explanation. The quote should distinguish the state certificate from station services and optional work. If an employee says, “We'll know after we start,” ask what could change the price and whether you can decline additional work.

A failed inspection is another point where customers lose control of the bill. The official test result and any later repair or diagnostic work are separate decisions. Don't authorize repairs just because the vehicle failed. Ask for the failure details, the retest price, and a written repair estimate before approving anything.
The practical standard is simple: no surprise line items. If the station can't explain the charge before the inspection, choose another station.
Discounts, Coupons, and Smart Ways to Lower the Final Bill
The easiest way to cut a STAR certified smog check price is to reduce the station charge, while keeping the required inspection intact. Coupons can help, and BAR notes that reported customer-paid prices may include discounts, so the number you see in a report is not always the number you will pay. Compare the final total, not the headline price.
Start with the station's own website, then check local deal pages, email offers, and direct mailers. Read every restriction before you go. Some coupons apply only to certain vehicle years or inspection types, and some separate the station charge from the certificate fee.

Use this pre-payment checklist
- Certificate fee: Is the fixed state certificate charge included?
- Transmission fee: Is electronic submission billed separately?
- Retest policy: What happens if the vehicle fails the first test?
- VIN verification: What condition triggers an extra verification charge?
- Payment timing: Do you pay before the result, or after the station completes the test?
- Failed inspection rules: Is any portion refundable if the vehicle does not pass?
- Additional diagnosis: Does the original quote stay valid if the shop recommends diagnostic work?
Compare Test Only stations with Test-and-Repair stations too. The statewide averages are different, but the cheapest category is not automatically the right choice if your DMV notice directs you to a specific STAR inspection type.
For local offers and current terms, review STAR certified smog check coupons. Bring the coupon up before the technician starts, and ask for the final total out loud. That avoids the usual billing argument, where the customer and the station are working from different definitions of “price.”
The rule is simple. Confirm the inspection category, ask for the total including $8.25, and compare two complete quotes. STAR certification can be required and worth paying for, but it is no reason to accept an unexplained premium.
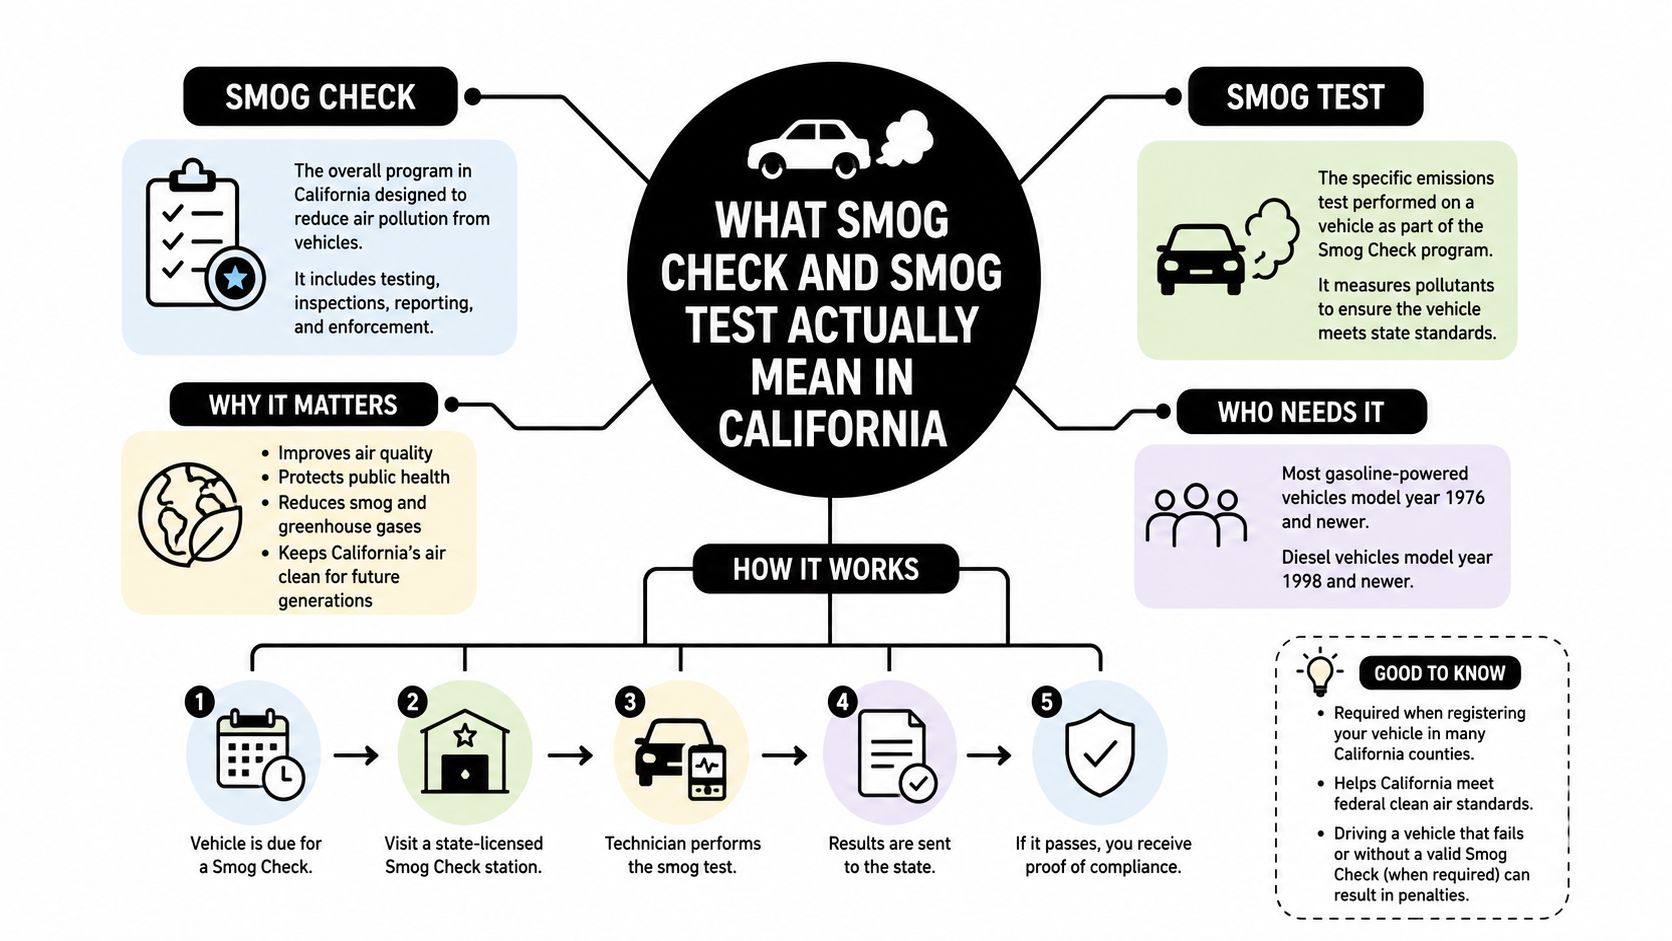
In California, Smog Check is the official state program, and smog test is the common name for the inspection itself. For most drivers, they point to the same DMV-required event, but the actual inspection method changes by model year, with 2000 and newer vehicles generally checked through OBD II and 1999 and older vehicles tested with BAR-97 tailpipe equipment.
That's why the wording gets confusing. Your DMV renewal notice may say Smog Check, while a local shop sign says smog test, and both are talking about the same trip you need to make before registration can move forward.
Table of Contents
- Introduction Why Drivers See Two Terms for One Requirement
- What Smog Check and Smog Test Actually Mean in California
- How California Smog Inspections Work Today
- Which Test Your Vehicle Needs Based on Year and Type
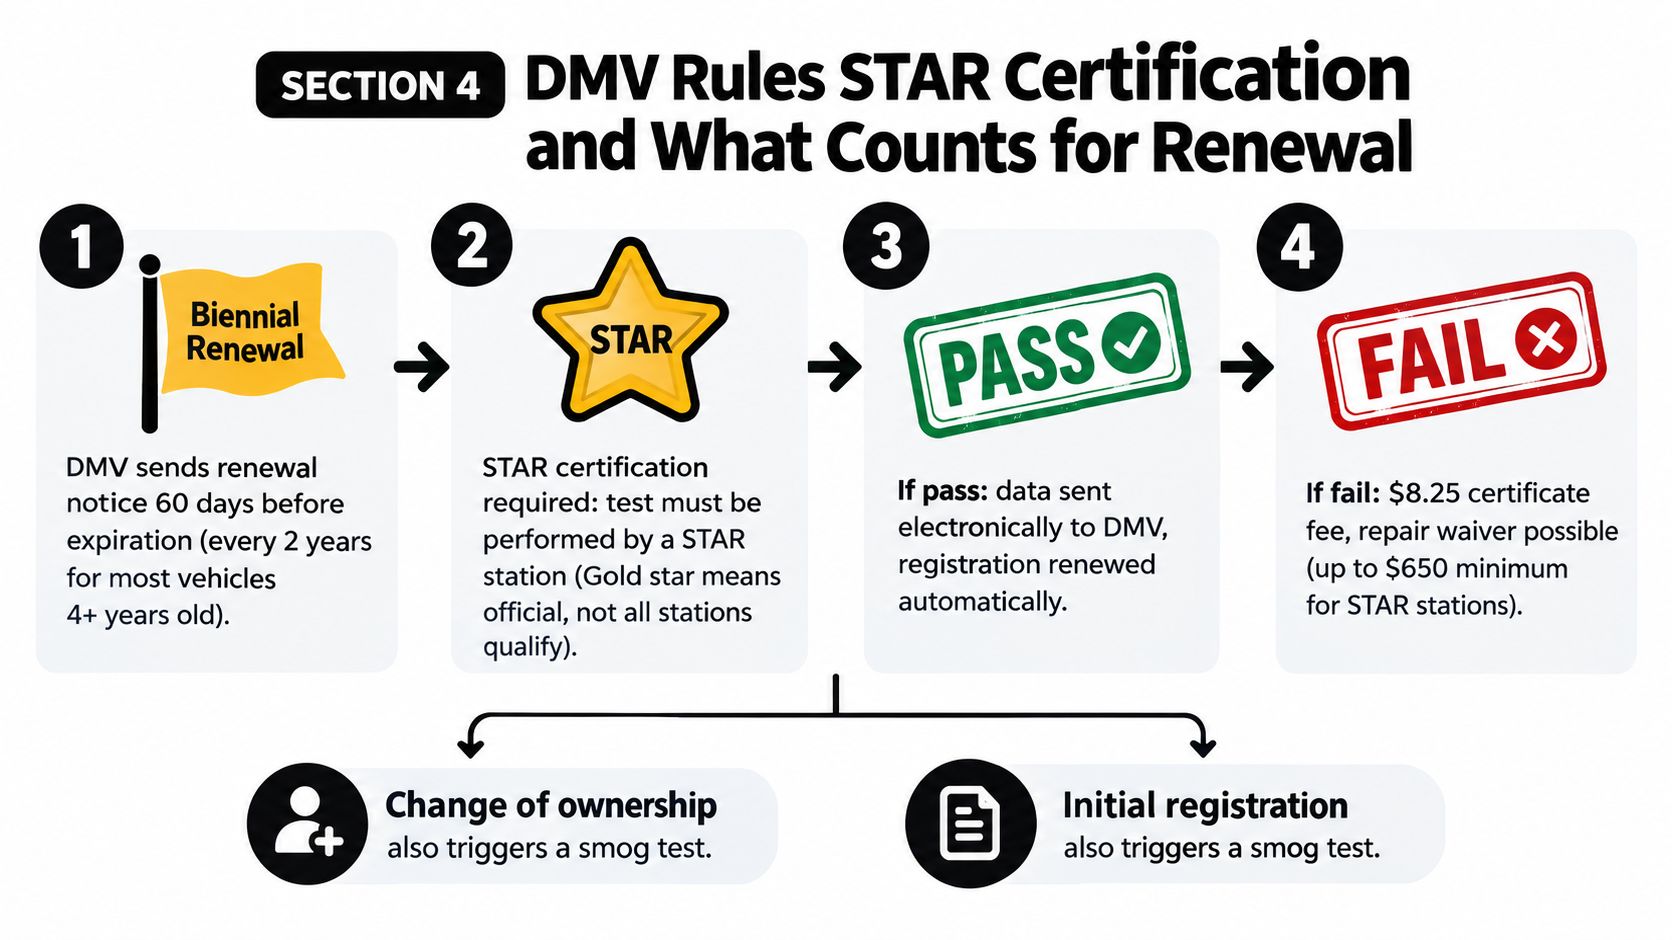
- DMV Rules STAR Certification and What Counts for Renewal
- How to Prepare Your Vehicle and Pass the First Time
- Choosing the Right Smog Station in the East Bay
Introduction Why Drivers See Two Terms for One Requirement
A lot of East Bay drivers hit the same moment. You open your renewal notice, see that California wants a smog check, then search online and find shops advertising smog tests. It's easy to wonder whether those are two different services, two different prices, or two separate legal steps.
Usually, they aren't separate at all. The confusion comes from the fact that California uses one term for the regulated system and everyday drivers use another term for the inspection procedure.
A common real-world example
Say you drive a 2008 sedan in San Leandro. Your renewal reminder tells you to complete a smog requirement before DMV can process registration. Then you call a station and the person on the phone says, “Yes, we do smog tests.” That doesn't mean they're offering something different from what the DMV asked for. They're using the common shop-floor phrase for the inspection that satisfies the state program.
The same thing happens with older vehicles. Someone with a 1995 pickup may hear “smog test” and assume it's the same process their neighbor's 2016 hybrid gets. It isn't. Both fall under California's Smog Check system, but the way the vehicle is inspected can be very different.
Practical rule: If your paperwork says you need a Smog Check, you usually don't need to buy one thing from DMV and another thing from a shop. You need the inspection that fits your vehicle and counts for registration.
The fast way to think about it
Use this simple distinction:
| Term | What it usually means | Why it matters |
|---|---|---|
| Smog Check | California's official compliance program | It's tied to DMV registration, station licensing, and state rules |
| Smog test | The actual inspection performed on the vehicle | It's the procedure that generates the pass or fail result |
That difference sounds semantic until you're trying to book the right station. Once you understand the compliance mechanics, the next questions get easier. What kind of test does your car get? Do you need a STAR station? Will your result count automatically for DMV? Those are the questions that save time.
What Smog Check and Smog Test Actually Mean in California
A first-time driver usually hears both terms in the same week. The DMV notice says you need a Smog Check for registration. The shop says they perform smog tests. In California, those phrases point to the same requirement, but they do not do the same job.
Smog Check is the state program. Smog test is the inspection work done on your vehicle inside that program. The practical difference shows up after the car is inspected. A test result by itself does not satisfy registration. What counts is a result recorded through California's Smog Check system so BAR can issue the electronic record DMV recognizes, as described in the BAR Smog Check Reference Guide.
Why both terms stayed in use
The split in language makes sense once you look at who is using the words.
State agencies use Smog Check because they are talking about rules, station licensing, certificate records, and whether a vehicle has met a registration condition. Shops and drivers often say smog test because they are talking about the appointment in the service bay, the machine hookup, and the pass or fail result for that specific car.
That sounds small, but it answers a common point of confusion. If a shop advertises smog testing, that does not automatically tell you every result will work for your renewal. The result has to be produced under the state program, by a properly licensed station, and transmitted in the way DMV accepts.
What the distinction changes for you
The wording becomes practical instead of academic.
If you ask, “Do I need a smog test?” you are asking about the procedure performed on the vehicle. If you ask, “Do I need a Smog Check?” you are really asking a compliance question: Does my registration require an inspection, what kind of inspection applies to my vehicle, and does this station have authority to submit a result that counts?
A simple way to picture it is a school exam. The test is what the student takes at the desk. The program is the school system that decides who can give the exam, how the score is recorded, and whether the result satisfies the graduation rule. California works the same way. Your car can be inspected, but DMV only cares about the inspection result that enters the Smog Check system correctly.
Plain-language takeaway
Use smog test for the procedure at the station. Use Smog Check for the legal program tied to DMV.
That distinction helps with three decisions drivers make all the time:
- Test type: your vehicle may get a different inspection method depending on year and configuration
- Station choice: some vehicles or notices require a station with specific authorization, such as STAR
- DMV outcome: registration depends on the official transmitted result, not just the fact that your car was looked at
So the question is not which phrase is more correct. The useful question is whether the inspection you book will produce the right record for California compliance.
How California Smog Inspections Work Today
A first-time driver often expects one standard smog appointment. At the station, the process changes once the technician enters the vehicle information. California does not run one single inspection routine for every car. The Smog Check program uses different inspection methods based on the vehicle's model year and emissions setup.
That is the practical difference between the system and the procedure. Smog Check is the state program that sets the rules. The smog test is the specific inspection your car receives under those rules.
According to BAR's current smog inspection overview, newer vehicles are usually inspected through the BAR On-Board Diagnostic Inspection System, while older vehicles may still go through the BAR-97 Emissions Inspection System with direct tailpipe measurement.
California Smog Inspection Methods Compared
| Inspection Type | Vehicles Covered | What Is Measured | Equipment Used |
|---|---|---|---|
| OBD inspection | 2000 and newer vehicles | Electronic diagnostic data related to emissions performance | BAR On-Board Diagnostic Inspection System |
| BAR-97 tailpipe test | 1999 and older vehicles | Direct exhaust emissions at the tailpipe | BAR-97 Emissions Inspection System |
| Visual and functional checks | Applies as part of the inspection process where required | Emissions-related components and system operation | Technician inspection tools and station equipment |
What the technician is actually doing
For a newer vehicle, the inspection usually works like a report-card check from the car's own computer. The technician connects to the onboard diagnostic system and verifies whether the emissions monitors, fault information, and related data meet program requirements. The car can drive normally and still fail if that electronic record shows an emissions problem.
For an older vehicle, the inspection is more like measuring what comes out of the tailpipe in real time. The station uses BAR-97 equipment to sample exhaust emissions directly, along with any required visual or functional checks. The workflow is different because the test is measuring output, not mainly reading stored diagnostic information.
That distinction matters at the counter and at DMV. Two drivers can both ask for a "smog test" and receive different procedures because the Smog Check program assigns the inspection path by vehicle category.
Why one appointment is faster than another
Drivers often compare appointment times and get confused. The reason is usually mechanical, not random.
An OBD-based inspection is often more direct because the system is reading emissions-related data already stored by the vehicle. A BAR-97 inspection takes more setup because the station must perform tailpipe measurement with different equipment and procedures.
So if one car is finished quickly and another takes longer, the station is not changing the rules on the fly. The program is applying a different test method to a different kind of vehicle.
What counts in the end
The key outcome is not that your car was inspected. The key outcome is that the correct inspection method was performed and the result was transmitted in a way California accepts for Smog Check compliance.
That is why the wording matters less than drivers think, and the mechanics matter more. The phrase "smog test" describes the procedure in the bay. "Smog Check" describes the larger compliance system that decides which procedure applies and whether DMV will accept the result.
Which Test Your Vehicle Needs Based on Year and Type
You get a renewal notice, book what sounds like a routine smog appointment, and then the station asks a question that changes everything: what year is the vehicle, and what fuel does it use?
That question matters because California does not sort inspections by the words drivers use. It sorts them by vehicle category. "Smog Check" is the compliance system. The "smog test" is the inspection procedure that system assigns to your car.
For many drivers, the first decision starts with model year and fuel type. A newer gasoline car usually follows one inspection path. An older gasoline car may follow another. Diesel vehicles can fall under different rules, and some registrations also require a STAR station, which affects where the result will count.
If you want a practical year-by-year reference before you book, this guide on what smog check you need helps match the vehicle to the likely inspection path.
Start with the vehicle category
A simple way to sort it is like checking which line you belong in at the airport. Everyone is traveling, but not everyone goes through the same lane.
- 2000 and newer gasoline vehicles: these are usually inspected through an OBD-centered process.
- Pre-2000 gasoline vehicles: these often need a tailpipe-based procedure.
- Diesel vehicles: these can have different program rules, so the station must handle that vehicle type correctly.
- Vehicles marked for STAR: the inspection result must come from the right kind of station, not just any nearby shop.
The practical point is simple. Your vehicle category decides the test method, and sometimes it also decides the station.
Four common examples
A 2005 sedan usually goes down the newer-vehicle path. In plain terms, the inspection often focuses on what the vehicle's onboard system reports. If the check engine light is on or the monitors are not ready, that can affect the outcome even if the car feels fine to drive.
A 1995 truck is a different case. Older gasoline vehicles are more likely to need direct emissions measurement, so the appointment may involve different equipment and a different setup at the station.
A diesel pickup deserves a quick phone call before booking. Some drivers assume every smog location handles diesel the same way. They do not. The right question is whether the station performs the inspection your diesel vehicle needs.
A hybrid can confuse first-time drivers too. Hybrid does not automatically mean exempt or simplified. The category still depends on how California classifies that vehicle for the registration event in front of you.
Why two drivers can have different appointments
Friends often compare notes and wonder why one visit took fifteen minutes and another took much longer. The reason is usually built into the rules, not the shop.
Two people can ask for a "smog test" and receive different procedures because their vehicles fall into different Smog Check categories. One car may be routed through an OBD-based inspection. Another may need a tailpipe procedure. A third may need the same inspection result, but from a STAR-certified station for DMV to accept it.
Simple booking rule: check your model year, fuel type, and any STAR requirement on your DMV notice before choosing a station.
That is where the wording clears up. The debate is not really smog check versus smog test. The issue is which inspection path California assigns, and whether that result will satisfy your registration requirement.
DMV Rules STAR Certification and What Counts for Renewal
You finish the inspection, the technician hands you a passing result, and you assume the DMV part is done. Then the renewal notice still shows a smog requirement. For first-time drivers, that feels confusing, but the reason is usually simple. California does not just need a vehicle to be tested. California needs the inspection to be completed in the right compliance channel so DMV can accept it for registration.
California treats Smog Check as the full regulatory system tied to registration, station licensing, and eligibility. A smog test is the procedure performed on the vehicle inside that system. That difference matters at renewal time because DMV is checking more than whether your car passed. DMV is checking whether the result came from the right kind of inspection, at the right kind of station, for your vehicle's requirement.
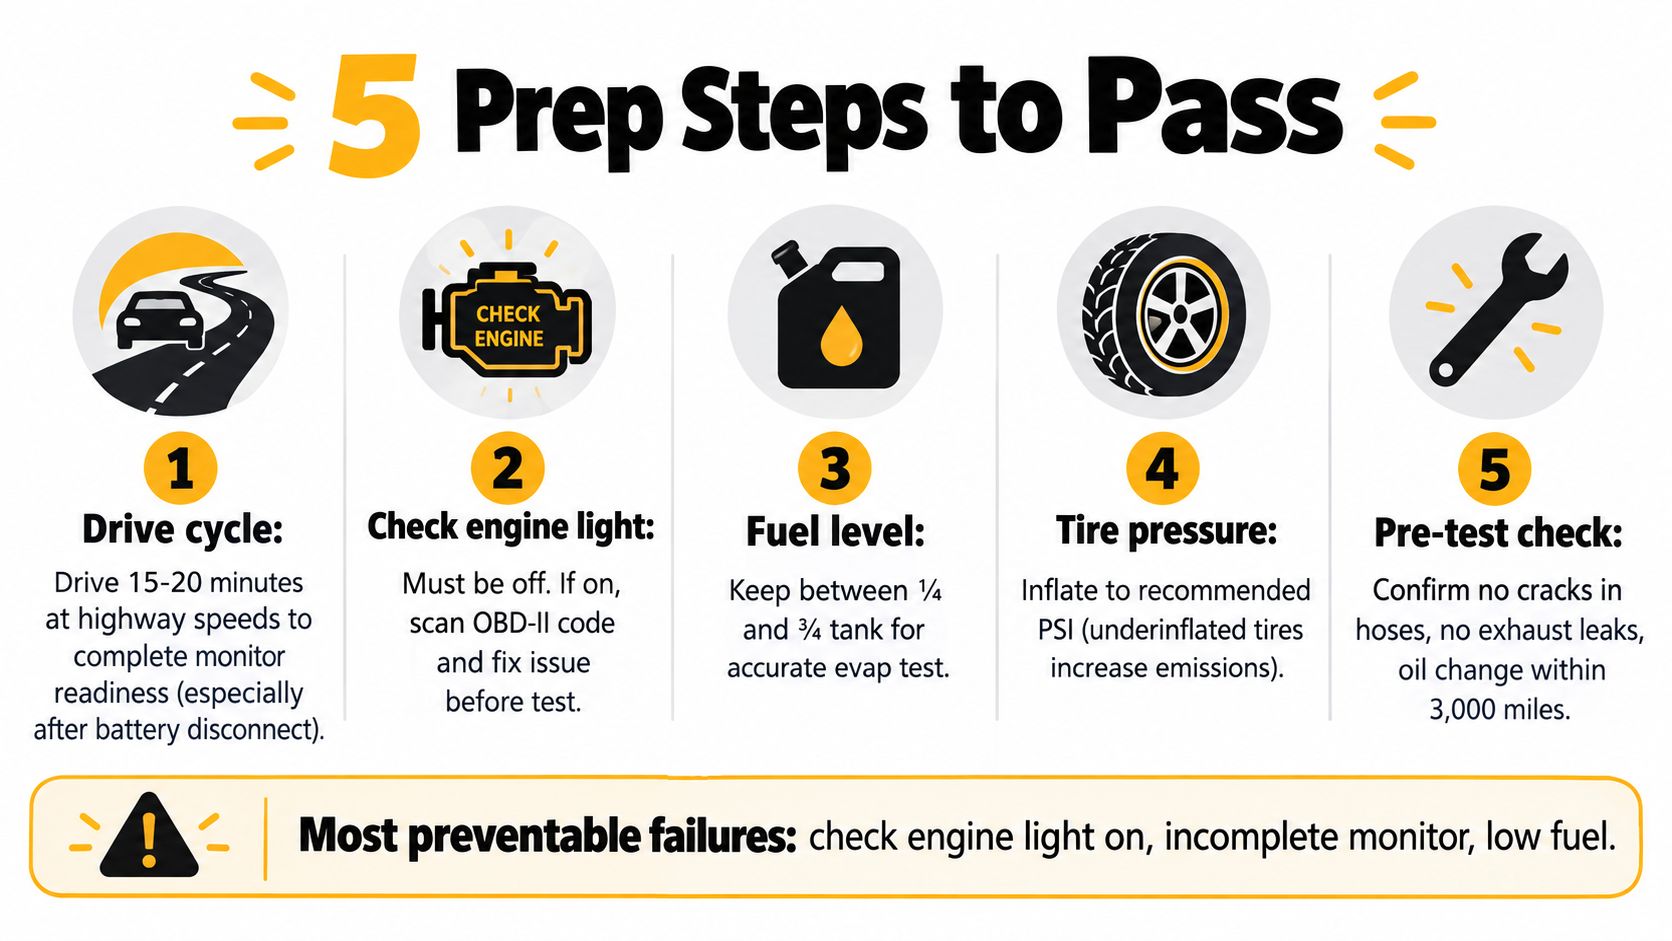
When the result affects your registration
For many California drivers, Smog Check works like a checkpoint built into the registration process. The state may require it for a renewal cycle and for some other registration-related events. In plain terms, the test result only helps you if it is attached to the registration requirement you have.
That is why wording alone does not decide anything. A driver can call it a smog test, an inspection, or a smog check. DMV still looks at the compliance record behind that visit.
Why STAR stations matter
STAR is part of that compliance record. If your DMV notice says a STAR inspection is required, the state is not making a suggestion about where to shop. It is telling you which station category can produce a result that counts for your renewal.
A simple way to picture it is this. Passing at the wrong station can be like bringing the right form to the wrong office. The paperwork may be real, but it does not satisfy the step DMV asked for.
Research discussing California's STAR program explains that STAR stations handle a large share of inspections and play a central role in the state system, especially for vehicles directed into that channel through program rules and DMV requirements, according to this University of Chicago analysis of California STAR station performance. If you want a plain-language explanation before you book, this guide on what a smog STAR station is explains what the designation means in practical terms.
A short explainer can also help if you want to see the process discussed visually.
Test-only versus test-and-repair
Station type can matter too. Some stations only perform inspections. Others can inspect and also repair a vehicle if it does not pass.
That distinction does not usually change whether DMV accepts a valid result. It changes what happens next if the car fails. A test-only station documents the outcome. A test-and-repair station may be able to diagnose and fix the problem before you return for another inspection.
How to Prepare Your Vehicle and Pass the First Time
Preparation depends on the inspection method your vehicle gets. A newer car and an older car can both be due for the same registration event, but the smartest pre-test routine isn't identical.
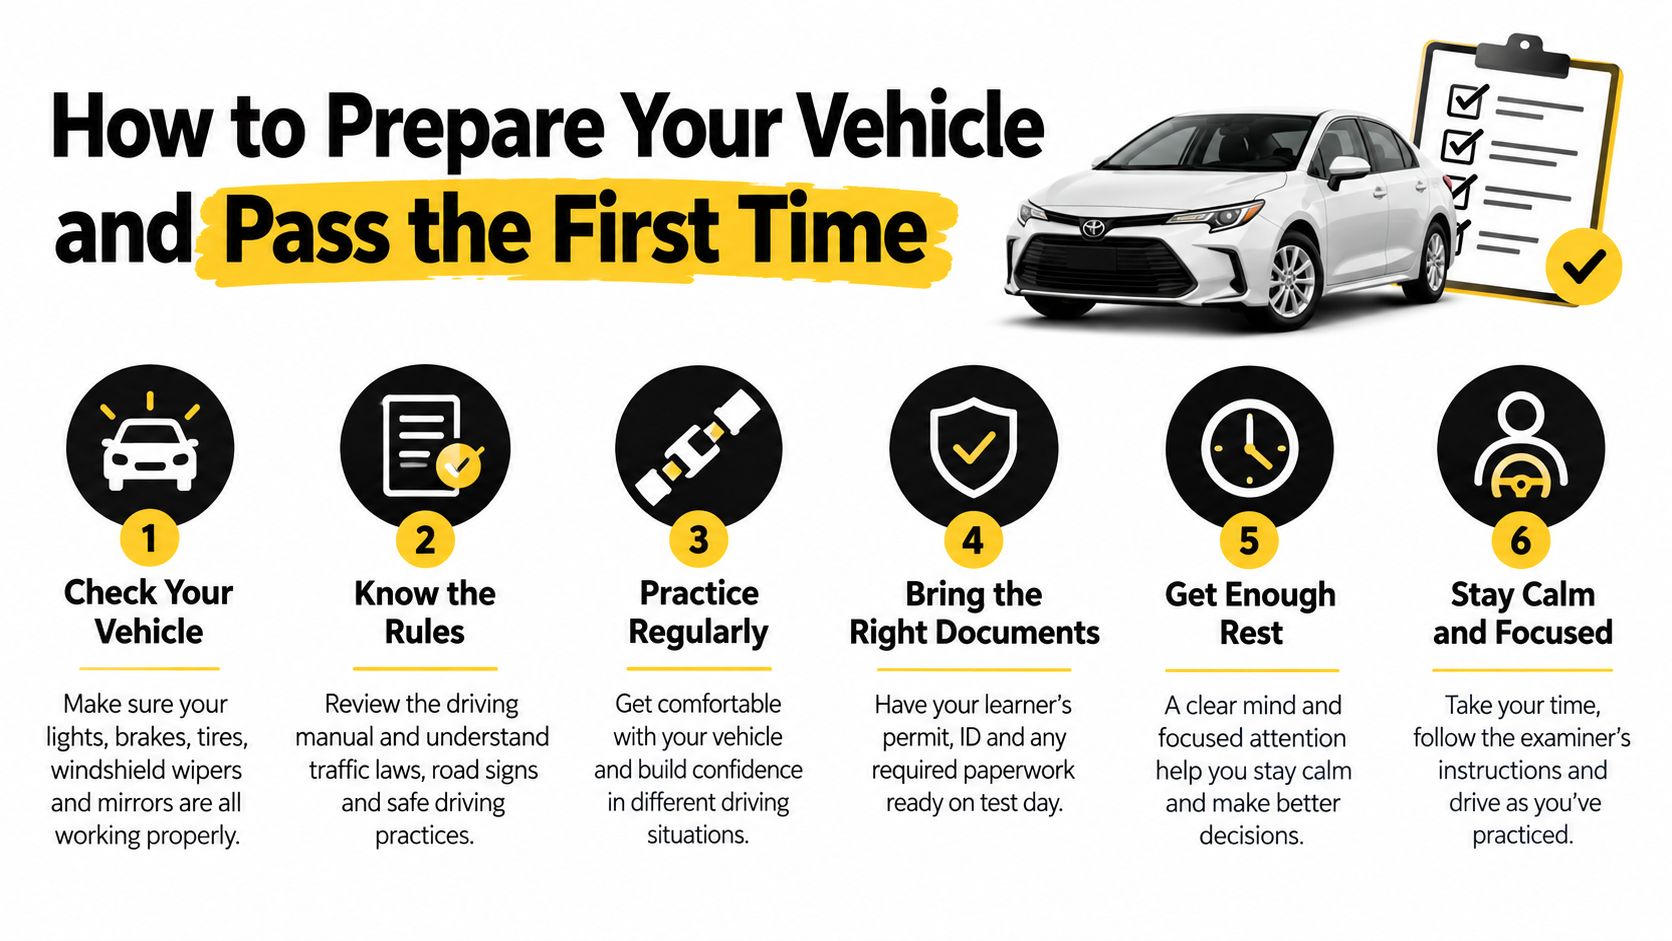
For newer vehicles with OBD-focused inspections
If your vehicle is in the newer category, think about computer readiness first. If the battery was recently disconnected or repairs were just completed, the onboard system may not yet be ready to report a complete picture.
Check the dashboard before you go. If the check engine light is on, that's a sign to pause and diagnose the issue rather than hoping the station visit will sort it out.
For older vehicles with tailpipe measurement
Older vehicles benefit from basic mechanical awareness before the appointment. If the engine is running rough, there's an exhaust leak, or visible emissions components appear tampered with or damaged, the inspection is more likely to uncover a problem.
A warm vehicle is usually better than a cold one. Drivers often get smoother results when the car has been driven normally beforehand rather than brought in after sitting for a long time.
Preparation is not one generic trick. For newer vehicles, focus on diagnostic readiness. For older vehicles, focus on engine condition, exhaust integrity, and obvious emissions-related issues.
A simple pre-appointment checklist
- Check warning lights: If the check engine light is on, treat that as a repair issue first.
- Drive the vehicle normally beforehand: A vehicle that has been sitting may not be in the best condition for inspection.
- Look for obvious problems: Loose caps, unusual exhaust smell, rough idle, or visible component damage are worth addressing.
- Don't book blindly after recent repairs: Give the vehicle enough normal operation to settle after emissions-related work.
- Match the station to the vehicle: Confirm the shop handles your model year and fuel type.
If you want a practical driver-focused checklist, this page on how to get a car to pass smog gives a straightforward prep rundown.
A failed inspection isn't always about major repairs. Sometimes the problem is simply showing up before the vehicle is ready for the kind of inspection it actually receives.
Choosing the Right Smog Station in the East Bay
The right station depends less on slogans and more on fit. Start with the vehicle, then match the station to the compliance requirement.
If you drive a 2000 or newer vehicle, convenience and workflow matter. These inspections are often straightforward, so many drivers care most about whether the station handles modern OBD-based testing efficiently and sends results properly for DMV use.
If you own a 1999 or older vehicle, experience with BAR-97 testing matters more. The process is more equipment-dependent, so you want a shop that regularly handles older vehicles and doesn't treat them like an exception.
What to look for before you book
A solid East Bay station should make a few things clear:
- Vehicle coverage: confirm they inspect your year and fuel type.
- STAR status: check whether the station can handle your requirement if DMV directs you to STAR.
- Process clarity: the staff should explain whether your vehicle is likely getting an OBD inspection or a tailpipe test.
- DMV compliance handling: ask how the result is processed for registration purposes.
- Waiting experience: this matters more than people think, especially for commuters booking around work.
A practical local example
In San Leandro, Speedy Smog is one example of a STAR-certified station that handles newer vehicles, older vehicles, diesels, and hybrids, which makes it relevant for drivers who need one location capable of matching different Smog Check paths. That matters most when a household has more than one vehicle type and the inspection process isn't the same across them.
The bigger lesson is simple. Don't choose a station just because it uses the phrase “smog test” or “smog check” on a sign. Choose it because it can perform the right inspection, under the right certification rules, for the vehicle and DMV situation you have.
If you need a California-compliant inspection in the East Bay, Speedy Smog provides STAR-certified smog testing for newer vehicles, older vehicles, diesels, and hybrids in San Leandro. If this article helped you sort out the difference between the Smog Check program and the test your car needs, visit Speedy Smog to find a station option that matches your vehicle and registration requirement.
Most California drivers pay roughly $70 to $85 total for a passing smog test. That total usually comes from a station inspection fee in the low $60s plus the fixed $8.25 state certificate fee, and the exact amount changes by station type and by vehicle.
If you're staring at a registration notice and trying to figure out why one shop advertises one price and another shop sounds completely different on the phone, you're not alone. This is one of the most confusing parts of California car ownership for first-time drivers. A smog check sounds like one purchase, but in real life it behaves more like a grocery receipt. You see the shelf price first, then the required add-on, and sometimes a separate cost shows up only if something goes wrong.
That's why the easiest way to understand Smog Test California cost is to split it into three buckets:
- The station fee for the inspection itself
- The state certificate fee of $8.25 when the car passes
- Possible retest or repair costs if the car doesn't pass the first time
A lot of frustration comes from mixing those buckets together. A driver sees an ad for a smog price, assumes that's the whole bill, then feels blindsided at the counter. In many cases, the station didn't invent a surprise charge. The customer just wasn't told clearly what part was the shop's price and what part was the state-required certificate.
That's also why out-the-door totals vary so much. A newer gasoline car might not even need a test yet. An older vehicle may need the full inspection. A STAR station quote can look different from a non-STAR station quote. If the vehicle fails, the test fee can become the smallest part of the whole problem.
If you want a simple reference before you start calling around, this California smog check price guide gives a useful local starting point. But first, let's make the pricing system easy enough that any quote you hear will make sense.
Table of Contents
- Introduction What You Will Actually Pay for a Smog Test
- How California Smog Test Pricing Really Works
- Regional Price Ranges and Why Station Type Matters
- Vehicle Age and Type and How They Change Your Cost
- Coupons Discounts and Smart Ways to Avoid Surprise Charges
- If You Fail Retest Fees and the Repair Cost Cap Explained
- Conclusion Your Quick Plan for an Affordable Compliant Smog Test
Introduction What You Will Actually Pay for a Smog Test
Your registration notice shows up, you head to a smog station, and you see an ad with a low price on the window. Then the total at the counter sounds different from what you expected. For first-time drivers, that is where the confusion starts.
The main reason is simple. A smog check bill is usually made up of three separate buckets, and ads or phone quotes do not always mention all three at once.
Why the price feels confusing
The first bucket is the station fee. That is the shop's charge to inspect the car.
The second bucket is the state certificate fee. That fee applies when the vehicle passes.
The third bucket is the one drivers hope to avoid. If the car does not pass, you may need to pay for a retest, repairs, or both.
That is why one shop may sound cheaper at first, but the out-the-door total can end up looking different. One quote may cover only the inspection. Another may include the passing total. Another shop may pause and ask about your car's year, fuel type, or whether it needs a STAR station, because those details affect which bucket matters most.
Practical rule: Ask for the out-the-door total for a passing smog check, and ask what happens if the vehicle needs a retest.
What catches first-time drivers off guard
Drivers new to California smog rules often assume the state sets the full price from top to bottom. It does not. The state requires part of the bill, while the station sets its own inspection fee. That is why two shops a few miles apart can quote different totals without either one doing anything unusual.
Vehicle age changes the picture too. Some cars are not due for a smog test yet, while older vehicles are more likely to need the full inspection and, in some cases, a station type that limits where you can go. So the question is not just, "What does a smog test cost?" It is, "Which kind of smog check does my car need, and what will all three buckets add up to?"
If you want a local reference point before calling around, this California smog check price guide for San Leandro drivers can help you compare quotes with the right questions in mind.
How California Smog Test Pricing Really Works
A smog quote works a lot like a restaurant menu. The posted number may be one part of the bill, while the final total depends on what applies to your car that day.
In California, the station chooses its own inspection price. The state also requires an $8.25 Smog Check certificate fee on a passing test, according to the California Bureau of Automotive Repair. That certificate is sent electronically to the DMV, so you usually do not need to carry in a paper copy after a pass.
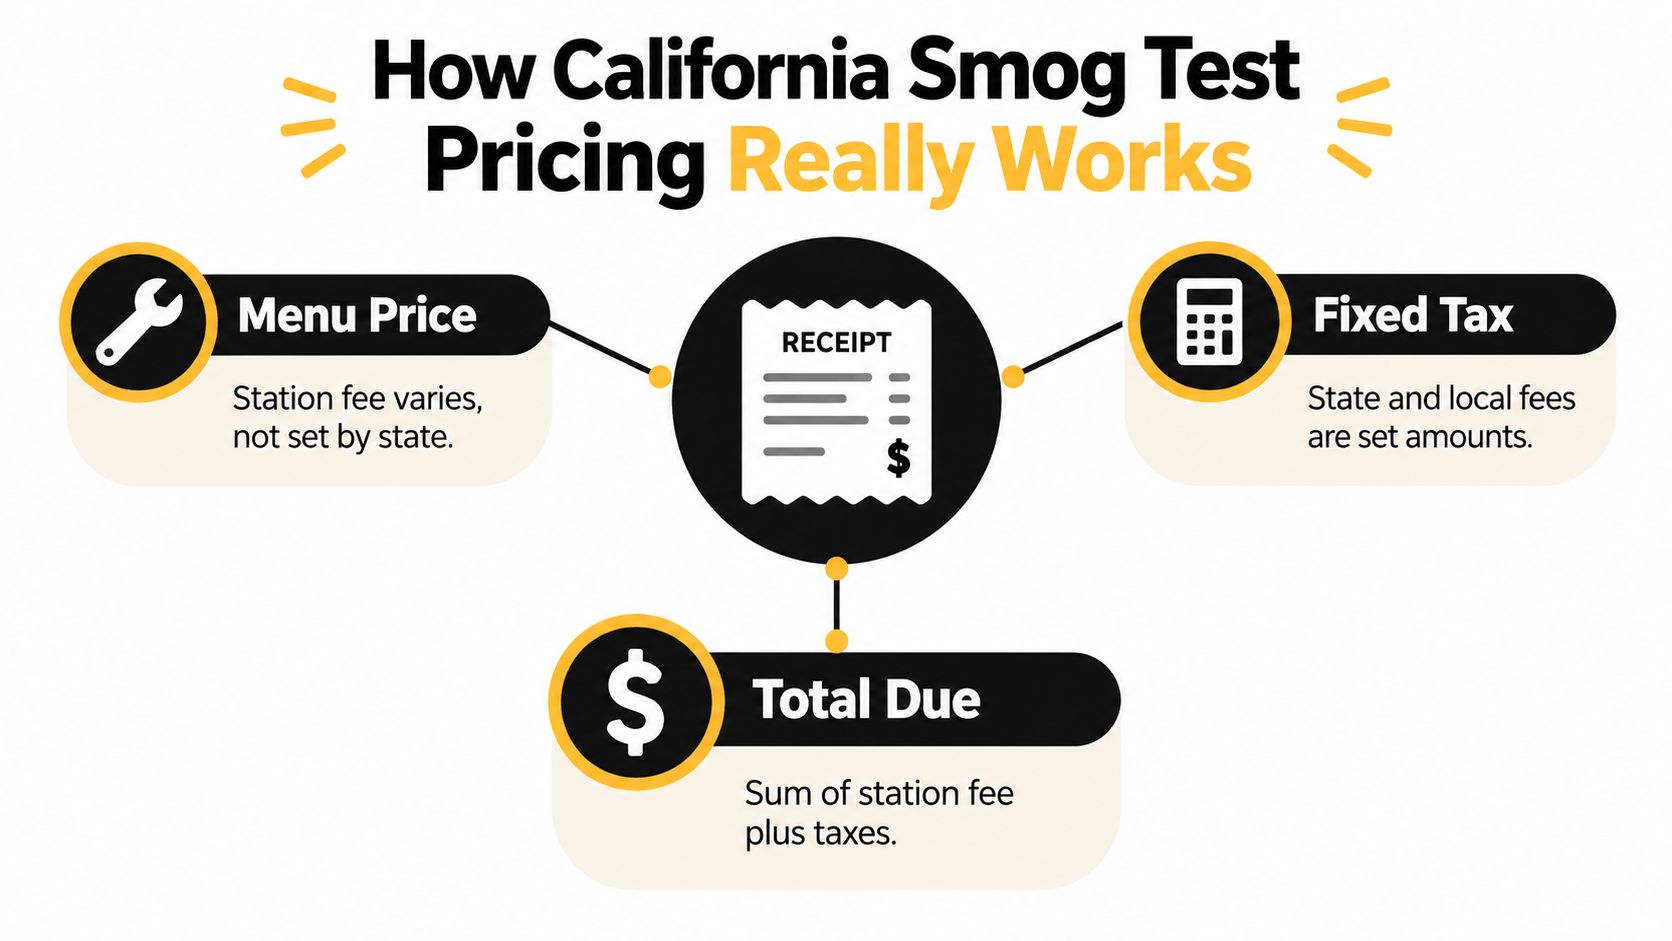
What changes the number you hear on the phone
The biggest moving part is the station fee. That is the shop's charge for the inspection itself. It covers the test equipment, the technician's time, and the cost of running the station.
The state does not set that part of the price, so two nearby shops can quote different inspection fees and both be normal.
A pass adds the fixed certificate fee. A fail usually does not. If the car does not pass, the station has no passing certificate to send, so the extra cost usually shows up later as a retest fee, repair bill, or both.
Why advertised prices can feel confusing
A low ad is often real, but it may only describe the inspection line. Another station may quote the likely passing total instead. Both shops can sound like they are giving the full price when they are really talking about different parts of the same receipt.
That is why one question clears up a lot: "Is that your inspection fee only, or my total if the car passes?"
If you want to be even more specific, ask two short follow-ups:
- "Does your quote include the $8.25 certificate fee?"
- "If my car fails, what do you charge for a retest?"
What first-time drivers should listen for
If the person at the counter asks for your car's year, fuel type, or whether your registration notice says STAR, they are usually trying to quote the right inspection category, not make the price sound slippery.
That matters because the inspection fee is the flexible part of the bill. The certificate fee is fixed. The wildcard is what happens if the car does not pass the first time.
So the useful way to compare shops is simple. Ask for the out-the-door total on a pass, then ask what the retest policy is on a fail. That gives you the price range, not just the headline number.
Regional Price Ranges and Why Station Type Matters
A first-time driver in Oakland might call two STAR stations and hear two different numbers that both sound right. One shop quotes the inspection fee. Another quotes the likely pass total. The only way to make sense of local pricing is to separate the bill into buckets, then compare the same bucket at each station.
The California Bureau of Automotive Repair explains the statewide baseline well. Inspection prices are not regulated, but the certificate fee on a passing test is fixed at $8.25. In the same report, BAR lists an average initial inspection fee of about $62.58 at STAR Test-and-Repair stations and $60.85 at STAR Test-Only stations, according to BAR's Smog Check Executive Summary Report for July 2025.
A quick comparison table
| Station Type | Average Inspection Fee | Certificate Fee | Typical Total on Pass |
|---|---|---|---|
| STAR Test-and-Repair | $62.58 | $8.25 | about $70.83 |
| STAR Test-Only | $60.85 | $8.25 | about $69.10 |
Those statewide figures are a baseline, not a promise. In the East Bay, a driver calling STAR stations in San Leandro or Oakland will often hear quoted pass totals a little above those averages once local overhead, appointment timing, and station pricing are factored in. That is why a local quote can be higher than the table without being unusual.
Station type also matters for a practical reason. A test-only shop is set up to inspect. A test-and-repair shop can inspect and fix problems under one roof. That difference can change labor costs, scheduling, and how a shop sets its inspection price.
BAR also notes that station categories post different average prices, and that non-STAR test-and-repair locations are consistently the highest-cost category in the available 2026 data, as noted in BAR's March 2026 executive summary.
What this means in the East Bay
For San Leandro, Oakland, and nearby cities, use the statewide averages like a measuring stick. Then compare local quotes by asking for the pass total, not just the ad price. If you want to start with nearby options, this list of East Bay smog check stations is a useful place to compare shops before you call.
A simple way to read the market is this: the station fee is the part that moves around, the certificate fee is fixed, and the third bucket only shows up if you need a retest or repairs. Once you sort quotes that way, the price differences stop feeling random.
The simplest way to compare quotes
Use this short checklist when you call:
- Ask for the total on a pass: Include the inspection fee and certificate fee.
- Ask what type of station it is: Test-only, test-and-repair, STAR, and non-STAR can price differently.
- Give your vehicle details: Year, fuel type, and any STAR requirement help the shop quote the right category.
That gives you a true side-by-side comparison instead of three different pieces of the bill.
Vehicle Age and Type and How They Change Your Cost
Two drivers can walk into smog stations on the same day and pay very different amounts, even before either shop sets its price. The reason is simple. Vehicle age and vehicle type decide whether you need the test at all, and that changes which cost bucket you are paying.
For some newer vehicles, the smog cost shows up at registration instead of at the station. California DMV explains that certain newer gasoline-powered vehicles pay a $20 smog abatement fee during registration for the first several model years, rather than getting a biennial smog inspection right away, on its smog inspections page.
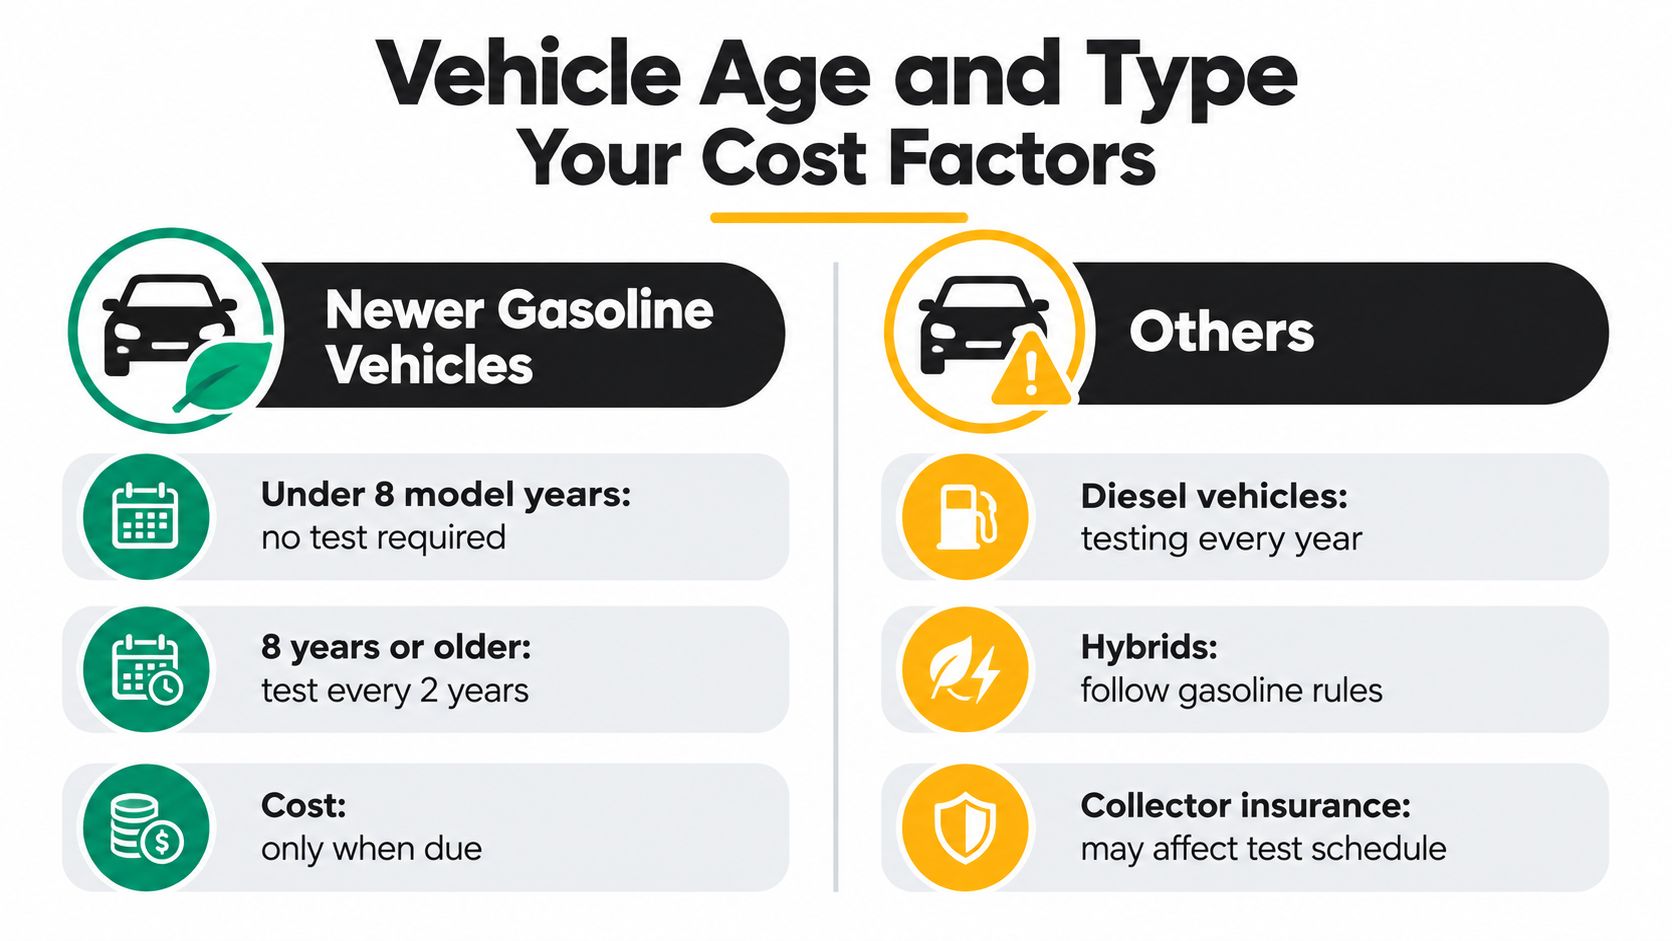
A quick real-world example makes this easier.
Say your neighbor has a newer gas sedan. That driver may handle the smog requirement through the registration abatement fee, so there is no station fee, no certificate fee, and no retest question that year.
Now look at an older gas SUV parked next to it. That owner is more likely paying the first two buckets discussed earlier, the station inspection fee plus the state certificate fee. If the vehicle has a problem, the third bucket can appear too, which means a retest or repairs.
That is why advertised prices can confuse first-time drivers. One car is buying a registration-related requirement. Another car is buying an actual inspection.
Vehicle type adds another layer. Gasoline, diesel, hybrid, and special registration situations do not always follow the same path. A title transfer can also change the timing, so a driver who did not need a test last renewal may need one for a sale or ownership change.
The easiest way to sort it out is to ask one question first: am I paying DMV this cycle, or am I paying a smog station?
Here is the simple version:
- Newer gasoline vehicle: You may be in the abatement phase, where the cost is tied to registration instead of a shop visit.
- Older gasoline vehicle: You are more likely paying for the inspection and certificate at a smog station.
- Diesel, hybrid, or transfer situation: Requirements can differ, so check your renewal notice carefully before comparing shop prices.
A good rule of thumb is this. Vehicle age decides whether you are even shopping for a smog test. Vehicle type helps decide what kind of test rules apply. Once you know those two pieces, the total cost stops feeling random and starts falling neatly into the right bucket.
Coupons Discounts and Smart Ways to Avoid Surprise Charges
Once you know whether your vehicle needs a test, the next step is trimming the station portion of the bill without creating new headaches.
Some shops run coupons on certain vehicles, especially newer ones. Speedy Smog, for example, lists smog test coupons on its site, including a $25-off offer for most newer-vehicle smogs. That kind of discount affects the station fee, not the fixed state certificate.
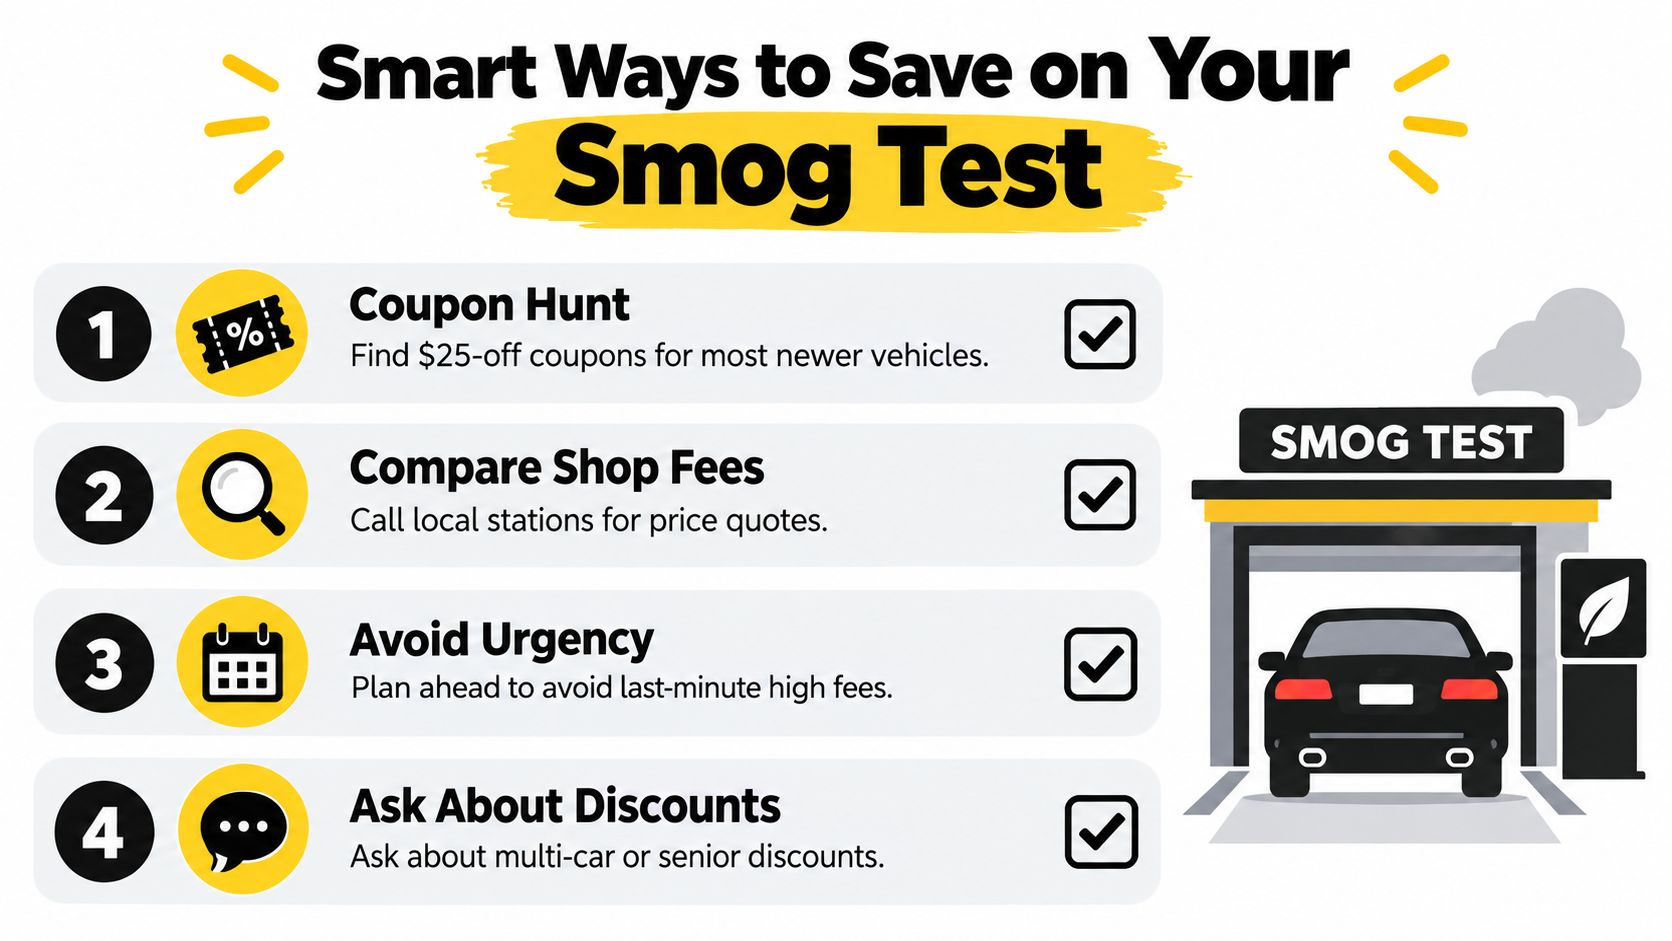
What to check before you use a coupon
A coupon can absolutely help, but don't look at the discount in isolation. Look at how it fits into the final total.
Here are the smart questions to ask:
- Does the coupon apply to my vehicle year? Some offers are limited to certain model years or common passenger vehicles.
- Is the certificate fee included in the quoted total? A coupon may reduce the inspection price while the state fee remains separate.
- What happens if the car doesn't pass? Ask about retest policy before the test starts.
- Do I need an appointment or printed coupon? Shops vary on how they process discounts.
Timing saves money too
The easiest way to overpay is to wait until the last minute. When drivers are up against a registration deadline, they often stop comparing quotes and just grab the first available appointment.
A little lead time gives you room to:
- Call more than one station
- Confirm the complete passing total
- Check whether a coupon lowers your real bill
- Handle minor maintenance first if the car has been acting up
Here's a short walkthrough that helps many first-time drivers:
Small details that prevent big annoyance
The station fee isn't the only thing worth comparing. Convenience matters too. If a shop handles common vehicles quickly, that can save time off work or shorten a weekend errand list.
For example, Speedy Smog states that typical tests for 2000 and newer vehicles are often completed in about 10 to 15 minutes, which matters when you're balancing school pickup, work, and DMV deadlines. Fast service doesn't replace transparent pricing, but it does make the whole errand less painful.
Ask for the total, ask about coupon eligibility, and ask about retest policy. Those three questions catch most surprise charges before they happen.
If You Fail Retest Fees and the Repair Cost Cap Explained
A failed smog test changes the math fast.
Before the failure, you are mostly looking at the first bucket, the station fee. After the failure, two other buckets can start to matter a lot more. You may face a retest fee, and you may need repairs before the car can pass. That is why the cheapest advertised test price does not always lead to the lowest total bill.
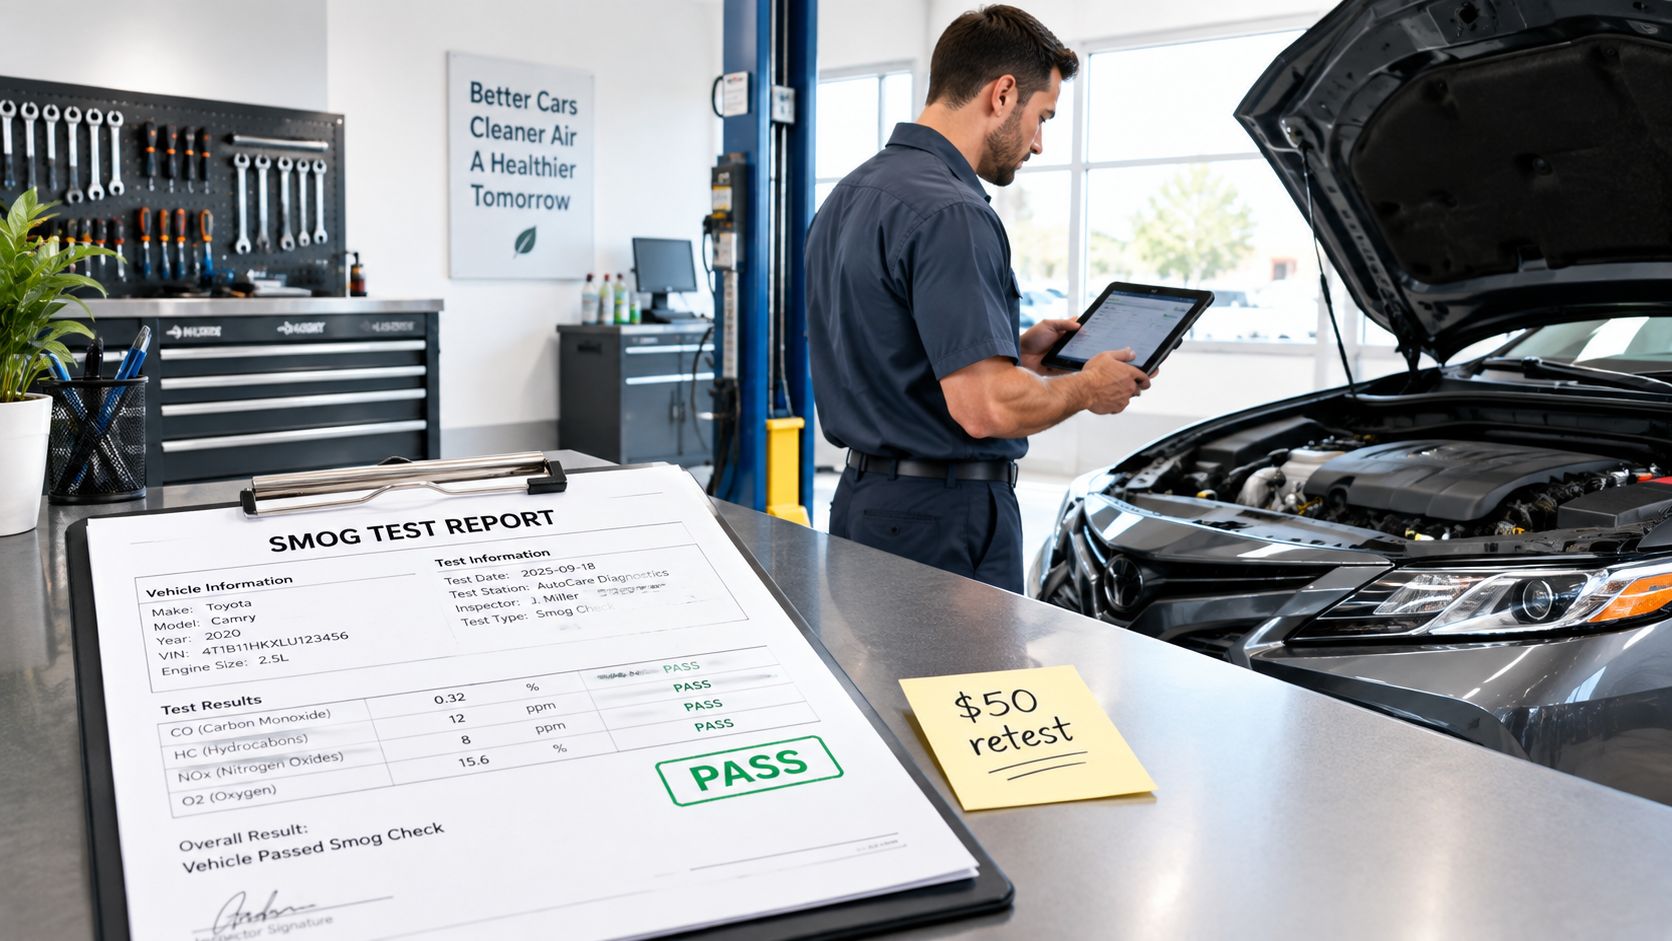
What usually happens after a fail
Here is the plain-English version. The first test tells you whether the car passed that day. If it fails, the next question is not just "How much was the test?" It becomes "What will it take to get this car ready for a passing retest?"
That second part can include a few separate charges:
- Retest fee: Some stations charge less for a return visit. Some do not.
- Diagnostic work: A fail result may point to a problem, but it does not always tell you the full repair answer by itself.
- Repair cost: The actual fix can be minor or more involved, depending on why the vehicle failed.
- Certificate fee later: The state certificate still gets added when the vehicle finally passes.
That is the cost split many first-time drivers miss. The first receipt is only one piece of the total.
What the repair cost cap means, in simple terms
California has a repair cost cap rule for certain biennial smog situations, as noted earlier in the article. Drivers often hear that and assume it puts a lid on everything connected to a failed test. It does not work that broadly.
A better way to read it is this: the rule can help in a specific smog-check context, but it is not a promise that every expense tied to a failure stops at that number. Extra diagnostics, additional testing, or work outside that covered situation can still add cost.
So if your car fails, use the cap as one part of the picture, not the whole picture.
Why some failures stay inexpensive and others do not
Two cars can fail on the same day and end up with very different bills.
One driver may need a small fix and a straightforward retest. Another may be dealing with an older vehicle, an intermittent warning light, or a problem that takes time to pin down. That is why failure costs are hard to quote over the phone. Until the shop knows why the car failed, any number is only a rough guess.
It helps to treat a failed smog like a doctor visit that leads to lab work. The first visit identifies a concern. The next step is figuring out exactly what is causing it.
How to reduce the chance of a bigger bill
If the car already has symptoms, budget beyond the test itself.
Common red flags include a check engine light, rough idle, poor fuel economy, or a car that has been sitting for a long time without regular driving. In those cases, the inspection fee may end up being the smallest part of what you pay.
A few simple habits can lower the odds of surprise costs:
- Do not test with the check engine light on: That is asking for trouble.
- Take care of obvious drivability issues first: If the car is running rough, smog day is probably not the right first stop.
- Ask about retest policy before you pay: Some stations are clearer and fairer about return charges than others.
- Keep your paperwork: If you need repairs and come back, having the first test result handy saves time.
The practical takeaway is simple. If your car is healthy, your smog cost usually stays in the first two buckets. If it fails, the third bucket, retest and repair costs, can become the one that matters most.
Conclusion Your Quick Plan for an Affordable Compliant Smog Test
You call one station and hear one price. Then you show up and the total is higher than you expected. That usually happens because the smog bill is not one number. It is a few separate charges stacked together.
A clear way to read Smog Test California cost is to sort it into three buckets. First is the station fee for the inspection. Second is the state certificate fee that gets added on a pass. Third is the bucket many drivers hope to avoid, a retest or repairs if the car does not pass. Once you separate the bill that way, the price difference between stations starts to make sense.
The best last step is simple. Do not ask, "How much is a smog?" Ask, "What would I pay out the door if my car passes today?" That one sentence cuts through a lot of confusion because it pushes the shop to give you the number that matters, not just the headline price.
A quick plan before you book
Use this 30-second phone script:
- "Hi, I have a [year, make, model]. What is the full out-the-door price if it passes today?"
- "Does that total include the certificate fee?"
- "Is my vehicle the kind that needs your station type, including STAR if required?"
- "If it does not pass, what is your retest policy?"
That short call does two useful things. It helps you compare stations on the same basis, and it tells you which shop explains fees clearly without dancing around the question.
The practical East Bay takeaway
A good smog visit should feel more like checking out at a grocery store than getting surprised at the register. You should know what is in the cart before the total shows up.
If you are in the East Bay, a STAR Certified station may be the right fit if your DMV notice calls for it. If you want a straightforward local option, Speedy Smog offers STAR Certified testing in San Leandro with transparent pricing, a waiting room, and quick service for many common vehicles.
Keep it simple. Confirm you need the test now, call for the full passing total, and choose the shop that answers plainly. That is the easiest way to keep your smog cost compliant, predictable, and easier on your wallet.
Replacing a catalytic converter is not a smog-check strategy. It's one repair in an emissions system that includes sensors, computer monitors, exhaust plumbing, and the converter itself. I've seen plenty of drivers arrive with a brand-new part and still leave with a failure because the check-engine light was on, the monitors weren't ready, or the replacement converter had the wrong California approval marking.
California checks more than whether a converter is hanging under the car. Inspectors verify the correct equipment, its location, its condition, and the vehicle's emissions-system data. This guide explains what the converter does, how a smog check catalytic converter inspection works, which California rules matter, why replacement jobs fail, and how to decide between diagnosis and another parts purchase.
Table of Contents
- Why a New Catalytic Converter Does Not Guarantee a Pass
- What a Catalytic Converter Actually Does
- How Smog Inspections Evaluate Your Converter
- California Rules Every Driver Should Know
- Common Ways Drivers Still Fail After a Converter Swap
- Pre-Smog Checklist You Can Run in Your Driveway
- Repair Versus Replacement and Where to Get Tested
Why a New Catalytic Converter Does Not Guarantee a Pass
The popular advice is simple: replace the catalytic converter, clear the code, and go get a smog check. That advice is incomplete and can waste your money.
A California inspection evaluates the emissions system as a package. The converter matters, but so do the upstream and downstream oxygen sensors, fuel-control operation, EVAP system, EGR equipment where applicable, engine temperature, exhaust leaks, and the PCM's readiness monitors. A replacement part won't correct a sensor that still reports inefficient catalyst operation, a misfire that damages the new substrate, or a monitor that hasn't completed its required drive conditions.
California inspectors also look at the converter itself. The California Smog Check manual explains that inspectors verify the converter is in the correct location, undamaged, unmodified, and properly approved when it's an aftermarket unit. A converter can be physically present and still fail the visual inspection if the marking can't be validated or the installation doesn't match the vehicle's requirements.
Counter advice: Don't ask only, “Did I replace the converter?” Ask, “Is the whole emissions system ready to be tested?”
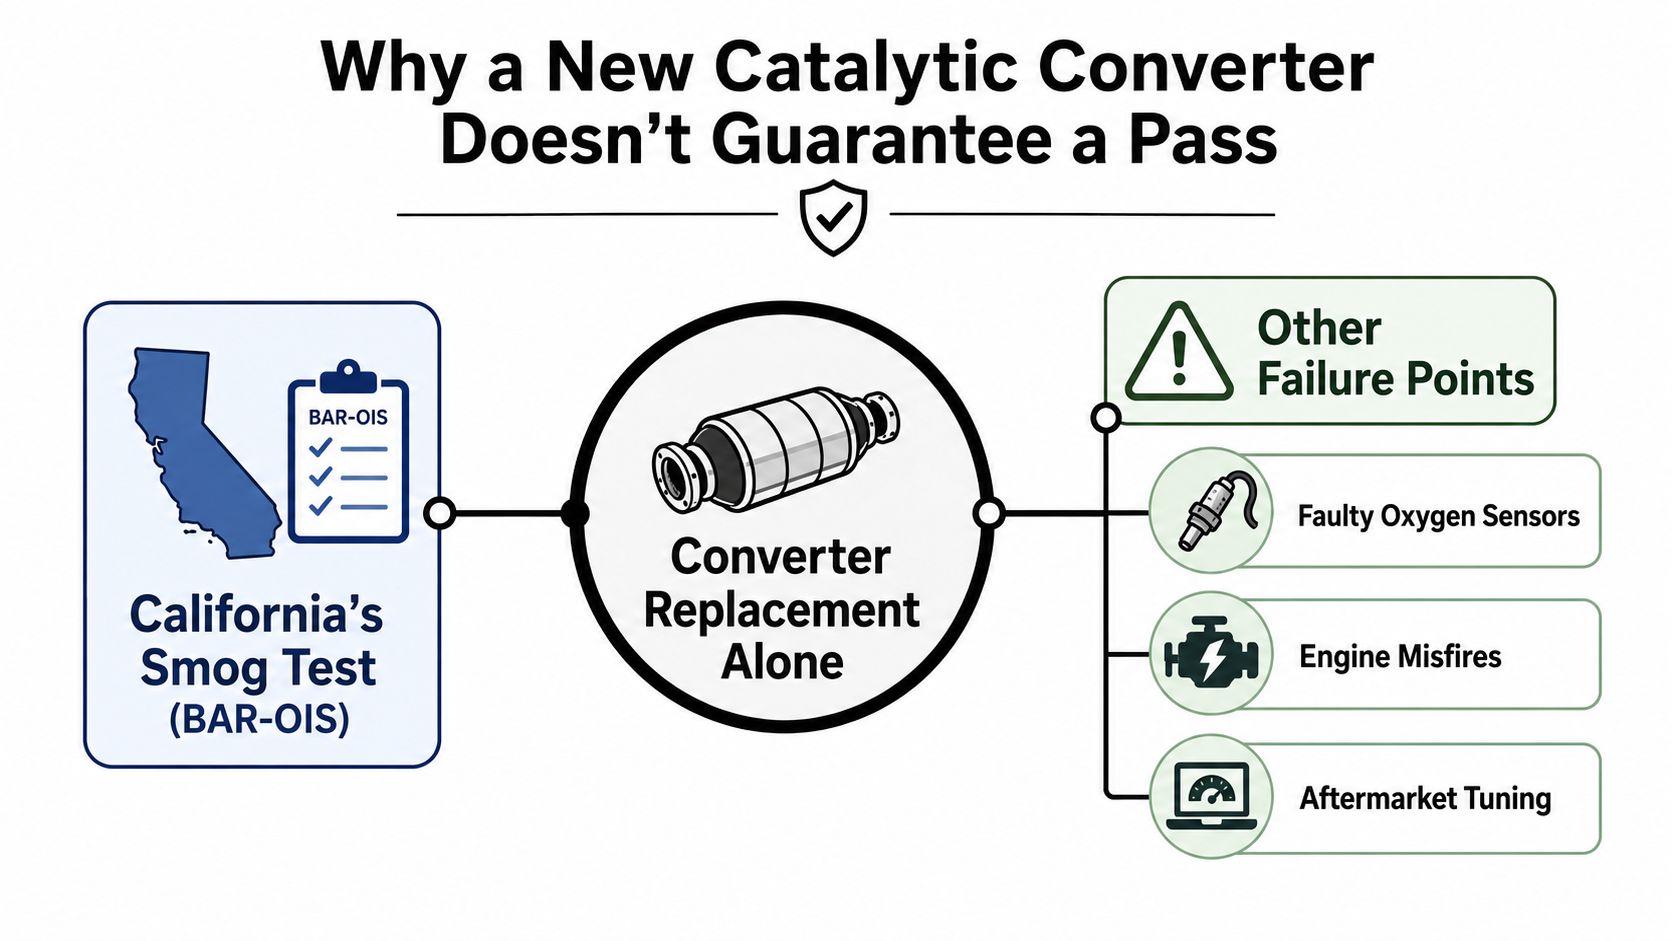
A pending or stored efficiency code, incomplete OBD monitors, an incompatible aftermarket part, or an illuminated check-engine light can stop the test even when the engine seems to run normally. The converter may be new, but the car still has to prove that its sensors and computer can monitor emissions performance.
The right approach is diagnostic. Confirm the code, inspect the exhaust and sensors, verify the replacement part, check readiness, and only then schedule the inspection.
What a Catalytic Converter Actually Does
A gasoline engine produces several pollutants during combustion. Carbon monoxide forms when fuel doesn't burn completely. Hydrocarbons are unburned fuel and combustion byproducts. Nitrogen oxides, commonly called NOx, form when combustion temperatures allow nitrogen and oxygen to combine.
The converter reduces those pollutants before the exhaust reaches the tailpipe. Inside the housing is a ceramic honeycomb or metallic substrate with a high-surface-area coating that contains precious-metal catalysts such as platinum, palladium, and rhodium. The metals promote chemical reactions without being consumed in the process.
A modern three-way converter handles three jobs:
- It oxidizes carbon monoxide into carbon dioxide.
- It oxidizes hydrocarbons into carbon dioxide and water.
- It reduces NOx into nitrogen and oxygen.
Older systems may use separate oxidation and reduction sections, while modern vehicles commonly combine the reactions in one three-way assembly. The converter has to reach operating temperature before those reactions work effectively, which is why cold-start behavior, warm-up, fuel mixture, ignition, and exhaust flow all affect inspection results.
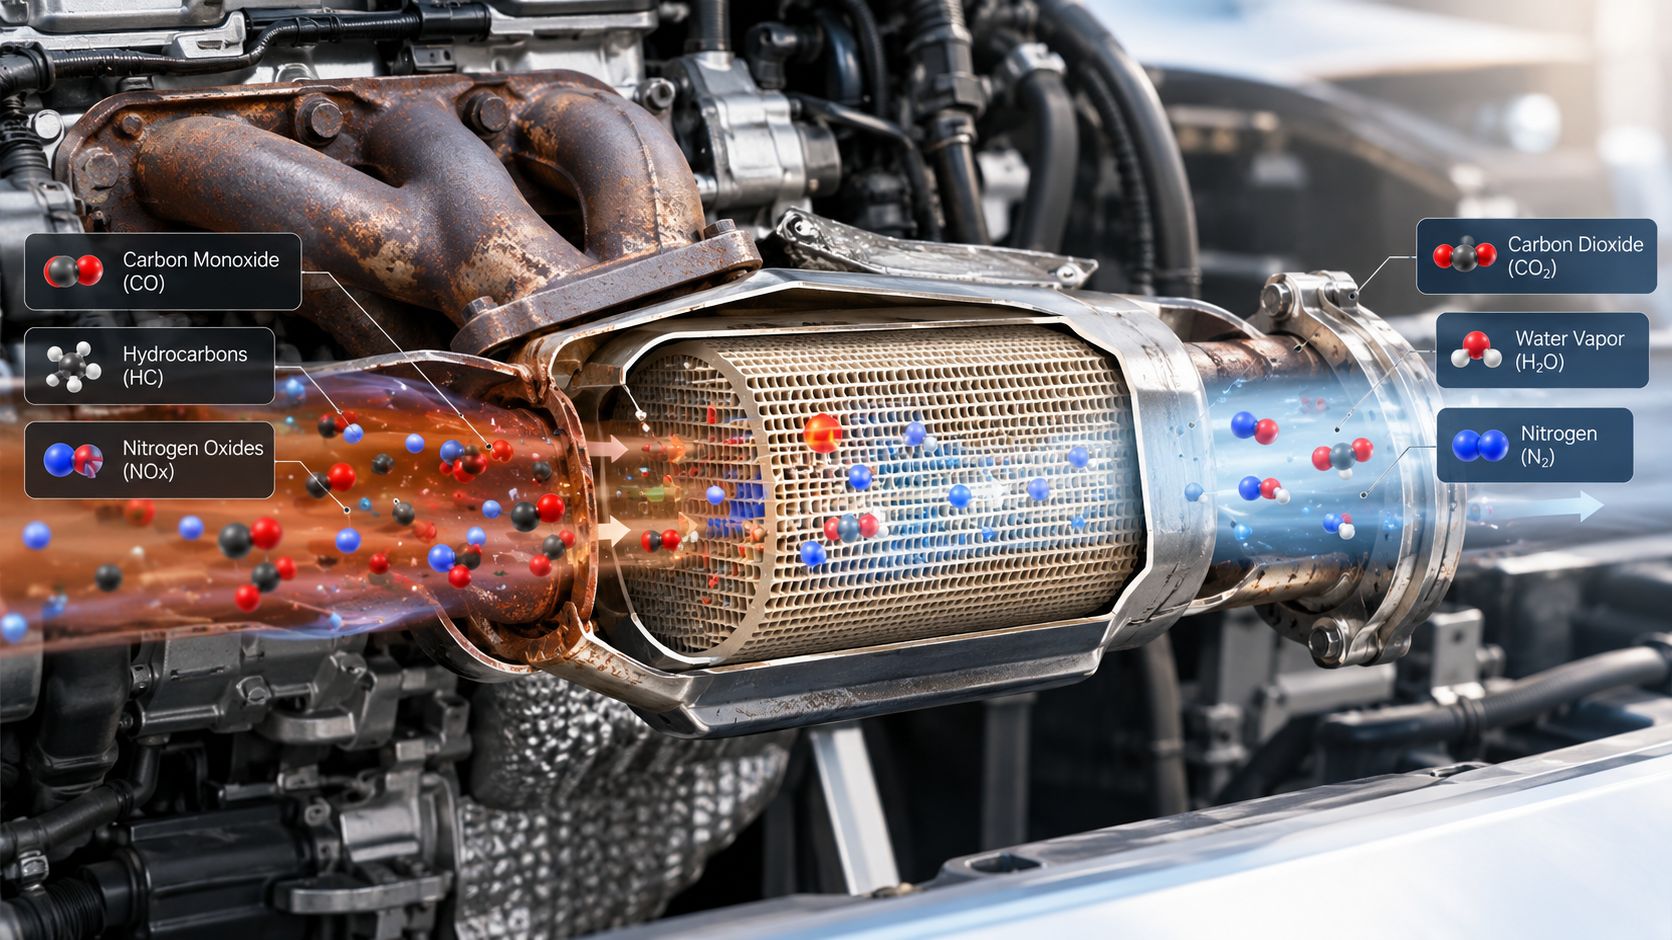
The oxygen sensors provide the computer with information about the exhaust before and after the converter. The upstream sensor helps the PCM adjust the air-fuel mixture. The downstream sensor helps the PCM judge whether the converter is storing oxygen and smoothing out the exhaust signal as it should.
That placement is deliberate. The converter sits in the exhaust path between the engine and muffler, with sensor locations selected to let the PCM compare exhaust behavior on both sides. A technician may use scan data, code information, visual inspection, and emissions measurements to determine whether the unit is doing more than occupying space under the vehicle.
For a plain-language explanation of the component itself, see this guide to how a catalytic converter functions. Understanding the chemistry makes the inspection rules easier to follow. The inspector isn't judging the part by appearance alone. The inspection is looking for evidence that the exhaust-cleanup process still works.
How Smog Inspections Evaluate Your Converter
A new converter can still fail a California smog check. The inspector evaluates the entire emissions system, including the converter's installation, sensor data, fault codes, readiness monitors, and measured exhaust. Presence isn't proof of performance.
Visual inspection checks the hardware
The technician verifies that the required number of converters is installed in the original locations. Each housing should be secure, undamaged, and free of obvious modification, removal, or bypass work.
Aftermarket units receive close attention. California requires an aftermarket converter to carry a valid CARB Executive Order, or EO, number for the specific vehicle application. The California Energy Commission catalytic-converter materials explain that the Smog Check process verifies the correct converter, proper installation, and unmodified condition. Since January 1, 2009, aftermarket converters in California have needed an ARB EO number to pass the catalyst visual inspection.
A missing, unreadable, or mismatched marking can fail the vehicle even when it drives normally. A technician can also reject a converter that is present but mounted in the wrong position.
The computer scan checks stored evidence
For vehicles covered by OBD testing, the station connects a scan tool to the diagnostic connector. The technician checks for an illuminated malfunction indicator, stored emissions codes, pending codes where relevant, and readiness monitor status.
The catalyst monitor matters, but the inspection covers other required monitors too, including EVAP, oxygen-sensor, and EGR systems. Clearing codes before the appointment may remove the immediate fault while leaving monitors incomplete. The vehicle can then fail because the system has not completed its checks.
The downstream oxygen sensor should show behavior consistent with a working converter. A signal that closely imitates the upstream sensor can point to poor oxygen storage or weak conversion. Scan data cannot replace the visual inspection, and a stable sensor reading does not excuse an incorrect or improperly installed converter.
Tailpipe testing measures actual emissions
Older applicable vehicles may receive tailpipe testing in dynamometer modes such as ASM or TSI. The equipment measures HC, CO, and NOx against the vehicle's applicable limits.
EPA materials report that catalytic converters reduce carbon monoxide and hydrocarbons by more than 90%, and NOx by up to 70%. The same material states that, by 1998, converters had cut 20 million tons of CO, 2 million tons of HC, and 1 million tons of NOx in the United States. Those results show why converter performance matters, but a replacement part still has to match the vehicle and work with the rest of the emissions system.
| Inspection Layer | What It Checks on the Converter | Applies To |
|---|---|---|
| Visual and tampering inspection | Presence, location, condition, mounting, and valid EO marking | Vehicles subject to visual equipment checks |
| OBD scan | Catalyst performance data, codes, and readiness monitors | Applicable OBD-equipped vehicles |
| Tailpipe measurement | HC, CO, and NOx output under test conditions | Applicable vehicles receiving tailpipe testing |
California Rules Every Driver Should Know
California's smog rules can fail a vehicle before the tailpipe numbers become the main issue. The station type, converter approval, vehicle category, and inspection format all matter. A new converter does not override any of them.
Start with the station listed for your vehicle. A vehicle directed to a STAR station, including one designated a gross polluter or placed on the DMV no-pass list after a previous failure, must receive certification from a STAR-certified station. A regular test-only location cannot replace that required STAR inspection.
California also restricts replacement converters. A universal unit is not acceptable because it fits the exhaust or produces passing emissions. The aftermarket converter must be approved for the vehicle and carry a verifiable CARB Executive Order number. Inspectors also check the number of converters, their original locations, and signs that someone modified, bypassed, or removed emissions equipment.
Certain vehicles meeting the 8-year and 8,000-mile conditions in California's aftermarket-converter rules may use an EPA-compliant aftermarket unit marked with the appropriate ARB EO number instead of the original-equipment unit. That allowance does not make every replacement legal. The part still must match the vehicle and its application.
Know which vehicles fall outside normal testing
California exempts several categories from routine smog checks:
- 1975 and older vehicles
- Diesel vehicles above 14,000 pounds GVWR
- Motorcycles
- Natural-gas vehicles above 14,000 pounds
- Certain specialty vehicles
Smog requirements commonly appear during registration renewal, a vehicle sale, or a transfer. Qualifying vehicles generally follow a biennial renewal cycle, but the DMV notice determines the obligation for your vehicle.
California began applying OBD-based testing to 1996 through 1999 vehicles in 2025. Those inspections combine scan information with visual emissions-equipment checks instead of relying only on a tailpipe test. Check the California smog-check rules guide if you are unsure whether your vehicle needs a STAR station or which test format applies.
| Vehicle Category | Test Required | Where to Test |
|---|---|---|
| STAR-directed vehicle | STAR inspection and certification | STAR-certified station |
| Applicable OBD-equipped vehicle | OBD scan plus required visual checks | Authorized smog station |
| Applicable older vehicle | Required inspection format, which may include tailpipe testing | Authorized station approved for that vehicle |
| Exempt category | No routine smog certification under the exemption | No smog station required for that exemption |
Read the DMV notice before choosing a shop. Confirm whether it specifies STAR, then tell the technician about recent converter or sensor work before testing starts.
Common Ways Drivers Still Fail After a Converter Swap
A driver replaces the converter, sees no obvious engine problem, and expects a certificate. Then the technician finds one of the following.
The check-engine light stayed on
An illuminated check-engine light means the vehicle fails the emissions inspection. A new converter won't repair a downstream oxygen sensor that keeps reporting inefficient catalyst operation. It also won't solve a misfire, fuel-control problem, EVAP fault, or wiring issue that caused the code in the first place.
Codes such as P0420 or P0430 point toward catalyst efficiency, but they're not a license to replace the part without testing. A leak near a sensor, incorrect sensor installation, damaged wiring, or an engine problem can produce the same kind of complaint.
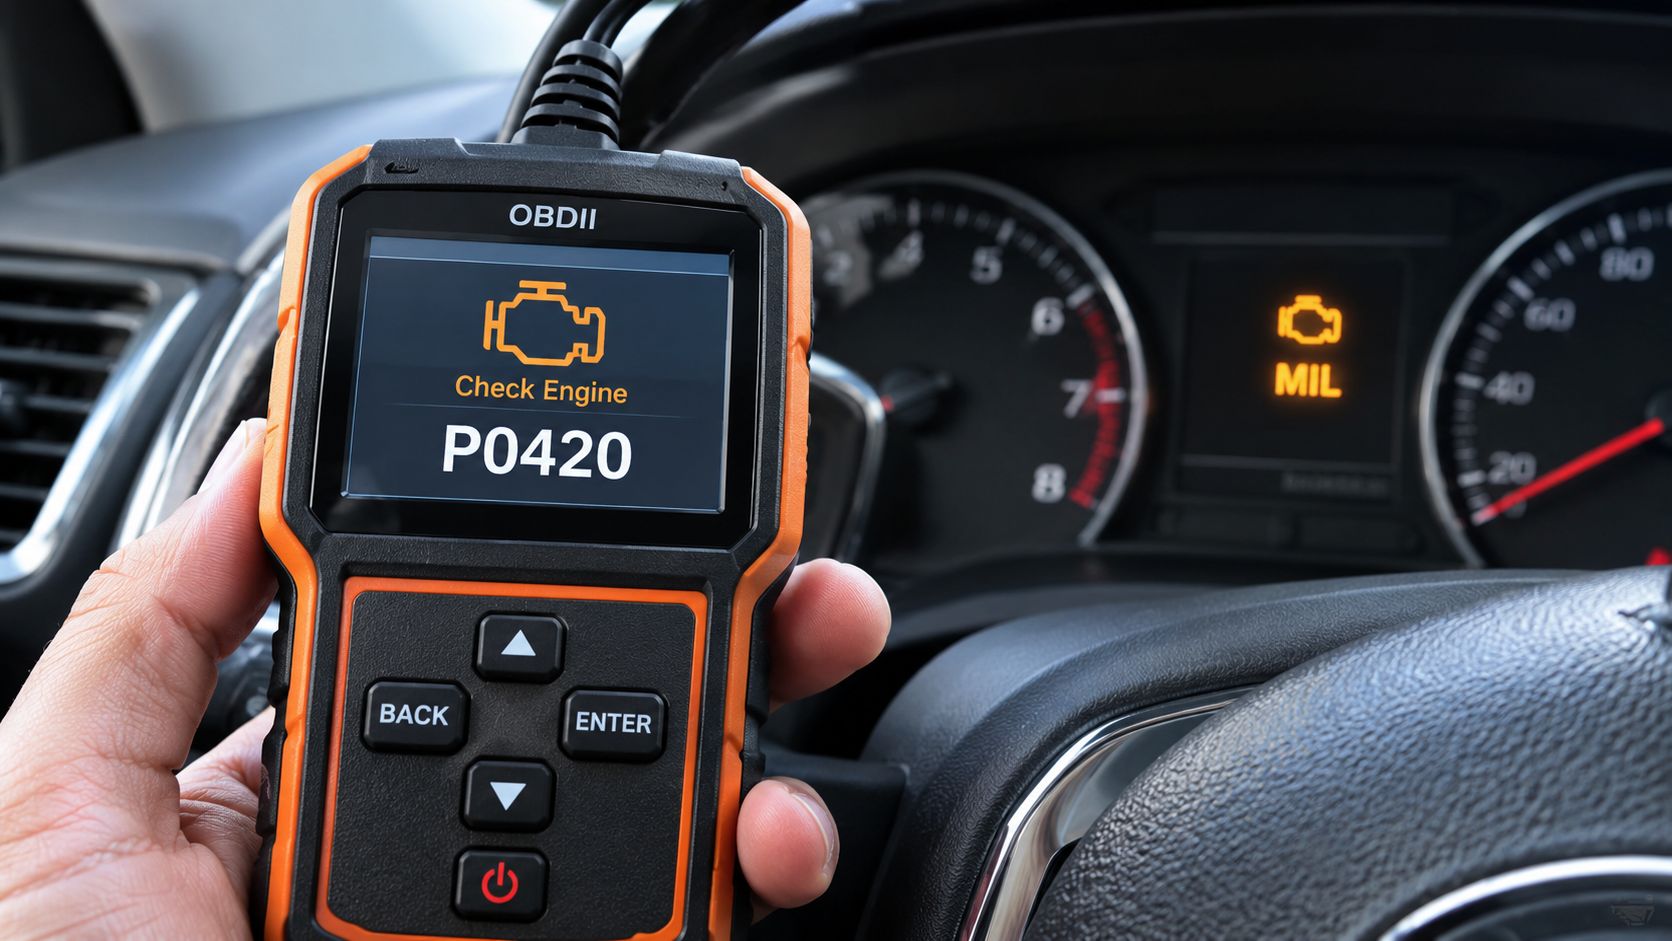
The EO marking is wrong or missing
A replacement converter may fit the pipe perfectly and still be illegal for that application. If the EO number is absent, unreadable, invalid, or assigned to another vehicle family, the visual inspection can fail.
Don't wait until inspection day to discover this. Ask the installer to show you the marking and confirm that the part matches the vehicle's application.
The monitors aren't ready
The PCM needs suitable driving conditions after codes are cleared or parts are replaced. A short trip directly from the repair shop may not complete catalyst, EVAP, oxygen-sensor, or secondary-air monitors.
The car can run smoothly while the inspection remains blocked by incomplete data. Check readiness with an OBD scanner before booking.
The exhaust installation has visible defects
A leaking flange, cracked flex pipe, loose hanger, or missing heat shield can raise safety and emissions concerns. A leak can also pull outside air toward an oxygen sensor and distort the signal used to judge converter operation.
A converter that rattles internally, sits in the wrong location, or shows obvious tampering deserves attention before the test.
The engine condition undermines the new part
A misfire, oil contamination, incorrect fuel mixture, or poor temperature control can overload or poison the catalyst. Replacing the converter without correcting the cause often turns an expensive new part into another failed component.
Stale fuel and a cold exhaust system can also affect test behavior. Arrive with the vehicle operating normally, and tell the technician about recent repairs rather than trying to conceal them.
Pre-Smog Checklist You Can Run in Your Driveway
A new catalytic converter does not make the rest of the emissions system pass automatically. Check the dashboard, monitor status, visible exhaust hardware, and appointment details before paying for an inspection.
Check the dashboard and scan data
If the check-engine light is on, postpone the smog test. Use an OBDII scanner, borrow one from a parts store, or ask a repair shop to check stored and pending codes.
Review readiness status as well. Required monitors should show Ready or Complete, not Not Ready. Disconnecting the battery, clearing a code, or replacing a converter or sensor can reset the monitors. The PCM needs normal driving conditions to complete its checks.
Start the drive cycle with the vehicle warmed up so the converter and oxygen sensors reach operating temperature. Combine ordinary city driving with sustained faster-road driving, then scan the vehicle again before the appointment. Do not rely on a guessed mileage target. The monitor display is the evidence that matters.
For guidance on the warning light, read clearing a check-engine light correctly. Clearing the light without repairing the fault only hides the symptom and can leave the monitors incomplete.
Inspect visible hardware
With the vehicle cool and safely parked, check for rust holes, loose hangers, cracked pipe sections, missing heat shields, and soot around flanges. Never crawl under a vehicle supported only by a jack. If the converter marking is not visible from a safe position, have a technician inspect it.
Confirm that the replacement converter has a legible EO sticker or stamp. Keep the repair invoice and part information with the vehicle records. These documents help verify what was installed if the inspector questions the part.
Prepare for the appointment
Check the fuel level and tire pressure. Bring the DMV renewal notice and payment. Tell the station about any recent converter, oxygen sensor, battery, or engine repair.
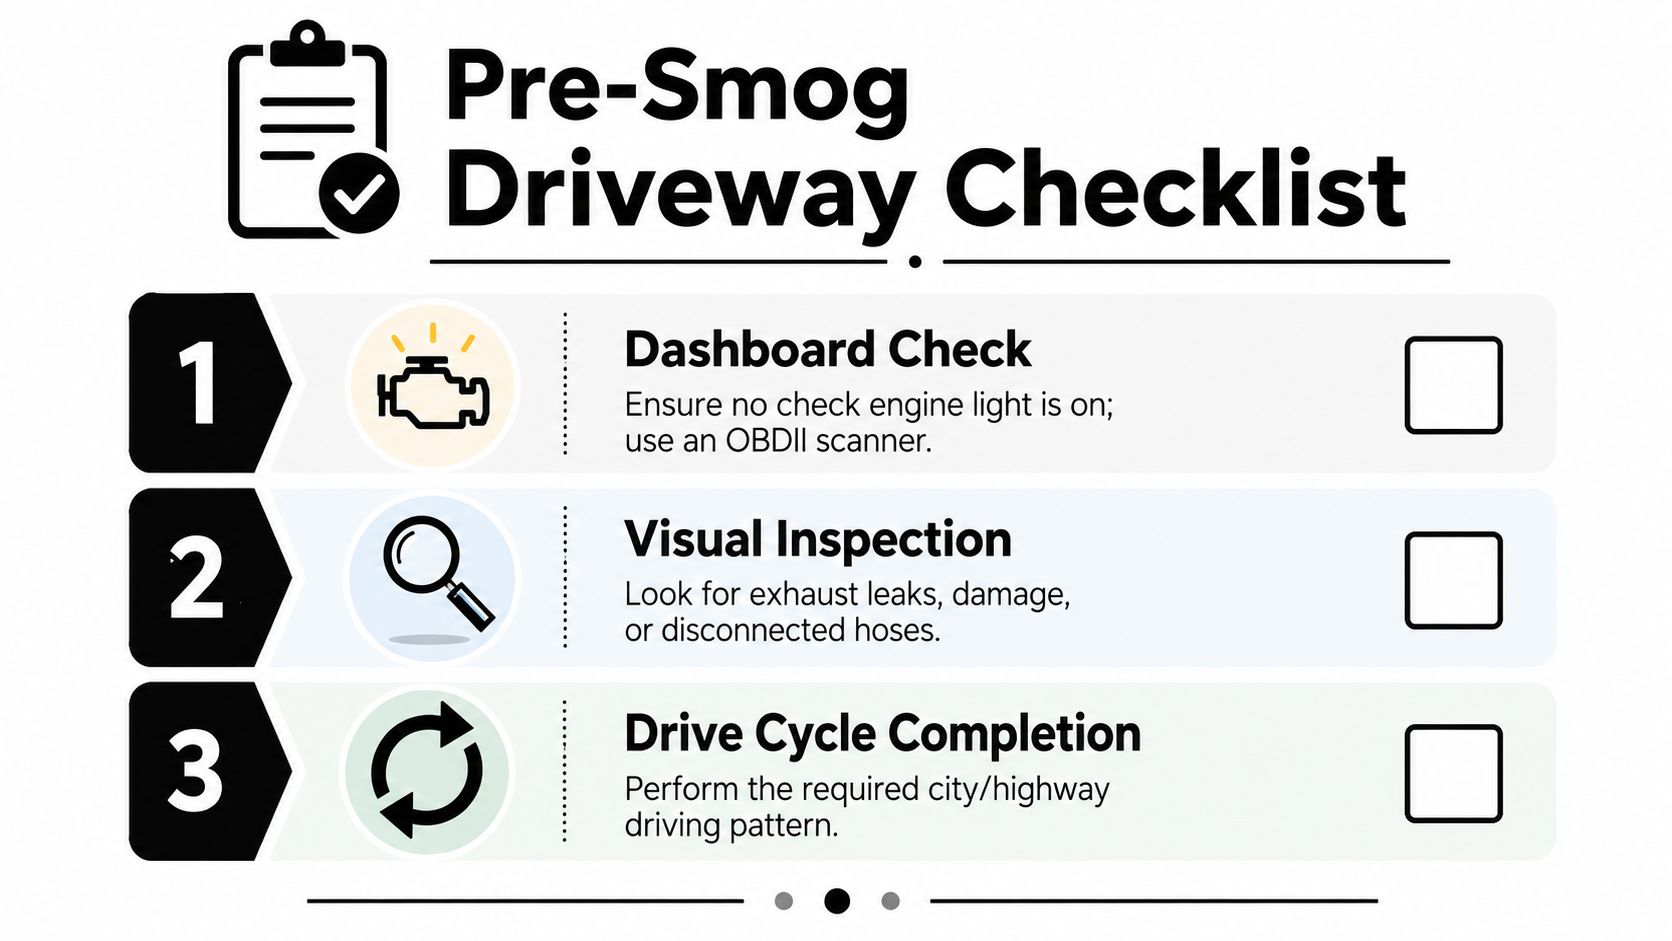
Use this visual walkthrough to organize the basic checks before visiting a station.
Repair Versus Replacement and Where to Get Tested
Confirm the diagnosis before approving a converter replacement. A sensor, exhaust leak, vacuum leak, wiring fault, fuel-control problem, or software issue can trigger a catalyst-efficiency code. Replacing the converter first can leave the underlying fault unresolved and make you pay twice.
Repair is the right choice when the converter remains physically sound and testing identifies a correctable cause. An oxygen sensor, exhaust leak, or calibration problem may restore proper monitoring. Replacement is necessary when the substrate is broken, contaminated by oil, melted after a misfire, physically damaged, or confirmed to have lost conversion capability.
The decision usually follows two practical paths:
| Option | Typical Cost | Timeline | Best When |
|---|---|---|---|
| Sensor, leak, or control-system repair | $150 to $600 | Often same-week | The converter is sound and another fault caused the failure |
| CARB-compliant converter with installation | $1,000 to $2,500 | Several days when parts must be ordered | The converter is damaged, contaminated, or confirmed inefficient |
Treat those figures as planning ranges, not guarantees. Get the diagnosis in writing, and verify that any replacement converter carries the correct California approval for your vehicle. Ask whether the technician checked what caused the original failure, particularly if the old converter melted or broke apart. A new part cannot compensate for an unresolved misfire, fuel-control fault, or sensor problem.
Before booking the test, confirm whether your DMV notice requires a STAR station. A STAR-certified shop can perform the applicable OBD assessment, inspect the converter markings, and transmit a passing certificate electronically. Speedy Smog in San Leandro performs standard and STAR-directed smog checks, including OBDII assessments, so the inspection evaluates the emissions system rather than only confirming that a part was installed.
Bring the repair invoice and part information. Have the readiness monitors, scan data, and EO marking checked before the appointment, especially after recent converter, oxygen-sensor, battery, or engine work. That final review catches problems a brand-new converter cannot fix.
You've just replaced the battery, cleared an old check-engine code, or finished a repair. The car starts easily, idles smoothly, and feels normal on the road, so you drive straight to the smog station expecting a quick pass. Instead, the inspection fails because the vehicle's onboard tests haven't finished running.
That situation is frustrating because the mechanical repair may have been correct. Learning how to get a car to pass smog starts with a less obvious question: is the vehicle ready for the inspection computer to evaluate it? California drivers need to think about readiness monitors, diagnostic trouble codes, emissions equipment, and inspection timing, not just whether the car drives well.
Table of Contents
- Why a Car That Runs Fine Can Still Fail Smog
- Your Pre-Test Checklist the Week Before the Inspection
- OBD Readiness Monitors: How to Get Them Set Before Smog
- The Most Common Things That Fail a Smog Test
- DIY Fixes Versus When to Bring It to a Shop
- California Drivers and Why a STAR Station Matters
- Test Day Routine and Quick Answers to Common Questions
Why a Car That Runs Fine Can Still Fail Smog
The car starts easily, idles smoothly, and drives normally, yet the inspection computer can still reject it. A battery replacement, cleared code, ECU reflash, or repair that required disconnecting power may erase the diagnostic history, including readiness monitors for the catalytic converter, oxygen sensors, evaporative system, misfire detection, and other emissions controls.
A mechanically sound vehicle can therefore arrive at the station with an incomplete OBD record. California's October 1, 2025 rule requires all supported readiness monitors to be set for a pass. Refer to the California BAR's updated readiness-monitor regulations and the dedicated readiness section for the testing details.
The practical lesson: A smooth-running car isn't automatically a smog-ready car.
California's OBD-II inspection checks whether the vehicle has completed its required self-diagnostics. The scanner may show “not ready” even with no warning light on the dash. A pending fault can interrupt a drive cycle, leaving one or more monitors incomplete.
Clearing the check-engine light right before an appointment usually creates another problem. It hides the visible warning while resetting the evidence the inspection computer needs. Some monitors take specific operating conditions to complete, and one short trip after a repair may not finish them. Check readiness status with a scan tool before scheduling the test.
A vehicle can also fail because the underlying emissions fault remains, even if the engine feels normal. Evaporative leaks, sensor problems, and intermittent misfires may not affect drivability enough for a driver to notice.
New Jersey's 2024 inspection report offers broader maintenance context. It recorded 2,083,621 initial overall emissions inspections, with 1,937,882 passing and 145,739 failing at least one emissions component, according to the New Jersey 2024 annual inspection report. States use different rules, but the practical point holds: intact emissions equipment and a completed diagnostic record give a properly running vehicle a better chance than unresolved faults or a freshly reset computer.
Your Pre-Test Checklist the Week Before the Inspection
A car can feel normal on the drive to the station and still arrive with a preventable problem. Use the week before the appointment to catch basic faults, confirm recent work, and avoid changes that reset the vehicle's diagnostic history.
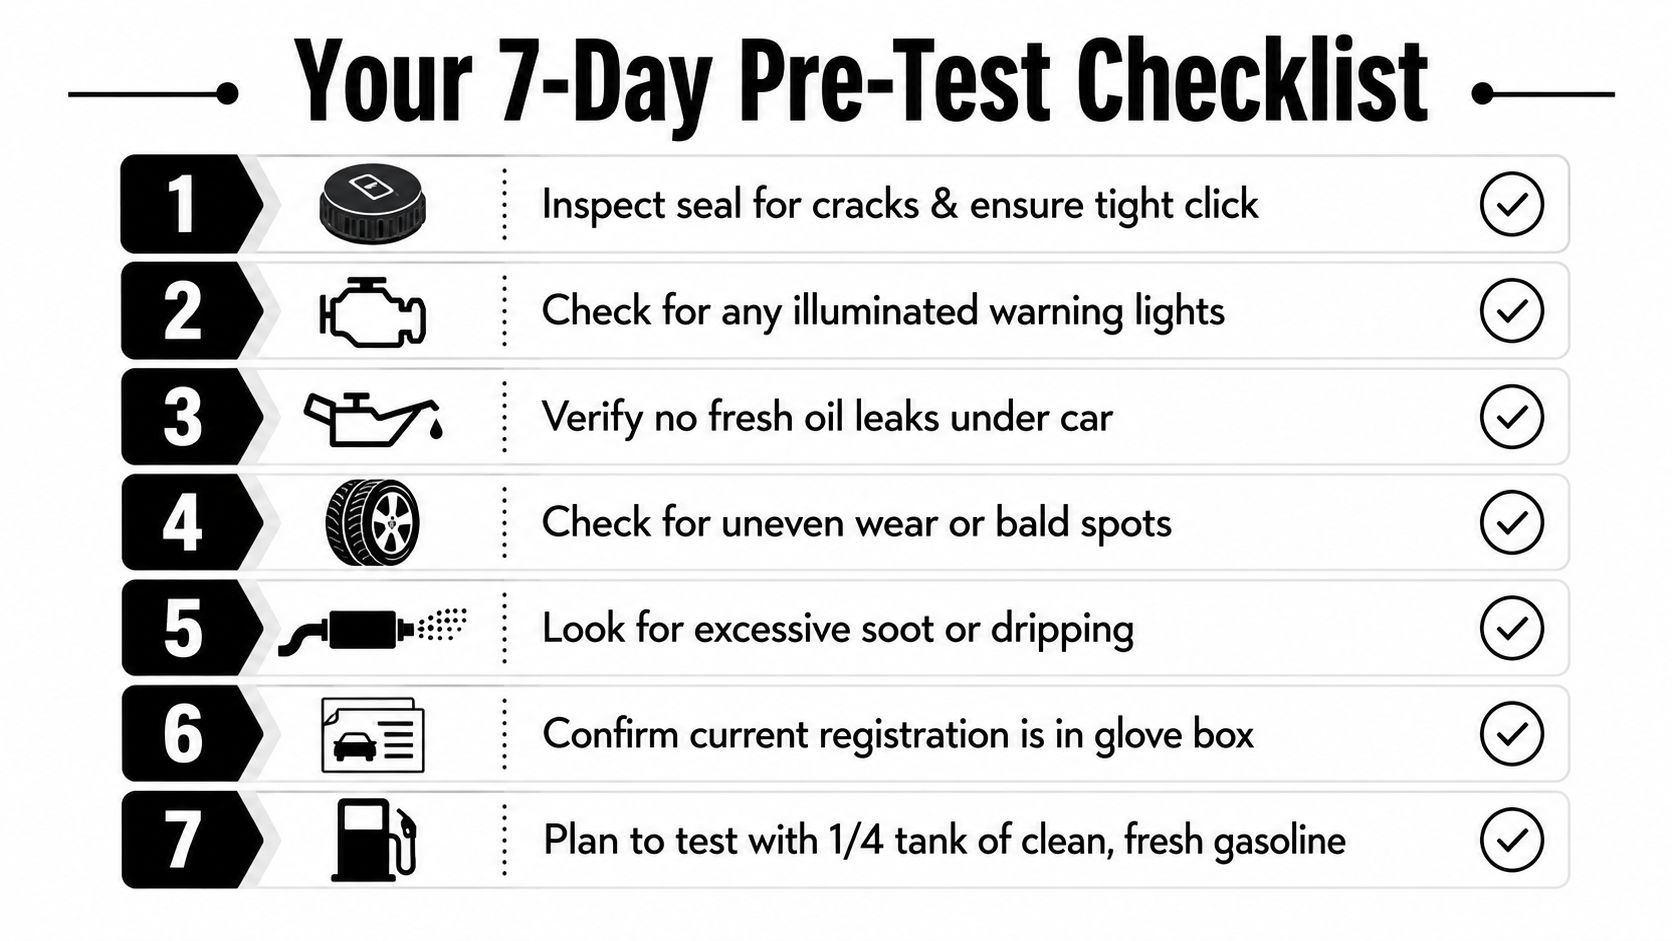
Begin with the dashboard and the basics
Use this walkaround as a practical screening routine:
- Check warning lights: The check-engine light should be off. Investigate any recently extinguished light before booking the inspection.
- Review recent work: Battery replacement, code clearing, ECU programming, or an emissions-sensor replacement can leave readiness status incomplete. Scan the vehicle before scheduling.
- Inspect visible equipment: Look for a missing catalytic converter, disconnected oxygen-sensor wiring, loose intake tubing, or altered emissions components.
- Check tires: Set tire pressure to the manufacturer's specification. Correct inflation helps the vehicle operate under a normal load during applicable dynamometer testing.
- Inspect the fuel level: Keep enough fuel for normal driving without filling the tank to the brim. A moderate level supports evaporative-system checks.
- Look underneath: Address fresh oil leaks, damaged exhaust components, and loose wiring before the appointment.
- Review service timing: If maintenance is due, read whether an oil change before a smog check makes sense for the vehicle's condition and schedule.
Skip fuel additives and premium gasoline as pass strategies. They cannot repair a leaking hose, failed oxygen sensor, weak ignition system, or inefficient catalytic converter. A scan and targeted repair provide more useful information than a product marketed as a quick solution.
Warm the vehicle without trying to outsmart the test
Drive normally during the week and include a sustained highway trip. The engine and exhaust system must reach operating temperature for emissions controls to function as designed, but warming the car does not replace completed monitors or a necessary repair.
A short fifteen-minute highway loop before the appointment can bring the exhaust system up to temperature. It cannot erase an active fault or finish every diagnostic test. Avoid clearing codes, disconnecting the battery, or making last-minute repairs unless you have time to verify the resulting readiness status before the inspection.
OBD Readiness Monitors: How to Get Them Set Before Smog
A mechanically sound car can still fail a California smog inspection when its readiness monitors are incomplete. These software tests run through the vehicle's OBD-II system and evaluate emissions functions such as the catalytic converter, oxygen sensors, evaporative system, exhaust-gas recirculation system, and misfire control. Each monitor needs specific operating conditions before it can report a result.
A monitor does not confirm that a component is installed. It checks whether the vehicle has driven through the temperature, speed, load, and fuel-system conditions required for that diagnostic. California BAR's 2025 to 2026 explanation of new OBD readiness regulations explains how supported monitors must be complete under applicable California rules.
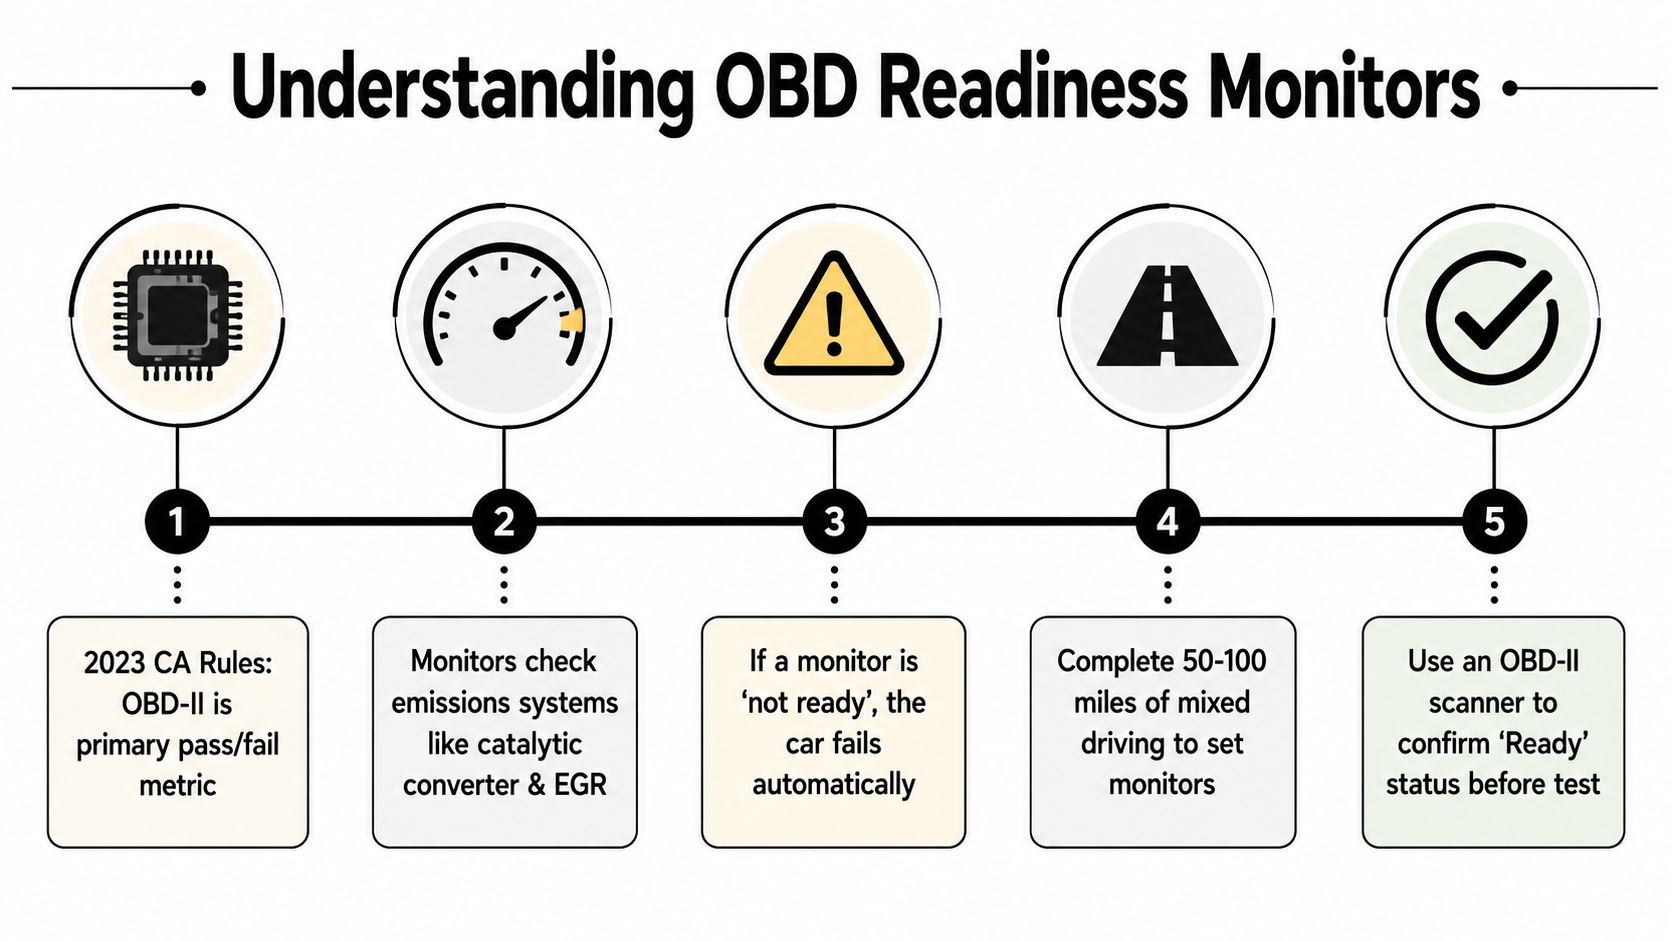
Use mixed driving, not driveway idling
A useful drive cycle combines a cold start, city driving, steady cruising, and controlled deceleration. Start with a cold engine, drive through stop-and-go traffic, then add a sustained highway stretch at a steady speed with gentle throttle and at least one natural slowdown.
A 2004 to 2010 Toyota Camry may need more than one type of trip for the EVAP monitor. City driving helps create the temperature and fuel-system changes it checks, while highway cruising can provide the steady operating conditions needed for other monitors. The exact sequence varies by engine, transmission, ambient temperature, and the monitor that remains incomplete, so use the manufacturer's procedure when available.
Repeat the drive pattern over separate trips. Extended driveway idling cannot reproduce the changing speed, load, and fuel-tank conditions many tests require. Some monitors also need the cycle repeated before they show ready.
Scan before paying for the official test
Check readiness status before arriving at the station. Depending on the vehicle, you may access diagnostic information through its service menu, use a Bluetooth OBD-II adapter with a compatible app, or request a pre-scan from an auto-parts store. The scan should show which monitors are ready, whether stored or pending codes exist, and whether the computer is commanding the check-engine light on.
For a practical guide, see how to read OBD codes. Do not erase codes just to make the dashboard look clear. Clearing codes also resets monitor progress, and a returning fault can prevent the vehicle from passing even after the light initially stays off.
The Most Common Things That Fail a Smog Test
A car can run smoothly and still fail because one emissions system is outside its permitted range. Start with the failure evidence before buying parts. A catalytic converter may be involved, but ignition faults, fuel-control problems, exhaust leaks, sensor wiring, and unauthorized visual changes can produce similar symptoms.
| Failure Cause | Symptom | Quick Check | Typical Repair |
|---|---|---|---|
| Catalytic-converter inefficiency | Emissions stay high after warm-up, or a catalyst-efficiency code appears | Review scan data and test exhaust performance after checking upstream faults | Correct the cause, then replace the converter only when diagnosis supports it |
| Check-engine light or emissions code | Warning light remains on or returns during driving | Scan stored and pending codes without erasing them | Repair the fault, verify the result, and complete required monitors |
| Loose or cracked gas cap | Fuel odor, EVAP code, or no noticeable drivability problem | Inspect the seal and tighten the cap until it clicks | Replace the cap if its seal or locking mechanism is damaged |
| Worn spark plugs or ignition faults | Rough idle, hesitation, misfire, or poor fuel economy | Inspect plugs and review misfire data | Replace worn components and diagnose the underlying cause |
| Dirty MAF sensor or vacuum leak | Lean-running symptoms, unstable idle, or intake noise | Check intake tubing and vacuum hoses, then review live data | Repair the leak or service the sensor using the correct procedure |
| Faulty oxygen sensor | Poor fuel economy, fuel-trim problems, or a recurring sensor code | Compare scan data with wiring condition | Confirm the circuit and mixture issue before replacing the correct sensor |
| EVAP-system fault | Fuel odor, difficult refueling, or an evaporative leak code | Inspect the cap and hoses; use a smoke test for hidden leaks | Repair the leaking hose, purge valve, vent valve, or related component |
These systems affect one another. A misfire can send unburned fuel into the exhaust, while a fuel-control fault can overheat the converter. A small EVAP leak can turn on the warning light even when the engine feels normal. Diagnosis should therefore follow the code, live data, and physical inspection rather than the most expensive suspected part.
Visual inspection can also matter. Missing or visibly altered emissions equipment, disconnected hoses, damaged wiring, or an intake and exhaust configuration that does not match the vehicle's approved setup can create a failure even when drivability is good. Check those items before the appointment, especially after aftermarket work.
Cold-start behavior deserves attention. The catalytic converter and oxygen sensors need heat before they can control and clean exhaust effectively. A normal warm-up drive is preferable to leaving a cold car idling briefly and then entering the station, but warming the vehicle cannot repair a failed component. If the light returns, the monitor stays incomplete, or the exhaust readings remain high, identify the fault before paying for another inspection.
DIY Fixes Versus When to Bring It to a Shop
Use a simple rule: handle inspection and replacement tasks at home when the fault is obvious, accessible, and unlikely to create a new emissions problem. Bring the vehicle to a shop when the repair requires scan-data interpretation, smoke testing, exhaust measurement, programming, lifting equipment, or emissions-component verification.
Reasonable driveway work
A gas-cap replacement is the clearest example. It takes little time, requires no special equipment, and addresses a common EVAP failure point. An air-filter replacement, correct spark-plug service, and inspection of loose intake tubing can also be sensible DIY work when you follow the manufacturer's specifications.
A basic OBD-II scanner is useful for checking codes and monitor status, but it doesn't turn every code into a diagnosis. A code identifies a system or condition that needs investigation. It doesn't always identify the exact failed part.
- Gas cap: Low complexity, low risk, provided you install the correct cap for the vehicle.
- Air filter: Straightforward, but confirm the housing seals correctly so unmetered air doesn't enter.
- Spark plugs: Manageable for an experienced owner, but incorrect gap, torque, or plug type can create a misfire.
- Readiness reset: Don't deliberately disconnect the battery to clear a code. That action can make the inspection less likely to pass by resetting monitors.
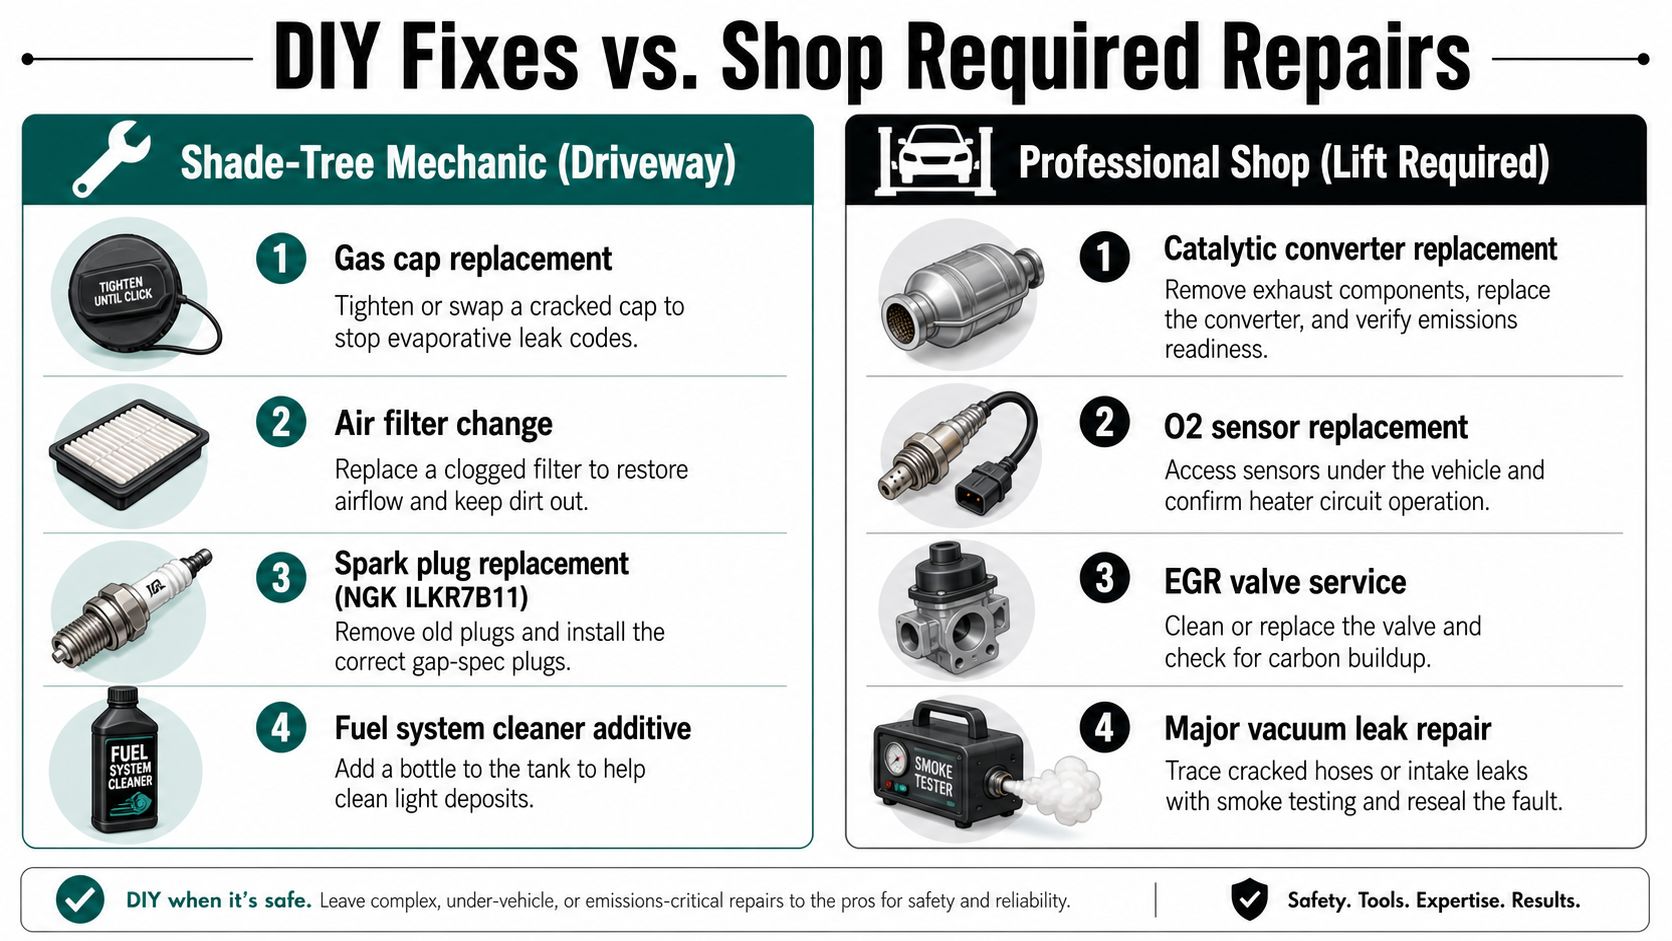
Repairs that need proper equipment
Catalytic-converter replacement, oxygen-sensor diagnosis, timing problems, and EVAP leaks belong in a shop when you don't have the necessary tools and service information. A smoke machine can reveal leaks that visual inspection misses. A scan tool can compare fuel trims, sensor response, misfire counts, and monitor behavior while the engine operates.
A STAR station can also be appropriate when the vehicle needs a directed repair or a referee-related inspection. The cost difference between parts-only work and professional service varies by vehicle and fault, so a technician should confirm the failed system before you authorize an expensive component.
A failed smog result is diagnostic information. Read the failure category and repair the cause instead of replacing parts in the order they appear on a search page.
California Drivers and Why a STAR Station Matters
A STAR Certified station operates under California Bureau of Automotive Repair oversight and follows the state's requirements for testing and applicable directed repairs. That matters when the vehicle has an unusual failure, a prior inspection issue, a visual-compliance concern, or a problem that requires more than a basic pass-or-fail scan.
Not every station handles the same work. Before booking, ask whether the location can test your vehicle's model year, fuel type, hybrid system, diesel configuration, or inspection category. Confirm whether it performs test-and-repair work, whether it can handle a directed repair, and whether a referee appointment is required instead of another ordinary inspection.
California BAR reporting separates inspection outcomes into categories that include overall, emissions, functional, visual, and OBDII failures, as shown in the BAR executive summary and performance report. A car can drive normally and still fail because emissions equipment is missing, a modification isn't approved, or the software state isn't acceptable.
What to ask before you arrive
- Vehicle eligibility: Can the station inspect your specific vehicle type and model year?
- Readiness status: Can the technician check monitors before beginning the official inspection?
- Repair capability: If the car fails, can the station diagnose the failure or must you use another facility?
- Special inspection needs: Does your situation require a directed repair or state referee?
- Documentation: What registration or prior inspection paperwork should you bring?
For East Bay drivers, Speedy Smog's explanation of STAR stations provides a practical overview of the certification and inspection process. The San Leandro shop handles emissions testing for common passenger vehicles as well as older vehicles, diesels, and hybrids, so drivers can confirm suitability before making the trip.
Test Day Routine and Quick Answers to Common Questions
On the day of the appointment, drive the car through fifteen to twenty minutes of mixed operation, including highway driving when practical. Check the dashboard before leaving, confirm the fuel level is within the station's recommended range, and bring registration plus the previous smog certificate if you have it. Turn off unnecessary accessories, remove chargers, and follow the technician's instructions when you arrive.
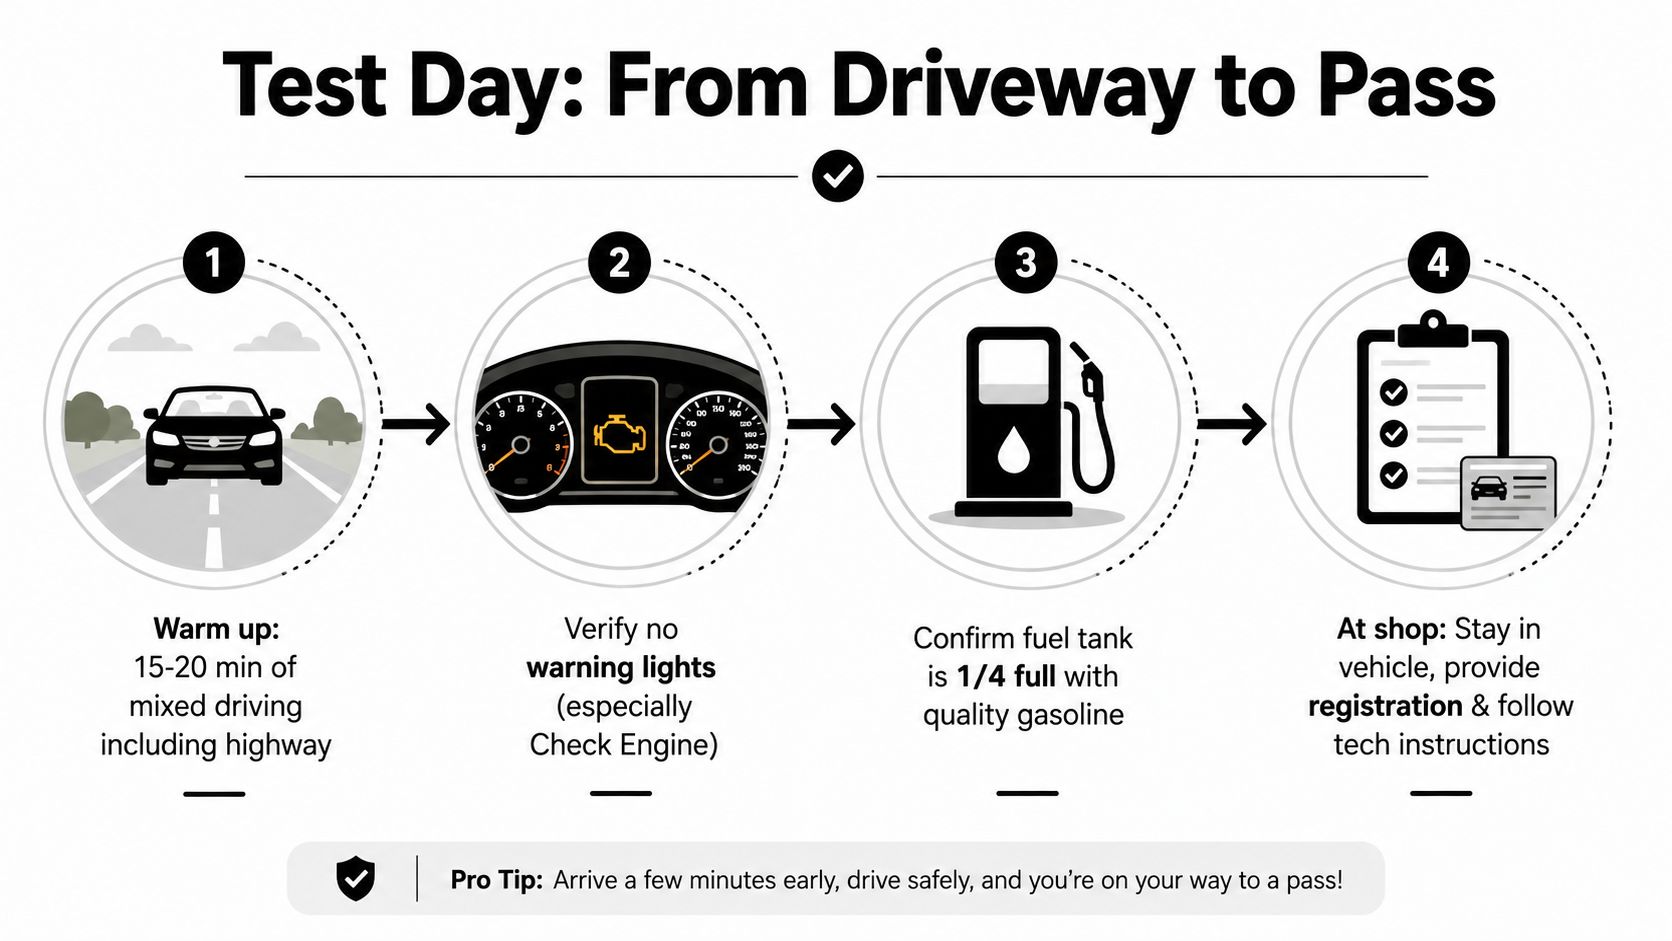
A recent battery disconnect doesn't automatically mean the car will fail forever, but it can reset the monitors. Drive until a scanner confirms the supported monitors are ready. The time required varies by vehicle and monitor, so mileage alone isn't proof of readiness.
Idling in the driveway usually isn't enough because monitors need changing speed, load, temperature, and operating conditions. A directed inspection means the vehicle must follow specific repair or inspection instructions, while a referee may be needed when the vehicle's emissions configuration or prior result requires state review.
For a final reminder, use the California BAR readiness guidance as the controlling reference for applicable monitor requirements rather than relying on generic advice from a parts store or online forum.
If your car has recently had a battery replacement, code clear, repair, or failed inspection, visit Speedy Smog for a California smog inspection and readiness-focused pre-test conversation. Bring the vehicle's failure paperwork or scan information so the technician can help you address the actual compliance issue before you pay for another test.
Most advertised California smog checks can look as low as $30, but the final out-the-door price most drivers pay in 2026 usually lands between $70 and $85 once the $8.25 state certificate fee and small extra charges are included. If you're holding a DMV renewal notice and trying to figure out what you'll really owe, that's the number to budget for, not the teaser price.
That gap between the ad and the invoice is where most of the confusion starts. Drivers see one number online, arrive expecting a bargain, and then find out the posted rate wasn't the full smog check price. The inspection fee can vary by station, the certificate fee is only charged when the vehicle passes, and some shops add small electronic filing fees or surcharges depending on the vehicle.
A lot of frustration disappears once you know how the bill is built. California doesn't regulate the base inspection price, so comparing shops only by the headline number often leads to surprises. The smarter move is to ask for the full out-the-door total before authorizing the test.
Table of Contents
- Your Guide to California Smog Check Prices in 2026
- Deconstructing Your Smog Check Bill
- Why Smog Check Prices Vary So Much
- Test-Only vs Test-and-Repair Stations
- The STAR Station Advantage and Its Cost
- How to Avoid Surprises and Save on Your Smog Check
- Get Your Smog Check Done Right
Your Guide to California Smog Check Prices in 2026
Your renewal notice shows a smog requirement. You call one shop and hear a low advertised price. You get to the counter, the certificate fee shows up, and the total is different from what you expected. That is the part that frustrates drivers, and it is why the out-the-door number matters more than the ad.
A useful baseline comes from the Bureau of Automotive Repair's California Smog Check Program information, which explains how the program works and why costs are split between the inspection itself and the certification that gets sent to DMV. In practice, most drivers are not comparing two identical prices. They are comparing one shop's headline number to another shop's finished bill.
At a STAR station, the final price can shift for reasons that are legitimate, but not always explained clearly up front. Vehicle type, model year, fuel system, and whether the car requires a STAR inspection all affect the time, equipment, and shop overhead behind the test. The honest way to quote a smog check is to tell the driver what they will pay if the vehicle passes and the certificate is issued.
That is the standard we use at Speedy Smog. Drivers asking about local smog check pricing and what is included usually want one straight answer. What is the final total, and what could change it?
Keep these three price layers separate:
- Advertised price: The promotional number, which may only cover the inspection portion.
- Inspection fee: The station's charge for performing the test on your vehicle.
- Out-the-door price: The full amount you pay after required fees are added, assuming the vehicle passes.
Once you separate those numbers, the bill stops feeling arbitrary. You can spot a thin ad, ask better questions before the test starts, and choose a station that prices the job clearly instead of explaining the extras after your car is already in the bay.
Deconstructing Your Smog Check Bill
A smog bill works a lot like a restaurant check. The menu price isn't always the final total. You have the main charge, then a required add-on, and sometimes a small processing fee tied to how the transaction is completed.
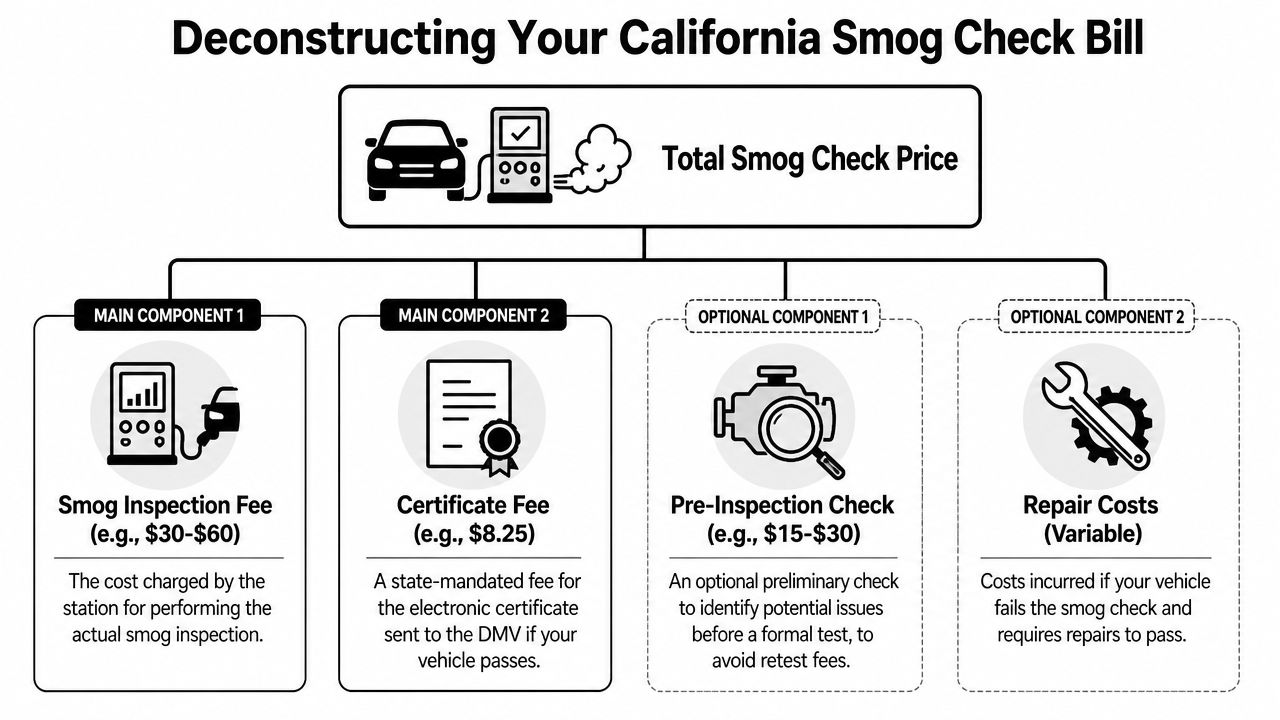
The two charges every driver should separate
California smog pricing has two main parts. The first is the station's inspection fee. The second is the state certificate fee.
For most passenger vehicles in 2026, the total price is made up of a variable inspection fee that typically ranges from $30 to $90 and a fixed $8.25 state smog certificate fee charged only on a passing result, as explained in this California smog fee breakdown.
That distinction matters because drivers often assume every line on the invoice belongs to the shop. It doesn't. The certificate fee is state-mandated and uniform across stations and vehicle types. The inspection fee is where shops differ.
A practical way to read the bill is this:
- Inspection fee: This is the shop's charge for the testing work itself.
- Certificate fee: This is the state fee for transmitting the passing certification to DMV.
- Electronic filing fee: Some stations add a small EFT charge for digital submission.
If you're comparing rates, ask whether the quote already includes the certificate fee. If it doesn't, you're not looking at the final number yet. For a local example of how shops present these charges, review emissions testing prices near me.
Why the out-the-door number matters more than the ad
A low ad isn't always a low total. That's where many drivers feel blindsided.
Some stations lead with the smallest possible base rate because it helps them appear cheaper in search results. By the time the certificate fee, filing fee, and any vehicle-specific add-on are included, the final price can be far from the number that got your attention.
Ask one sentence before you authorize the test: “What is my out-the-door price if the vehicle passes?”
That question does two things. It gives you a usable number for comparison, and it tells you whether the shop is transparent. If the answer sounds vague, keep asking until every line item is clear.
Why Smog Check Prices Vary So Much
A driver calls after seeing a low online special, then pauses when we ask for the year, fuel type, and whether the DMV requires a STAR inspection. That pause happens for a reason. The ad price and the actual out-the-door price can be different once the vehicle details are on the table.
Part of the spread comes from the car itself. Part comes from the station.
Vehicle age changes the amount of work
Older vehicles often take more time to inspect because the procedure is less straightforward than it is on many newer cars. A 2000-and-newer gasoline vehicle is often an OBD-based visit. On an older model, the technician may need more setup, more verification steps, and more hands-on testing time.
That extra labor affects pricing. So does risk. Older cars are also more likely to have missing labels, modified parts, or readiness issues that slow the appointment even if the vehicle ultimately passes.
If you're comparing local smog check stations in San Leandro, ask whether the quote changes by model year. At a transparent shop, that answer should be clear before the car goes on the machine.
Fuel type and vehicle design also matter
Diesel, hybrid, and some larger vehicles can require different equipment, added checks, or a slower workflow in the bay. That does not mean every station handles them the same way. It means the station has to price around the time, equipment use, and technician attention the job requires.
A compact gasoline sedan is usually the quickest appointment. A diesel truck or an older hybrid may not be.
| Vehicle Type/Age | Typical Pricing Pattern |
|---|---|
| 2000 and newer gasoline vehicles | Usually the simplest and often the lowest inspection price |
| 1996 to 1999 vehicles | Often higher because the test procedure can take longer |
| 1995 and older vehicles | Commonly the highest-priced group due to older testing requirements |
| Diesel and hybrid vehicles | Often priced above standard gasoline vehicles because inspection steps may be more involved |
Shop overhead creates real price differences
Two stations can perform the same legal inspection and still price it differently because their costs are different. Rent, technician wages, equipment maintenance, software, insurance, and STAR-related compliance all show up in the base inspection fee.
That is especially true in higher-cost areas. A shop in the East Bay usually carries more overhead than one in a cheaper market, and that affects the number on the menu board.
The practical takeaway is simple. Price variation is normal, but vague pricing is avoidable. A station should be able to tell you what changes the price before you approve the test. At Speedy Smog, that usually starts with a few direct questions about the vehicle so the quote matches the job, not just the ad.
Test-Only vs Test-and-Repair Stations
The type of station you choose affects convenience more than many drivers realize. Some stations only inspect. Others inspect and fix emissions-related problems if the vehicle doesn't pass.
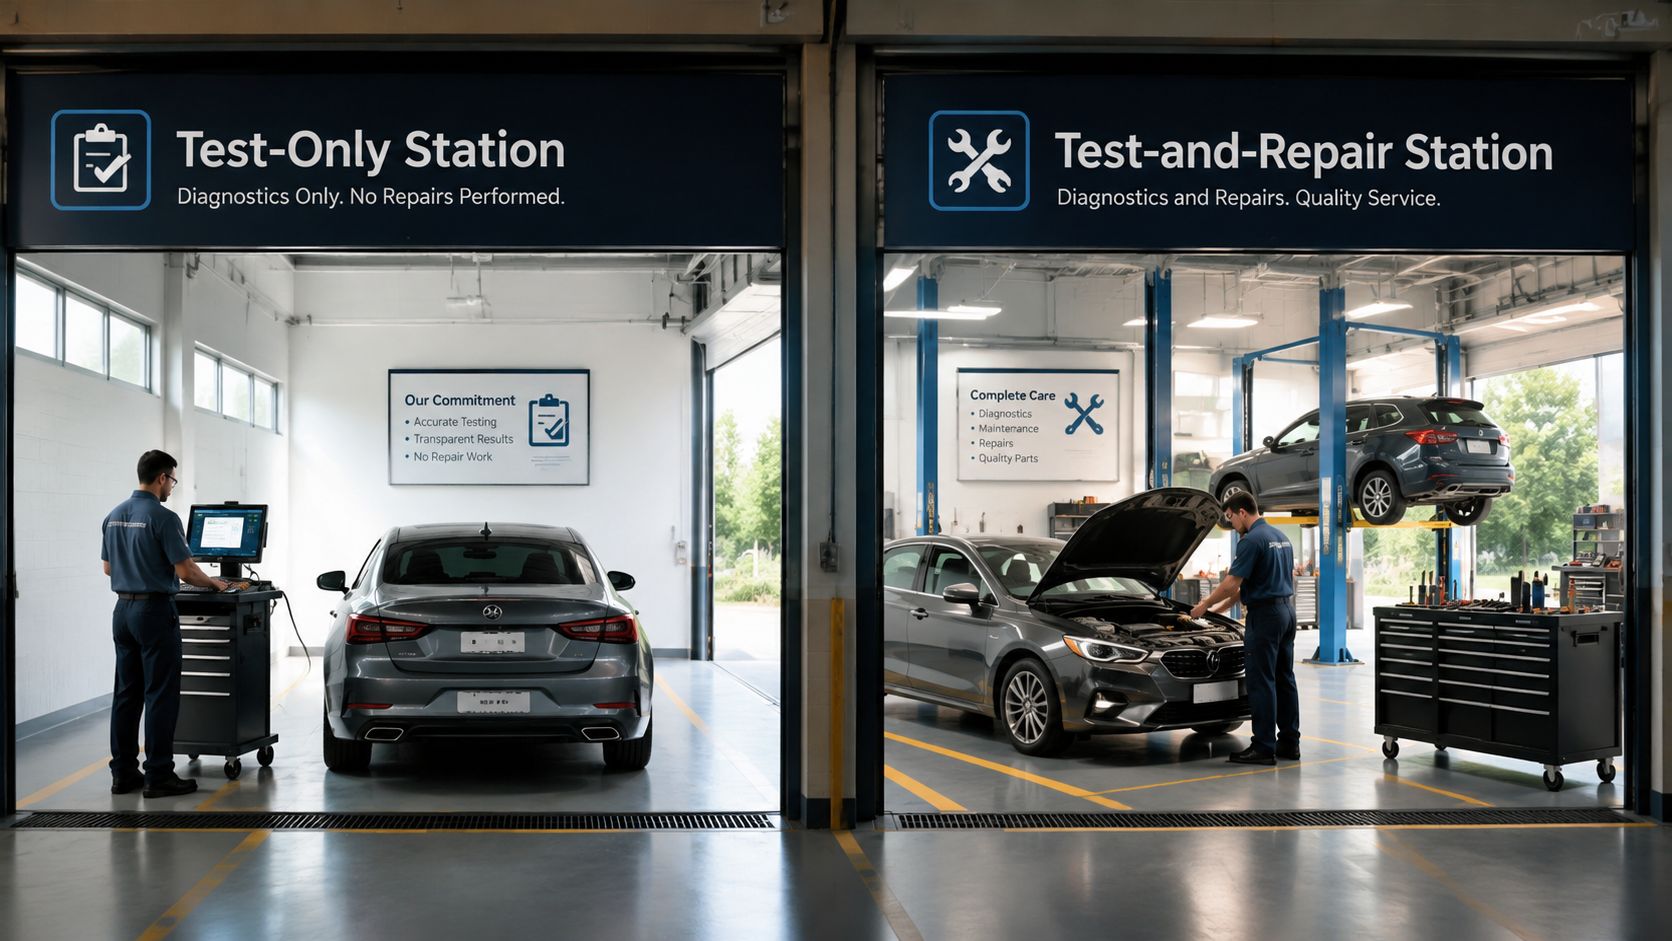
When a test-only station makes sense
A test-only station is exactly what it sounds like. The shop performs the smog inspection, but it doesn't handle repair work tied to a failed result.
That setup can make sense if you want a clean separation between diagnosis and repair. Many drivers like that structure because the station has no repair role in the next step. If your car is in good shape and you mainly need a valid inspection for registration, test-only can be a straightforward choice.
If you're sorting through local options, San Leandro smog check stations can help you compare shop types before you book.
When test-and-repair is the easier path
Test-and-repair stations offer convenience. If the car doesn't pass, you don't have to start from zero at a separate facility. That's often useful for older vehicles or cars that already have a history of emissions problems.
The trade-off is practical rather than dramatic. You gain speed and continuity if repairs are needed, but you should still ask how retests are handled and what happens if the first inspection finds an issue.
A quick visual overview helps if you're not familiar with the difference:
A simple rule works well here:
- Choose test-only if you want the inspection separate from repair decisions.
- Choose test-and-repair if convenience matters more and you suspect the car may need work.
- Call ahead if your vehicle is older, diesel, hybrid, or has a recent warning-light history.
The STAR Station Advantage and Its Cost
Some DMV notices specifically direct drivers to a STAR station. When that happens, the certification isn't just a label on the sign. It means the station has to meet a higher testing standard.
Why STAR usually costs a little more
BAR notes that STAR-certified stations, including those required in enhanced enforcement areas like the East Bay, typically charge an additional $5 to $12 premium over standard shops because of stricter equipment calibration and technician certification requirements, as described on California's STAR smog information page.
That extra cost usually reflects real overhead. STAR shops have to stay tighter on equipment accuracy, technician qualifications, and performance measures. From a driver's perspective, that can feel annoying if you're focused only on the cheapest quote. From a technician's perspective, it often means the inspection is being done with more rigorous controls.
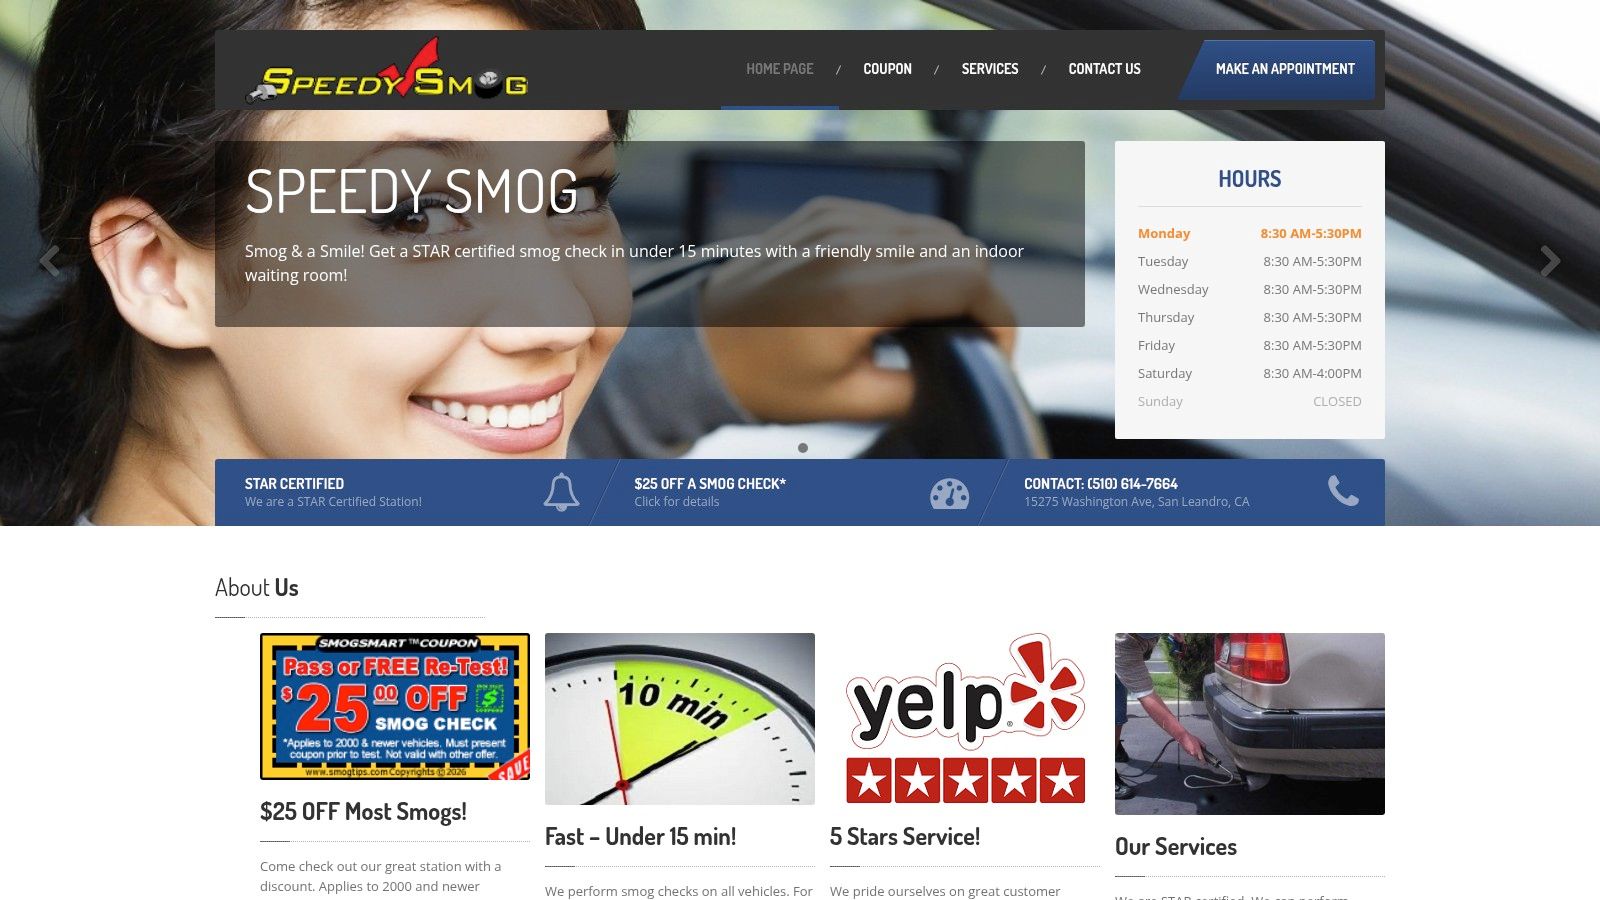
What you get for that premium
The benefit of a STAR station is reliability. You want the test done correctly the first time, especially when your registration deadline is close and you don't want an avoidable return visit.
For drivers in the East Bay, that's where a local STAR facility can make sense. If you want a plain-language overview of what STAR status means, what is a smog STAR station gives the basics.
One local example is Speedy Smog in San Leandro. It's a STAR-certified station, and for many newer vehicles the inspection is typically completed in about 10 to 15 minutes, based on the business information provided by the publisher. That kind of setup won't change the state rules, but it can make the visit smoother when the shop is transparent about pricing and efficient with newer cars.
A slightly higher STAR price can be worth it if it saves you from confusion, delays, or a poor-quality testing experience.
How to Avoid Surprises and Save on Your Smog Check
Most drivers don't need a complicated strategy. They need a short checklist and the confidence to ask direct questions before the test begins.
Questions to ask before the test starts
The biggest trap is the out-the-door gap. Some advertised prices in the $30 to $45 range don't include the $8.25 certificate fee or possible truck and SUV surcharges, which is why many drivers feel surprised at checkout, as noted in this explanation of the OTD pricing trap.
Ask these questions up front:
- Total price first: Ask for the full out-the-door price if the vehicle passes.
- Certificate included: Confirm whether the quote includes the state certificate fee.
- Vehicle-specific charges: Ask whether your truck, SUV, diesel, hybrid, or older vehicle changes the quoted amount.
- Retest policy: Find out what happens if the vehicle doesn't pass and whether a return visit changes the cost.
Simple ways to keep the bill under control
You don't have to chase the absolute lowest ad to save money. You just need to avoid paying for preventable problems.
- Bring the right expectations: If your car is older, budget differently than you would for a newer gasoline sedan.
- Check warning lights: If the check engine light is on, handle that issue before paying for an official smog inspection.
- Look for posted specials: Coupons can matter when they're applied clearly to the actual service.
- Choose transparent shops: The best price conversation is the one that gives you the full total before the test starts.
A straightforward coupon from a clear-pricing shop is worth more than a vague low teaser rate. The first one helps you budget. The second one often just starts a negotiation at the counter.
Get Your Smog Check Done Right
You pull in for a smog check expecting the price from the ad. Ten minutes later, the total is higher than you planned for. In my experience, that usually happens because the quoted number was not the full out-the-door price.
A clean smog visit starts with a clear quote. The shop should tell you what the test costs, whether the certificate fee is included, and whether your vehicle type changes the final bill. That matters more than chasing the lowest headline price, especially if you need a STAR inspection and want the paperwork handled correctly the first time.
The practical budgeting range is usually higher than the teaser ad, as noted earlier. Vehicle age, fuel type, STAR requirements, and station pricing all affect the final total. What drivers really want is simple. A pass, a valid certificate, and no surprise charges at the counter.
That is the standard worth looking for.
If you're in the East Bay and want the total explained before the test starts, consider Speedy Smog. It's a San Leandro STAR-certified station that handles newer cars, older vehicles, diesels, and hybrids, with a clean waiting area and periodic coupon offers that can reduce the cost on qualifying smog checks.