
You've got the DMV renewal notice on the counter, a registration deadline getting closer, and one practical question. Do you need a Smog Check in Oakland, CA, what kind of station can test your vehicle, and is the car ready to pass when you get there? Answer those three questions in order and the visit stops feeling like a gamble. It becomes a short workflow you can control.
Table of Contents
- Start With Your Oakland Smog Check Decision
- Determine Whether Your Vehicle Needs Testing
- Choose the Right Smog Station in Oakland
- Prepare Documents and Your Vehicle
- What Happens During a Typical Smog Check
- Understand Common Smog Check Failures
- Choose Your Next Step After a Failure
- Use a Smog Check Visit Checklist
Start With Your Oakland Smog Check Decision
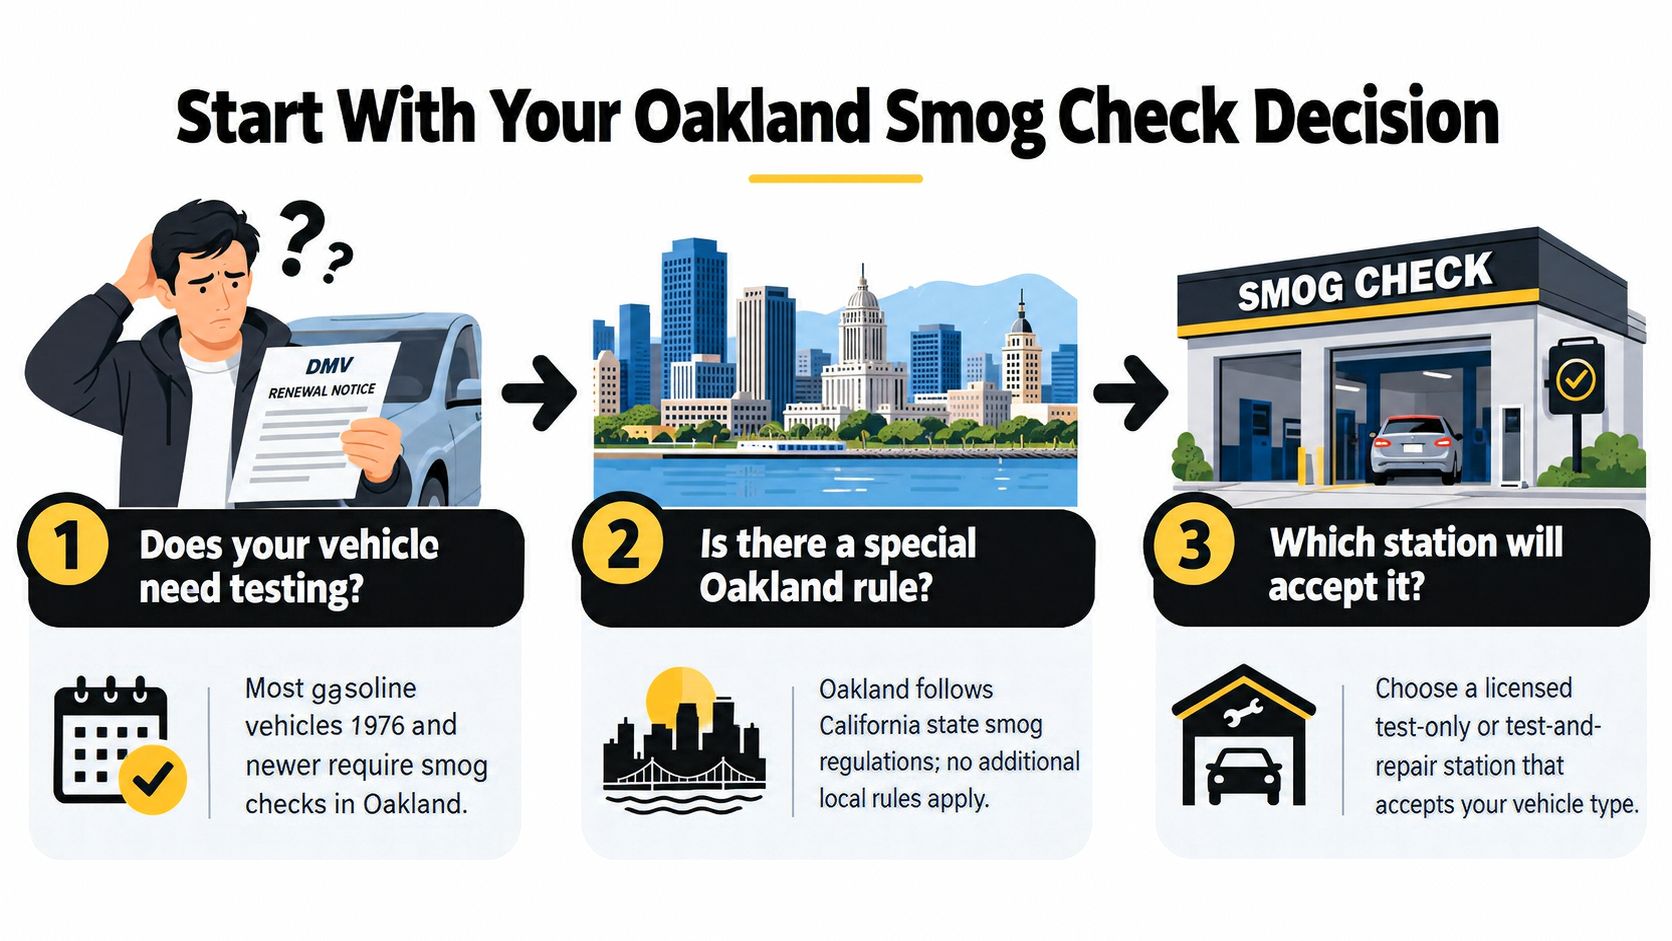
An Oakland driver finishing a commute opens that renewal envelope and sees smog certification requested. The car runs fine, so the first instinct is to search for the closest station and drive over. That's the wrong order. You need to decide whether a test is required, where your vehicle must be tested, and whether it's ready before you pick a shop.
Boarding a flight is a useful comparison. The destination doesn't matter if you've brought the wrong document or your bag can't clear the scanner. Your DMV notice is the boarding pass here. It controls the route for this transaction, and it tells you more than a generic search result can.
Why Oakland Follows a State System
Oakland doesn't run its own separate smog program. California established its Smog Check program as a statewide emissions-control system in the 1980s, and in its first year approximately 4 million vehicles were inspected under the mandatory biennial law, with about 70% passing without repairs. Vehicles that failed and were repaired showed an average 17% reduction in hydrocarbon and carbon-monoxide emissions right after repair, per that same early reporting.
That history explains the present workflow. A test isn't an optional maintenance add-on you can skip because the car feels fine. It's tied to specific registration transactions, and the result has to match the vehicle and transaction the DMV has on file.
There's also a difference between a routine renewal and other triggers. A biennial renewal is the familiar case, but a first California registration or a change of ownership can also put you in line for certification. Don't assume the rules from your last car carry over to this one.
Practical rule: Start with the paper in your hand, not the station map. If the notice, model year, and fuel type don't line up with your assumptions, resolve that first.
Expect the visit itself to vary. A newer gasoline car with complete diagnostic monitors is a different appointment from an older vehicle, a diesel, or a hybrid that follows another inspection path. Getting the decision right up front saves you a second trip, which is where most wasted time goes.
Determine Whether Your Vehicle Needs Testing
Don't classify your vehicle by age alone. That's the most common mistake East Bay drivers make, and it leads to the false idea that anything old is exempt. Age matters, but so do fuel type, model year, weight, and the type of registration transaction you're completing.
Match Model Year to Fuel Type First
Start with the broad categories, then check exemptions against them. Official California guidance places gasoline, hybrid, and alternative-fuel vehicles from model year 1976 onward generally within the program, while diesel vehicles from model year 1998 onward generally require testing. That same guidance identifies gasoline vehicles from 1975 or earlier, diesel vehicles from 1997 or earlier, electric vehicles, and certain heavy vehicles as exempt.
Read those two sentences together and the logic becomes clear. A 1999 diesel isn't exempt just because it feels old. A hybrid isn't automatically out of the program because it uses less gasoline. The category comes first, and the exemption, if one applies, has to override it clearly.
- Gasoline, hybrid, and alternative-fuel vehicles: Generally covered from 1976 onward, so a recently purchased older car in this group usually still needs attention.
- Diesel vehicles: Generally covered from 1998 onward, which catches many older trucks owners assume are grandfathered out.
- Electric vehicles: Listed as exempt, so don't book a test you don't need.
- Certain heavy vehicles: Treated as exempt under the DMV categories, but weight details matter, so don't guess from vehicle size alone.
Check the Transaction, Not Just the Calendar
Your vehicle can need certification even when it's not renewal time. Certification is also generally required when an affected vehicle is first registered in California or changes ownership. That covers a driver moving into Oakland with an out-of-state car, and it covers a private sale in San Leandro or Oakland where the buyer assumes the car is ready to register because the tags look current.
Imported and recently purchased vehicles trip people up. The relevant question isn't whether the previous owner tested it recently for their own renewal. It's whether your transaction triggers a requirement now. Those are different events, and the DMV treats them on their own terms.
If you're working through the broader rules before you call a station, the California smog check rules overview is a useful place to confirm how these categories fit together. Use it as a cross-check, not a replacement for your notice.
Let the Notice Resolve Conflicts
When your memory of the rules conflicts with the notice, the notice wins. Match the vehicle information on it to your actual model year and fuel type, then look for any instruction about station type. Some vehicles may use any licensed station, while others are directed to a STAR station.
If anything still doesn't add up, call the station before you travel and describe the vehicle and transaction. A two-minute verification beats arriving with the wrong expectation and being turned away. Bring the notice with you either way, so the station can transmit the correct vehicle information for your record.
Choose the Right Smog Station in Oakland
A STAR station isn't mandatory for everyone, and a regular station isn't a lesser choice if your notice doesn't direct you otherwise. What matters is matching the station to three things. Your DMV instructions, your vehicle type, and the transaction you're completing determine the right fit, in that order.
STAR certification is a performance distinction set through the Bureau of Automotive Repair. Some DMV notices direct specific vehicles to a STAR station, and when yours does, that instruction isn't optional. When it doesn't, you have more flexibility, and convenience, pricing clarity, and vehicle capability can carry more weight.
Compare the Two Routes Side by Side
| Consideration | Regular Station | STAR-Certified Station | Reader Action |
|---|---|---|---|
| DMV direction | Works when your notice doesn't specify STAR | Required when your notice directs you there | Read the notice before calling anyone |
| Certification recognition | Valid for transactions that accept any licensed station | Recognized for directed vehicles and general testing | Confirm the result will be transmitted for your transaction |
| Vehicle capability | Varies by station and equipment | Varies too, so don't assume every vehicle is accepted | Ask about your fuel type and model year in advance |
| Convenience trade-off | May be the closest option in Oakland | May mean a short drive elsewhere in the East Bay | Weigh travel time against a possible second trip |
| Pricing clarity | Ask for the full amount up front | Same standard applies | Don't compare stations on a partial quote |
That last trade-off deserves emphasis. The closest station to your house is only convenient if it can inspect your vehicle and its result counts for your transaction. A slightly longer drive to a station that handles your vehicle class correctly is faster than two short drives.
For a clearer explanation of what the designation means in practice, review the STAR certified smog station details before you decide. Then ask any station you're considering the same short set of questions. Can you test my fuel type and model year, does my notice require STAR, and will you transmit the certification electronically?
As one transparent East Bay example, Speedy Smog operates as a STAR Certified station at 15275 Washington Ave in San Leandro, 94579, not in Oakland itself. It serves Oakland-area drivers, handles 2000 and newer models, 1999 and older vehicles, diesels, and hybrids, and states that typical inspections for 2000-and-newer vehicles take about 10 to 15 minutes. Treat those specifics as a checklist for evaluating any station, not just this one. A good station should be able to state its status, its supported vehicle categories, and a realistic time window just as plainly.
Don't shop for a smog station the way you'd shop for a car wash. Proximity helps, but recognition for your specific transaction comes first.
Prepare Documents and Your Vehicle
Most avoidable failures and repeat trips happen before the technician touches your car. Preparation splits into two jobs. You need the right document in hand, and you need the vehicle's computer ready to report complete information.
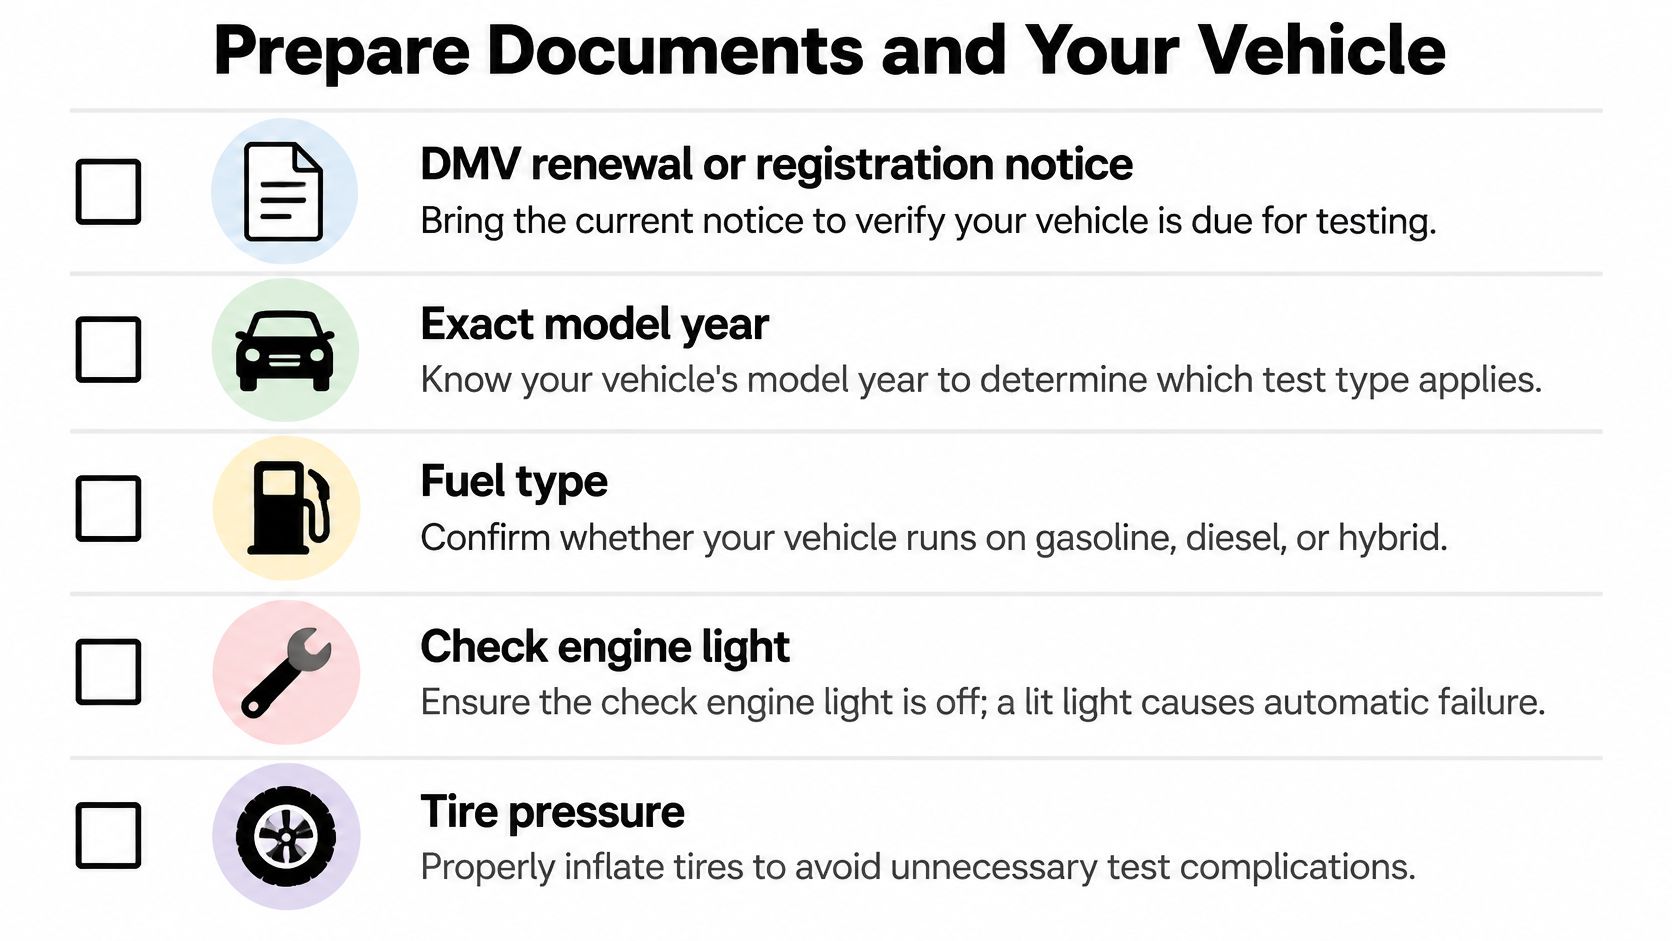
Bring this checklist image to mind as you work through the steps below.
Assemble the Paperwork and Vehicle Facts
- DMV renewal or registration notice: Bring the current notice, since it's the document that defines your transaction and any STAR direction.
- Exact model year: Know it precisely, because a one-year difference can change which rule applies.
- Fuel type: Confirm gasoline, diesel, hybrid, or alternative fuel before you call, so the station can confirm it can test you.
- Registration status: Be ready to explain whether this is a renewal, a first California registration, or an ownership change.
For a fuller walkthrough of pretest steps, the guide on what to do before a smog check covers the preparation sequence in more detail. Read it before you schedule, not in the parking lot.
Get the Onboard Computer Ready
For gasoline vehicles from model year 1996 onward and diesel vehicles from model year 1998 onward, the inspection relies heavily on the On-Board Diagnostics system. That check verifies the malfunction indicator lamp works correctly, looks for diagnostic trouble codes, and evaluates whether required emissions monitors are complete. It's closer to a computer health report than a simple tailpipe sniff.
Don't clear codes or disconnect the battery right before your appointment hoping to erase a warning. That resets the readiness monitors and leaves the computer without enough operating data. You're trading a known fault for an incomplete report, and both can stop you from passing. Repair the underlying problem instead, then complete the manufacturer-specific drive cycle so the monitors rebuild their data through normal driving.
This short video walkthrough shows what readiness preparation looks like in practice.
If your check engine light is on, treat that as a stop sign. Get the fault diagnosed before you test, because showing up hoping it won't matter wastes the trip. Also allow time for the vehicle to cool after driving, and confirm the station can inspect your vehicle class before you head out. None of this guarantees a pass, and any station promising one in advance isn't being straight with you. That removes the preventable reasons for failure.
What Happens During a Typical Smog Check
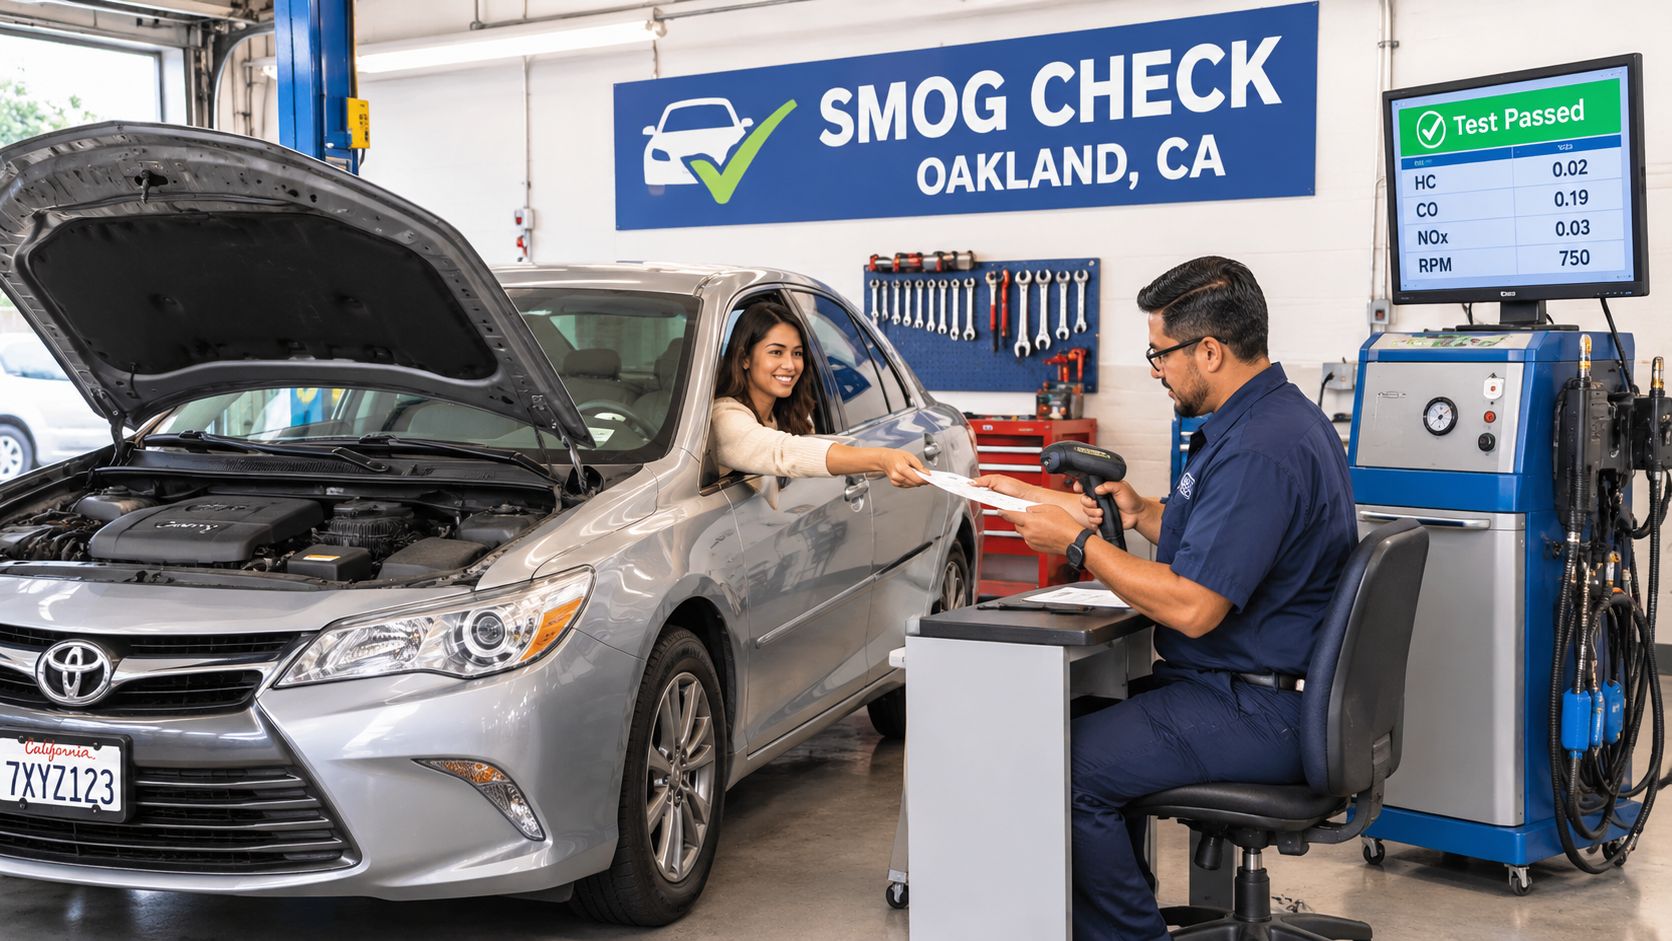
Follow a representative 2000-and-newer sedan through a visit and the whole process looks manageable. The driver arrives with the renewal notice, the station verifies the vehicle record against that document, and only then does the inspection begin. That record check isn't bureaucracy for its own sake. It's what ensures the result attaches to the right vehicle and transaction.
From Check-In to Result
Here's the sequence most drivers of newer vehicles experience.
- Arrival and verification: You hand over the notice, the station confirms model year, fuel type, and any STAR requirement.
- Inspection: The technician runs the test path appropriate to your vehicle, which for a newer model centers on the diagnostics described in the section above.
- Result handling: On a pass, the certification is transmitted electronically, so you aren't carrying a paper certificate to the DMV yourself.
For planning purposes, a typical inspection for 2000-and-newer vehicles takes about 10 to 15 minutes at the East Bay example mentioned earlier. Read that as a typical window, not a guarantee. A station can be busy, a vehicle can need extra attention, and your own arrival paperwork can add time. Budget a buffer around the test itself rather than scheduling something tight immediately after.
Where the Experience Changes
Older gasoline vehicles, 1999-and-older vehicles, diesels, and hybrids may follow different inspection paths. If yours falls into one of those groups, don't assume the newer-car timeline applies to you. Ask the station when you book how your category is handled and how long you should allow.
The surroundings matter less than the process, but they aren't irrelevant on a workday. A clean indoor waiting room makes a short wait easier, and transparent pricing stated before the test starts prevents an awkward surprise at the counter. Limited promotional offers exist at some stations, but don't let a discount distract you from the basic questions. Is this station right for my vehicle, and will its result count for my transaction? Those answers matter more than a few dollars saved on a test you'd have to redo.
Before you leave after a pass, confirm the result has been sent. That's your final step at the station, and it closes the loop between the inspection and your registration.
Understand Common Smog Check Failures
A failure doesn't automatically mean your engine is falling apart. On a modern vehicle, it often means the computer reported a problem, or hadn't collected enough data to report at all. Reading the result correctly is the difference between a targeted repair and throwing parts at the car.
Read the Result Like a Traffic Light
Use a simple comparison. The dashboard warning light is the signal you can see. Stored diagnostic trouble codes are the reason the signal changed. Readiness monitors are whether the system has run long enough to trust its own report. You need all three pieces before you can interpret a failure, not just the light.
That structure also explains why a vehicle can fail even when its tailpipe emissions look acceptable. If the OBD system reports an emissions-related fault or shows insufficient monitor readiness, the inspection can't certify the vehicle on tailpipe behavior alone. The computer's evidence and the exhaust evidence are separate checks, and either one can stop a pass.
The scale here is worth knowing. In statewide 2024 to 2025 data, approximately 19 million model-year-2000-and-newer vehicles were tested and about 1.3 million, roughly 7%, failed, with OBD-related failures at approximately 6.8% of OBD inspections. You're not dealing with a rare edge case when diagnostics cause a failure. It's the central failure path for newer vehicles.
Know the Usual Technical Causes
Four causes come up repeatedly in diagnostic failures.
- Catalytic-converter inefficiency: The converter isn't cleaning exhaust to the expected level.
- Evaporative-emissions leaks: Fuel vapor escapes where it should stay contained.
- Oxygen-sensor faults: The sensor feeding the computer bad data throws off the whole emissions picture.
- Misfire detection: The engine isn't firing consistently, and the computer catches it.
These range from relatively contained repairs to expensive ones, which is exactly why you shouldn't guess. The failure information narrows the diagnosis, and a proper diagnosis narrows the parts list.
After a failure: Keep the inspection details, don't reset anything, and diagnose from the codes before you buy a single part.
Clearing codes on the drive home undoes that advantage. You erase evidence and reset monitors at the same time, leaving the next technician and the next test with less to work from. Preserve the data and let it guide the next step.
Choose Your Next Step After a Failure
Repair immediately is bad default advice. Sometimes it's right. Sometimes you're about to spend real money on a vehicle where repair isn't the sensible path, and California runs a program specifically because that situation is common. Lay out your three actual options before you commit.
Compare Repair, Assistance, and Retirement
Diagnose and repair on your own suits a vehicle you intend to keep, with a contained fault and no history of repeated failures. Program-supported repair suits an income-eligible driver whose needed work qualifies. Vehicle retirement suits an older vehicle where repair costs and repeat failures have started to outweigh the car's remaining value to you.
The financial structure is specific. California's Consumer Assistance Program can provide income-eligible drivers up to $1,450 toward emissions-related repairs, while qualifying owners may receive up to $2,000 to retire a vehicle. The retirement option generally requires household income at or below 225% of the federal poverty level and, for the higher incentive, a failed Smog Check. A vehicle that passes may still qualify under a separate retirement pathway if the inspection occurred within the required 180-day window.
Those numbers change the math for a lower-income East Bay driver. A repair that looks unavoidable on your own budget may be partly covered, or retiring the vehicle may return more value than one more repair cycle on a car that keeps failing.
Respect the Eligibility Limits
Don't assume every mechanic's bill qualifies. Assistance is limited to eligible emissions-related work, requires program approval, and depends on income rules and documentation. Apply and get approved through the proper channel before you authorize work expecting reimbursement. Work done outside those conditions is your expense, whatever the total comes to.
There's a reason older vehicles deserve extra scrutiny in this decision. Lawrence Berkeley National Laboratory research using 1999 data estimated that one inspection-and-repair cycle reduced daily emissions by approximately 97 tons of hydrocarbons, 1,690 tons of carbon monoxide, and 81 tons of nitrogen oxides, with automobiles more than 10 years old accounting for over 90% of the hydrocarbon and carbon-monoxide benefits despite being only about half of vehicles tested. Older vehicles carry the greatest emissions-control deterioration risk. That doesn't make yours unsalvageable, but it does mean a single repair may not be the last one.
Sequence your decision this way. Get the diagnosis, check whether you qualify for assistance, compare the realistic repair path against retirement, and watch your registration timing throughout. A failed test doesn't force the cheapest-looking choice. It forces an informed one.
Use a Smog Check Visit Checklist
Run this sequence once and you've covered the article's decisions in order.
- Confirm the trigger: Renewal, first California registration, or ownership change, and check whether your notice specifies STAR.
- Verify vehicle fit: Make sure your station handles your fuel type and age group.
- Assemble information: Bring the notice, exact model year, fuel type, and registration status.
- Protect readiness: Repair known faults, complete the drive cycle, and don't clear codes or disconnect the battery.
- Budget time: Allow extra room around the test, especially for older, diesel, or hybrid vehicles.
After a pass, confirm the result was transmitted electronically before you leave. After a failure, keep the details and don't commit to a quick repair until diagnosis and assistance options are clear. Verify anything specific to your vehicle with your chosen station before you travel.
If your notice calls for a STAR inspection or you're testing a diesel, hybrid, older vehicle, or 2000-and-newer model, Speedy Smog can confirm your vehicle fit, explain the process in plain language, and complete the inspection for your DMV transaction. Bring your renewal notice, verify your vehicle is diagnostically ready, and visit to get tested and back on the road without a second trip.
The Smog Check certificate fee itself is only $8.25, but the actual cost is the repair work that follows. California Bureau of Automotive Repair data shows average repairs of about $665.59 at STAR test-and-repair stations and $703.74 at non-STAR test-and-repair stations.
You're probably holding a Vehicle Inspection Report, wondering whether your registration is now in trouble and whether a shop will sell you repairs you don't need. Take a breath. A failed smog check is a compliance problem, not an automatic loss of registration, and the smartest next move is to understand the failure before authorizing work.
California's 2025 BAR report recorded 959,667 failures among 11,275,981 initial tests, an overall failure rate of 8.51%. STAR Test-Only stations recorded 481,639 failures from 5,916,245 initial tests, an 8.14% rate. The report also recorded 83,034 BAR-97 emissions failures and 43,518 OBDII failures, so this is a recurring statewide issue, not an unusual event. Read the California BAR 2025 executive summary for the published breakdown.
Table of Contents
- You Just Failed a Smog Check in California
- Why Smog Checks Fail and What Your Report Tells You
- Quick Fixes You Can Try Before Paying a Mechanic
- Choosing the Right Station After a Failure
- Repair Costs, Assistance Programs, and Waivers
- Retesting and Clearing Your DMV Registration
- Your Post-Fail Action Checklist
You Just Failed a Smog Check in California
Your first job isn't finding the cheapest repair quote. It's preserving the evidence.
Start with the inspection report
The Vehicle Inspection Report, or VIR, tells you what failed. Read every line, not just the large “Fail” result. Separate monitors marked “not ready” from measured emissions that exceeded their limits. Those are different problems and require different decisions.
A not-ready monitor often means the vehicle's computer hasn't completed its required checks. An emissions exceedance points toward a running, fuel, ignition, exhaust, or catalytic-converter problem. Take clear photos of every page, including the station information and test date, then keep the original with your registration paperwork.
Ask the station whether the vehicle was identified as a gross polluter, directed vehicle, or high emitter. That label affects where you can go next. Don't book a generic retest until you know whether BAR has placed a testing restriction on the vehicle.
Check your registration timeline
A failed test doesn't instantly cancel your current registration. You still need to plan around the expiration date, and you shouldn't ignore DMV renewal notices while the repair is pending. Write down the expiration date and the retest deadline shown on your paperwork.
Practical rule: Never authorize a repair based only on the word “failed.” Authorize work after you know the exact code, monitor, visual defect, or measured pollutant involved.
If you want help interpreting the paperwork before visiting a repair shop, compare the terminology in this guide to common smog test results. Bring the VIR, any diagnostic printout, repair receipts, and registration documents to the next technician.
Why Smog Checks Fail and What Your Report Tells You
California failures generally fall into OBDII, emissions, visual, and functional categories. BAR's 2026 performance report recorded about 1.3 million failures among roughly 19 million 2000-and-newer vehicles tested during CY 2024–2025, an overall rate near 7%. It also reports a January 2026 all-model-year snapshot with 11,167 failures from 62,132 initial tests, or 17.97%. The categories overlap, so one defective part can trigger more than one result. See the BAR 2026 Smog Check Performance Report for the report details.
Match the failure to the likely system
OBDII failure usually means a fault code is active, a required monitor is incomplete, or the check-engine light is on. Common systems include the catalytic converter, EVAP controls, and oxygen sensors. Don't replace a catalytic converter just because the scanner mentions one. A technician needs to determine whether the converter failed or another issue caused the code.
Tailpipe emissions failure applies primarily to vehicles tested through measured exhaust emissions. High hydrocarbons can point to incomplete combustion, while carbon monoxide and nitrogen oxide readings can indicate fuel-control, combustion-temperature, or exhaust-treatment problems. The VIR's measured values matter more than a generic parts list.
Visual failures involve missing, modified, damaged, or tampered emissions equipment, including an emissions component that isn't properly installed. A warning lamp can also matter if the inspection requires it to operate correctly.
Functional failures involve systems such as air injection or other required emissions controls. These problems can look minor but still prevent certification.
| Failure Category | Typical Components | Avg. Repair Cost |
|---|---|---|
| OBDII | Catalytic converter, EVAP system, oxygen sensors, fault-code causes | Depends on diagnosis |
| Tailpipe emissions | Ignition, fuel control, exhaust treatment, catalytic converter | Depends on measured pollutant |
| Visual | Gas cap, catalytic converter, emissions plumbing, approved equipment | Depends on missing or damaged part |
| Functional | Air injection and related emissions controls | Depends on failed function |
For a component-by-component explanation, use this guide to smog check fail reasons. The report tells you the category. Proper testing tells you the repair.
Quick Fixes You Can Try Before Paying a Mechanic
Some checks cost nothing and take minutes. They won't solve every failure, but they can prevent you from paying diagnostic labor for an obvious issue.
Inspect the gas cap and warning light
Remove the gas cap and inspect the seal. If it's cracked, hardened, or doesn't tighten securely, replace it with the correct emissions-approved cap for your vehicle. A loose cap can create an EVAP leak, and an EVAP fault can illuminate the check-engine light.
Then turn the ignition on without starting the engine. Confirm that the check-engine light illuminates during the bulb check and goes out after the engine starts. If it stays on, don't schedule a retest yet. The underlying fault still needs attention.
Scan before clearing
A basic OBD-II scanner can show stored and pending codes. Scan first and save the code information. Clearing the code before you understand it destroys useful diagnostic context and may reset the readiness monitors.
If you've already repaired the problem and need to clear a confirmed code, check readiness afterward. Disconnecting the battery also resets monitors, so the vehicle needs a complete drive cycle before the inspection computer can evaluate it. The exact distance varies by vehicle and driving conditions, so use the manufacturer's procedure or let a technician verify readiness with a scan tool. This guide to reading OBD codes can help you understand the scan without confusing a code with a confirmed parts failure.
Look for basic engine issues
With the engine cool, inspect accessible vacuum hoses for splits or disconnected ends. Check whether the air filter is visibly restricted and whether the vehicle has overdue spark-plug service. These checks don't replace diagnosis, but they can reveal maintenance problems that affect combustion and emissions.
Don't erase codes repeatedly to chase a pass. A retest with monitors not ready can create another failure and delay the repair decision.
Choosing the Right Station After a Failure
A failed inspection does not automatically mean you need the cheapest retest. First read the VIR. If it identifies a testing restriction, the wrong station can cost you another inspection fee and delay repairs. The repair bill is usually the larger financial risk, so choose a location that can handle the failure and explain the next step clearly.
Match the station to the VIR
A regular smog station handles ordinary inspections and many standard retests. Call before driving over and ask whether it can retest your specific vehicle after reviewing the VIR.
A STAR Test-Only station performs inspections under BAR's STAR requirements. Use one when the paperwork requires enhanced testing or directs you to a STAR location. It will not perform repairs, so arrange diagnosis and repair separately.
A STAR Test-and-Repair station can diagnose and repair qualifying emissions problems, then complete the certification process when the vehicle is ready. This may reduce extra trips between a mechanic and testing station. Still, request the diagnosis, proposed repair, parts, labor, and retest costs in writing before approving work.
The BAR Referee handles disputes, unusual inspection situations, and certain vehicle-specific problems. The DMV directs drivers who fail to contact the BAR Referee Program through its smog inspection guidance. A referee is not a bargain retest. It is a state-run review for cases requiring independent handling.
| Station Type | Authorization | Typical Cost | Best For |
|---|---|---|---|
| Regular station | Standard inspections and eligible retests | Station's posted market price | Ordinary failures |
| STAR Test-Only | STAR testing and required enhanced retests | Test-only fee | Directed or enhanced testing |
| STAR Test-and-Repair | Diagnosis, repair, and qualifying certification | Repair plus testing | Drivers who want one repair location |
| BAR Referee | Independent state review and specialized cases | Ask BAR about applicable charges | Disputed or unusual failures |
Use BAR's station locator, confirm authorization, and ask what the VIR requires before booking. Speedy Smog, a STAR-certified station in San Leandro, publishes its current smog testing service details online so you can confirm pricing before visiting. Bring the VIR and ask whether the station can test, repair, or only perform the retest your vehicle needs.
Repair Costs, Assistance Programs, and Waivers
The inspection fee isn't the financial threat. BAR says the Smog Check certificate fee is $8.25, while its 2025 data puts average repair costs at about $665.59 for STAR test-and-repair cases and $703.74 for non-STAR test-and-repair cases. Those figures explain why you should treat the VIR as a diagnostic starting point, not a permission slip for unlimited parts replacement.
Get an estimate before approving work
Ask for three things in writing:
- The exact diagnostic finding and related trouble code.
- The repair that addresses that finding.
- The estimated parts, labor, and retest costs.
If the quote approaches the state's repair threshold, pause before authorizing the work and check whether you qualify for the California Consumer Assistance Program repair option. CAP may help eligible drivers with emissions-related repairs, but application timing and eligibility matter. Don't assume reimbursement will apply to work you already paid for.
Understand the waiver paths
BAR's repair-assistance rules use a $650 minimum repair-spend threshold, with eligibility depending on the vehicle, repair type, and program requirements. A cost waiver may be available when qualifying emissions repairs reach that threshold and the vehicle still fails. It isn't automatic, and the repair work must meet the program's documentation rules.
A parts waiver is different. It addresses situations where a required certified replacement part isn't available, often involving older vehicles. That isn't the same as failing to afford a repair or choosing not to replace a worn component.
Keep invoices, parts information, diagnostic results, and every retest report. If the vehicle remains noncompliant after documented qualifying work, ask BAR whether a waiver, CAP support, or referee review fits your case.
Retesting and Clearing Your DMV Registration
Once the actual fault is repaired, return to an authorized station with the original VIR and repair paperwork. The technician should check that the check-engine light is off, the required monitors are ready, and the vehicle is eligible for that station's testing authority before starting another inspection.
Don't waste the retest
A retest isn't a guess. Have the shop scan readiness first and verify that the repair addressed the failure category. If the battery was disconnected or codes were cleared, the vehicle may need its prescribed drive cycle before the computer can complete its checks.
BAR reports that roadside inspection samples in the relevant performance reports failed at a fleet-weighted average of about 14%, while routine testing outcomes differ. The point for a driver is simple: the vehicle's real emissions condition matters, and a temporary code reset won't create a durable pass. The BAR 2024 performance report provides the historical roadside comparison.
A STAR Test-Only location may charge the $8.25 certificate fee for the certificate portion of an eligible retest, while other stations set market prices that can include diagnosis, repair, and testing. Ask for the complete price before work begins.
Confirm DMV transmission
Passing results are transmitted electronically to the DMV, so you generally won't mail a paper certificate for an ordinary renewal. Keep the printed VIR anyway. It proves what happened, helps resolve transmission questions, and preserves your repair history.
If registration has already been suspended, contact the DMV and ask what it needs for reinstatement. Have your passing VIR, proof of insurance, registration-fee payment, and CAP documentation if applicable ready. Don't drive as though the registration is cleared until the DMV record confirms it.
Your Post-Fail Action Checklist
Use this sequence instead of calling several shops and repeating the same inspection.
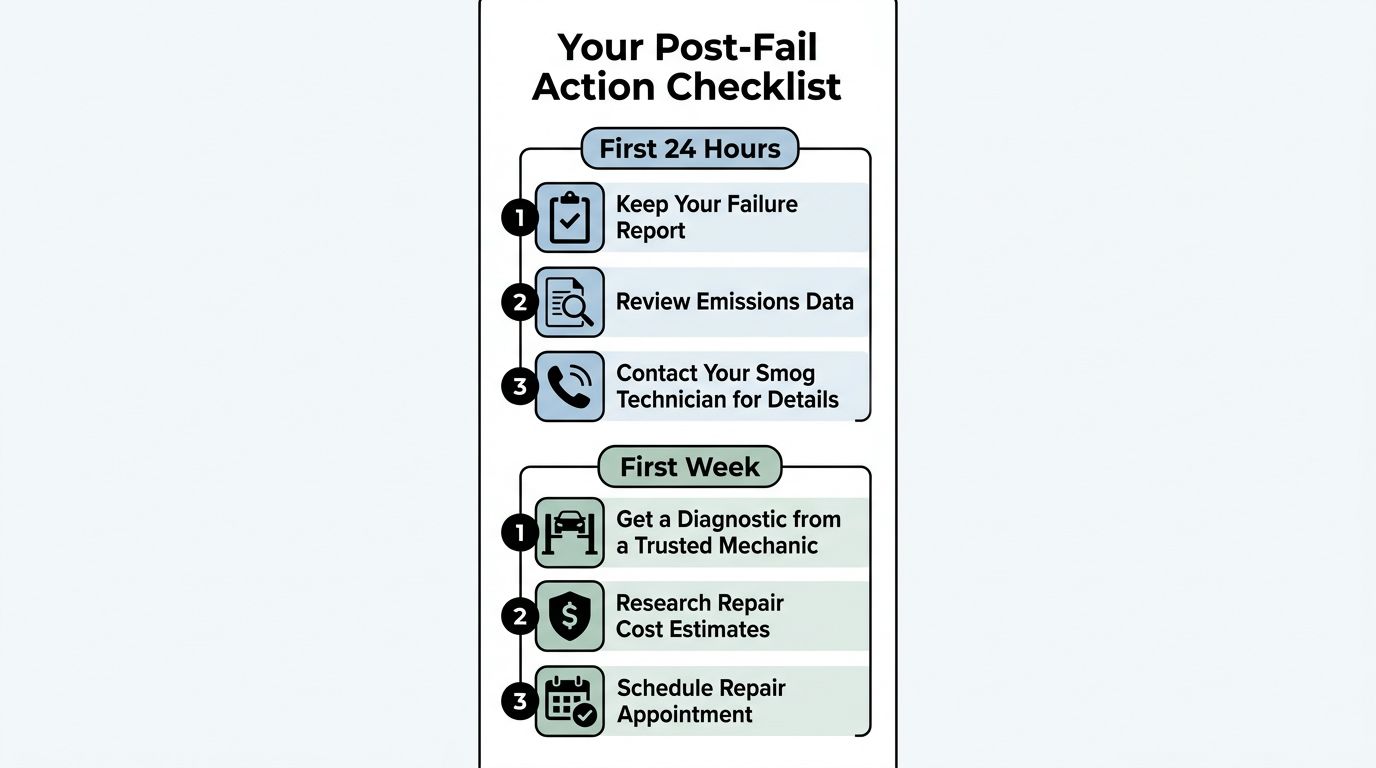
First 24 hours
- Keep the failure report. Photograph every page of the VIR and store the original with your registration documents.
- Review emissions data. Mark each failed category, every “not ready” monitor, and any gross-polluter or directed-vehicle designation.
- Check the calendar. Record your registration expiration date and the retest deadline shown on the paperwork.
- Pull diagnostic codes. Use an OBD-II scanner, save the results, and don't clear codes before a technician reviews them.
- Inspect simple items. Check the gas-cap seal, warning light, visible vacuum hoses, air filter, and obvious emissions-component damage.
First week
- Choose the correct station type. Call a regular station, STAR Test-Only station, STAR Test-and-Repair station, or BAR Referee based on the VIR designation.
- Get a real diagnosis. Ask the technician to verify the code, test the suspected system, and check readiness before recommending parts.
- Request a written estimate. Separate diagnostic labor, parts, installation, and retest charges.
- Check assistance before repairs. If the estimate reaches $650, review CAP and waiver eligibility before authorizing qualifying work.
- Schedule the repair. Keep the invoice, parts details, test results, and every document the shop provides.
Within the next 30 days
- Verify readiness after repair. Have the technician scan the monitors before sending the vehicle to retest.
- Retest at an authorized location. Bring the VIR and repair receipts, and confirm that the station can handle any directed or enhanced requirement.
- Confirm DMV receipt. Check that the passing result appears in the DMV record, especially if renewal is pending.
- Protect the paper trail. Keep the passing VIR, invoices, CAP approval, and waiver documents together.
- Escalate intelligently. If the vehicle still fails after repeated repair and testing, stop buying guesses and request BAR Referee guidance. If the repair remains unaffordable or the vehicle cannot meet requirements, ask BAR whether a waiver or assistance route applies.
The fastest path is usually the most documented one. A clear VIR, verified diagnosis, correct station, and complete receipts keep you from paying twice for the same uncertainty.
If your failed smog check is in the San Leandro or East Bay area, bring your VIR and registration paperwork to Speedy Smog for guidance on the appropriate retest path. The STAR-certified station can inspect eligible vehicles and help you understand what needs to happen before you spend money on repairs.
You walk into a smog station thinking this is just another registration errand. Ten or fifteen minutes later, someone hands you a printout with FAIL on it, and suddenly your whole day changes. Now you're thinking about repair bills, missed time, whether the car is safe to drive, and how many more steps this is going to take.
That reaction is normal. A failed smog check catches a lot of drivers at the worst possible time, usually when registration is already due and the budget is tight. The good news is that a failure report usually points you toward a solvable problem. The bad news is that people often waste money because they guess, replace parts too quickly, or go to the wrong shop first.
A calm approach works better. Read the report carefully. Figure out whether the failure was visual, functional, or emissions-related. Decide whether the issue is simple, diagnostic-heavy, or a sign that the car may not be worth fixing. If cost is a significant obstacle, California does have a repair assistance path for some drivers. Then, once the work is done, prepare properly for the retest so you don't pay twice for the same problem.
Table of Contents
- That Sinking Feeling When Your Car Fails Its Smog Check
- Understanding Your Failed Smog Check Report
- Common Smog Failures and Your Repair Options
- California's Smog Check Repair Assistance Programs
- Choosing a STAR Certified Smog Repair Shop
- Preparing for Your Smog Retest to Pass the First Time
- Smog Check Repair FAQs
That Sinking Feeling When Your Car Fails Its Smog Check
Most drivers don't fail a smog check because they ignored their car on purpose. Usually it's something more ordinary. The check engine light came on last week. The battery was disconnected during another repair. The car has been running a little rough, but still getting to work. Or the vehicle seems perfectly fine, then the test says otherwise.
I've seen the same look a lot. A driver stares at the report and asks the same first question almost every time: "What does this mean?" Right behind that comes the bigger question: "How much is this going to cost me?"
Those are fair questions. Smog failures feel bigger than they are because they hit three nerves at once:
- Money pressure: You weren't planning for an emissions repair.
- Time pressure: Registration doesn't wait.
- Information pressure: The report uses terms the average person doesn't deal with every day.
A failed smog check is a diagnosis starting point, not a final verdict on the car.
Some failures are simple. A loose gas cap, incomplete monitors, or a problem caught early can be straightforward. Others need proper testing because the code or emissions reading is only a clue. That's where people get into trouble. They replace the part named by a code reader, spend money, and still fail again.
The practical path is simpler than it feels in the moment. Start with the Vehicle Inspection Report. Match the type of failure to the likely system involved. Decide whether this is a basic fix, a diagnostic job, or a financial decision. If the repair bill looks tough, look into California assistance before authorizing major work. Then go back for the retest only when the car is ready.
Understanding Your Failed Smog Check Report
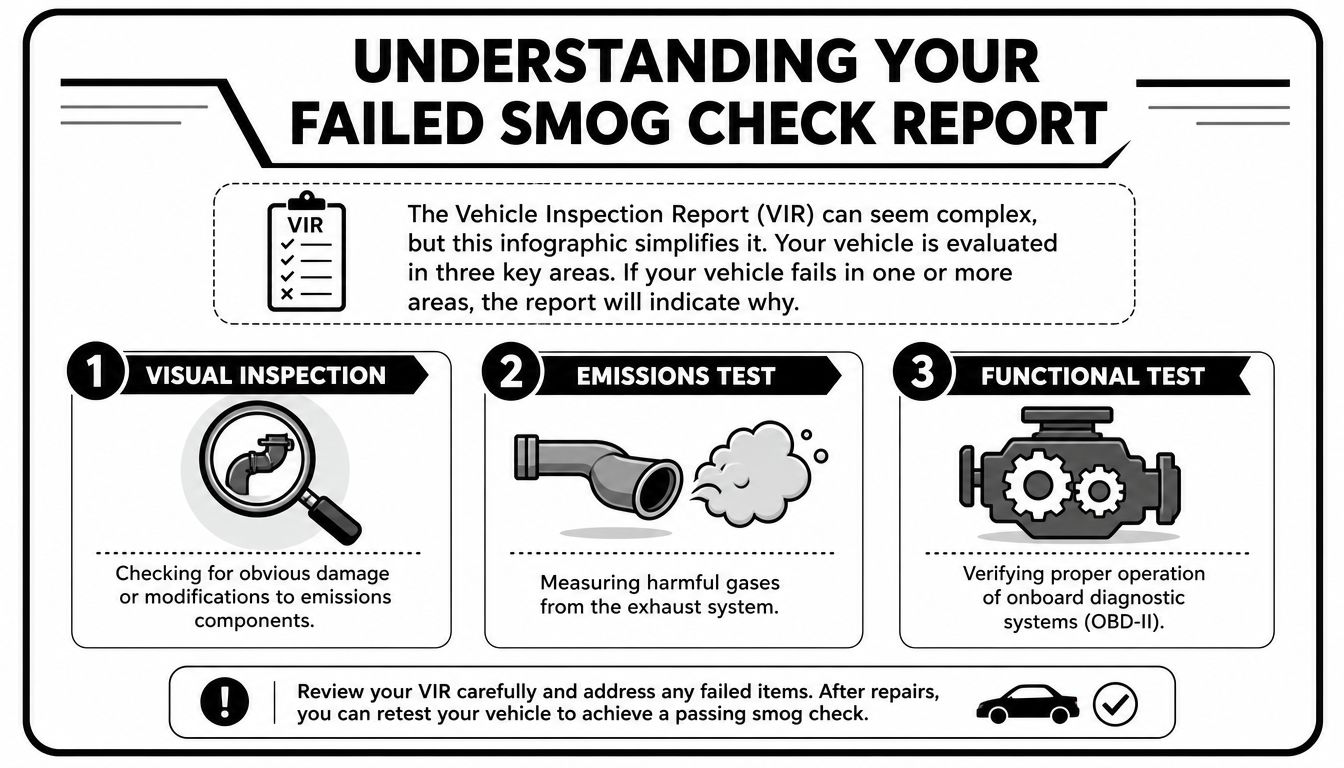
The Vehicle Inspection Report, often called the VIR, can look more complicated than it is. If you break it into sections, it starts making sense quickly. The report usually tells you whether the car failed because of something the technician saw, something the car's systems reported, or something that came out of the tailpipe.
For a more detailed example of how stations present outcomes, this guide to understanding smog test results helps drivers see what they're looking at.
Three places to look first
Visual inspection is exactly what it sounds like. The inspector checks whether required emissions parts are present, appear correct for the vehicle, and haven't been obviously tampered with. Missing hoses, disconnected components, or aftermarket parts that don't belong can trigger a failure even if the car seems to run fine.
Functional tests check whether key emissions-related systems behave properly. Depending on the vehicle and test type, this can include the gas cap, onboard diagnostics, and whether the check engine light is commanded on. If the computer says there's an active emissions problem, the vehicle won't pass just because it sounds okay in the parking lot.
Emissions readings show what the car is producing. Think of this as the results side of the test. The engine and emissions systems may be burning fuel cleanly, or they may be letting too much pollution through.
What the failure language usually means
When drivers see terms like HC, CO, NOx, or EVAP, they often assume they need a part with the same name. That's usually not how diagnosis works.
- Hydrocarbons (HC): Unburned fuel. High HC can point to incomplete combustion, misfires, ignition trouble, vacuum leaks, or engine condition issues.
- Carbon Monoxide (CO): Fuel that burned poorly because the mixture may be too rich. That can happen when the engine is getting too much fuel or not enough air.
- Nitrogen Oxides (NOx): Heat-related emissions. High NOx often points technicians toward combustion temperature control problems, exhaust gas recirculation issues on older systems, or a converter that isn't doing its job.
- EVAP system failure: This usually means the car can't properly contain fuel vapors. A gas cap can be involved, but so can hoses, valves, seals, or leaks elsewhere in the evaporative system.
Practical rule: A fault code or emissions category tells you where to investigate. It doesn't automatically tell you what part to replace.
If your report says the check engine light caused the failure, don't stop at the code description. The code names the condition the computer saw. The actual failed part might be upstream, downstream, electrical, mechanical, or a leak. That's why a clean diagnosis matters more than a quick guess.
Common Smog Failures and Your Repair Options
A lot of failed tests come back to the same handful of causes. In fact, the California Bureau of Automotive Repair says over 70% of smog check failures are attributed to a handful of issues, including malfunctioning oxygen sensors, catalytic converters, and evaporative emission control systems in its smog check FAQ.
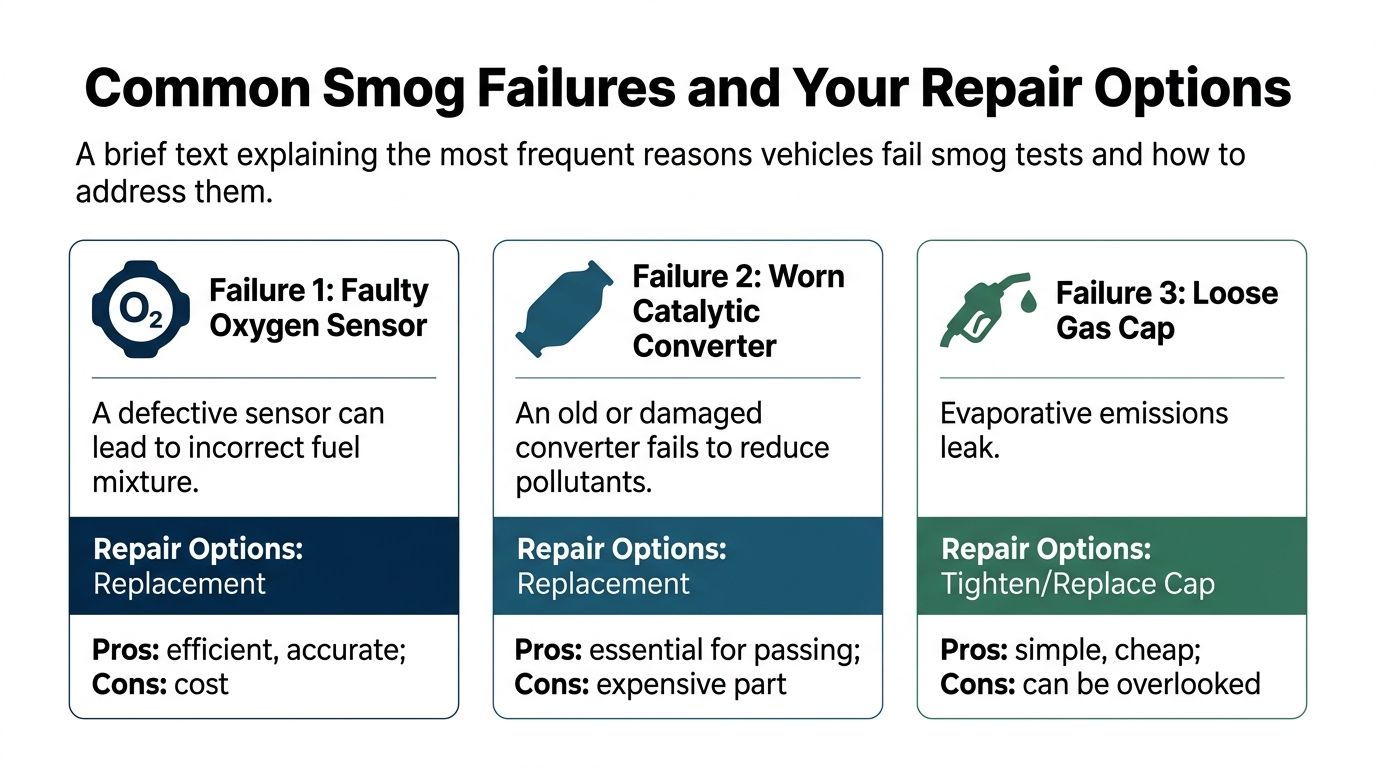
If you want a plain-language breakdown of the patterns behind failed tests, this page on common smog check fail reasons is a useful companion.
The failures technicians see again and again
Oxygen sensor problems are common because these sensors constantly report exhaust conditions to the engine computer. When one gets lazy, contaminated, or electrically faulty, the air-fuel mixture can drift. Sometimes replacement is the right move. Sometimes the sensor is only reporting a different problem, such as a vacuum leak or exhaust leak.
Catalytic converter failure is one of the big ones. The converter cleans up pollutants after combustion. But converters often get blamed for upstream problems they didn't create. If the engine has been running rich, misfiring, or leaking oil into the exhaust, a new converter can fail again unless the root cause is fixed first.
EVAP system faults can range from simple to annoying. A loose, worn, or incorrect gas cap can trigger an EVAP problem. So can a cracked hose, a purge valve issue, or a leak that only shows up under smoke testing. This is one area where guessing tends to waste money.
Check engine light on isn't a part failure by itself. It's the car asking for diagnosis. The key is whether the technician reads data and verifies the fault, or just starts swapping the most common part tied to the code.
Readiness monitors not set catches a lot of people after battery replacement, recent repairs, or code clearing. Nothing may be broken anymore, but the car's computer hasn't completed its self-tests yet.
DIY or professional repair
Some jobs are reasonable for a careful do-it-yourselfer. Others aren't worth the gamble.
- Good DIY candidates: Tightening or replacing a gas cap, correcting an obvious disconnected hose, checking that the battery terminals are secure after recent work, and confirming you haven't recently cleared codes before a retest.
- Borderline DIY jobs: Replacing an accessible oxygen sensor on a vehicle you know well, if you already confirmed that the sensor itself failed and not the wiring or a related engine problem.
- Professional territory: Catalytic converter diagnosis, EVAP leaks, wiring faults, repeated check engine light returns, and any case where the report points to symptoms rather than a clear failed component.
A lot of wasted money comes from confusing a symptom with a cause. A lean code doesn't always mean oxygen sensor. A catalyst code doesn't always mean converter first. A failed EVAP test doesn't always mean gas cap.
If a repair starts with "let's try this part first," slow down and ask what testing confirmed it.
The best repair path is the one that gets verified before parts are installed. That's especially true when you're already paying for a retest and registration is waiting.
California's Smog Check Repair Assistance Programs
For some drivers, the problem isn't understanding the failure. It's paying for the repair. California's main smog check repair assistance path is the Consumer Assistance Program, often called CAP. This program can help eligible vehicle owners either repair the vehicle or retire it if fixing it doesn't make sense.
The repair side matters most when the car is otherwise useful and the owner just needs help getting over the emissions hurdle. The retirement side matters when the vehicle has multiple issues, poor overall condition, or a repair path that doesn't line up with the vehicle's value.
When repair assistance makes sense
If your vehicle failed an official smog inspection and the emissions-related repair cost is the obstacle, CAP is worth looking into before you approve major work. The state program can provide up to $1,200 toward qualifying emissions-related repairs for eligible motorists, as described in the background material provided for this article.
That doesn't mean every failed car qualifies, and it doesn't mean every repair at every shop qualifies. The usual practical steps are:
- Keep your failed test paperwork. Don't lose the report.
- Check eligibility through BAR's CAP process. Eligibility can depend on factors such as household income, vehicle status, and program rules.
- Wait for approval before major emissions repairs if you're trying to use assistance. Work done outside the program path may not count.
- Use an authorized repair facility if the program requires it. Ask the shop directly whether they handle CAP-related repairs.
One mistake I see is drivers fixing the car first, then trying to back into assistance after the fact. If you're counting on help, start there.
Repair help versus retiring the vehicle
Repair assistance is for the owner who wants to keep the car. Vehicle retirement is for the owner who looks at the overall condition and says, "I don't want to keep sinking money into this."
The retirement option can offer $1,500 to retire a vehicle, based on the program details provided in the prompt for this article. That can be the cleaner decision when the car has several unresolved problems, poor reliability, or obvious mechanical wear beyond the smog issue.
A practical way to decide is to ask three questions:
- Is the car solid apart from the smog failure?
- Would I want to keep this vehicle if it passed tomorrow?
- Am I fixing one emissions issue, or stepping into a longer list of repairs?
If you don't trust the car even after a potential pass, retirement may be the smarter path.
California Consumer Assistance Program (CAP) Options
| Feature | Repair Assistance | Vehicle Retirement |
|---|---|---|
| Purpose | Help eligible owners fix emissions-related problems after a failed smog check | Help eligible owners retire a vehicle that isn't worth repairing |
| Best fit | The car is otherwise worth keeping | The car has broader problems or poor long-term value |
| Financial help | Up to $1,200 for qualifying repairs | $1,500 to retire the vehicle |
| Timing concern | Approval should come before major repair decisions when possible | Best considered before spending heavily on diagnostics and parts |
| Shop involvement | Usually requires using the proper participating repair path | Usually involves following the state's retirement process |
Don't choose between repair and retirement based only on emotion. Choose based on the car's condition, your budget, and whether you'd still want the vehicle after it passes.
The smartest move is to treat CAP like a fork in the road, not a last-minute add-on. If your car is a keeper, pursue repair assistance cleanly. If it isn't, don't let sunk cost push you into a bad decision.
Choosing a STAR Certified Smog Repair Shop
The shop you choose after a failure matters almost as much as the actual repair. A weak diagnosis can turn one real problem into a stack of unnecessary parts. A good shop narrows the issue, explains why the car failed, and shows you what needs to happen before the retest.
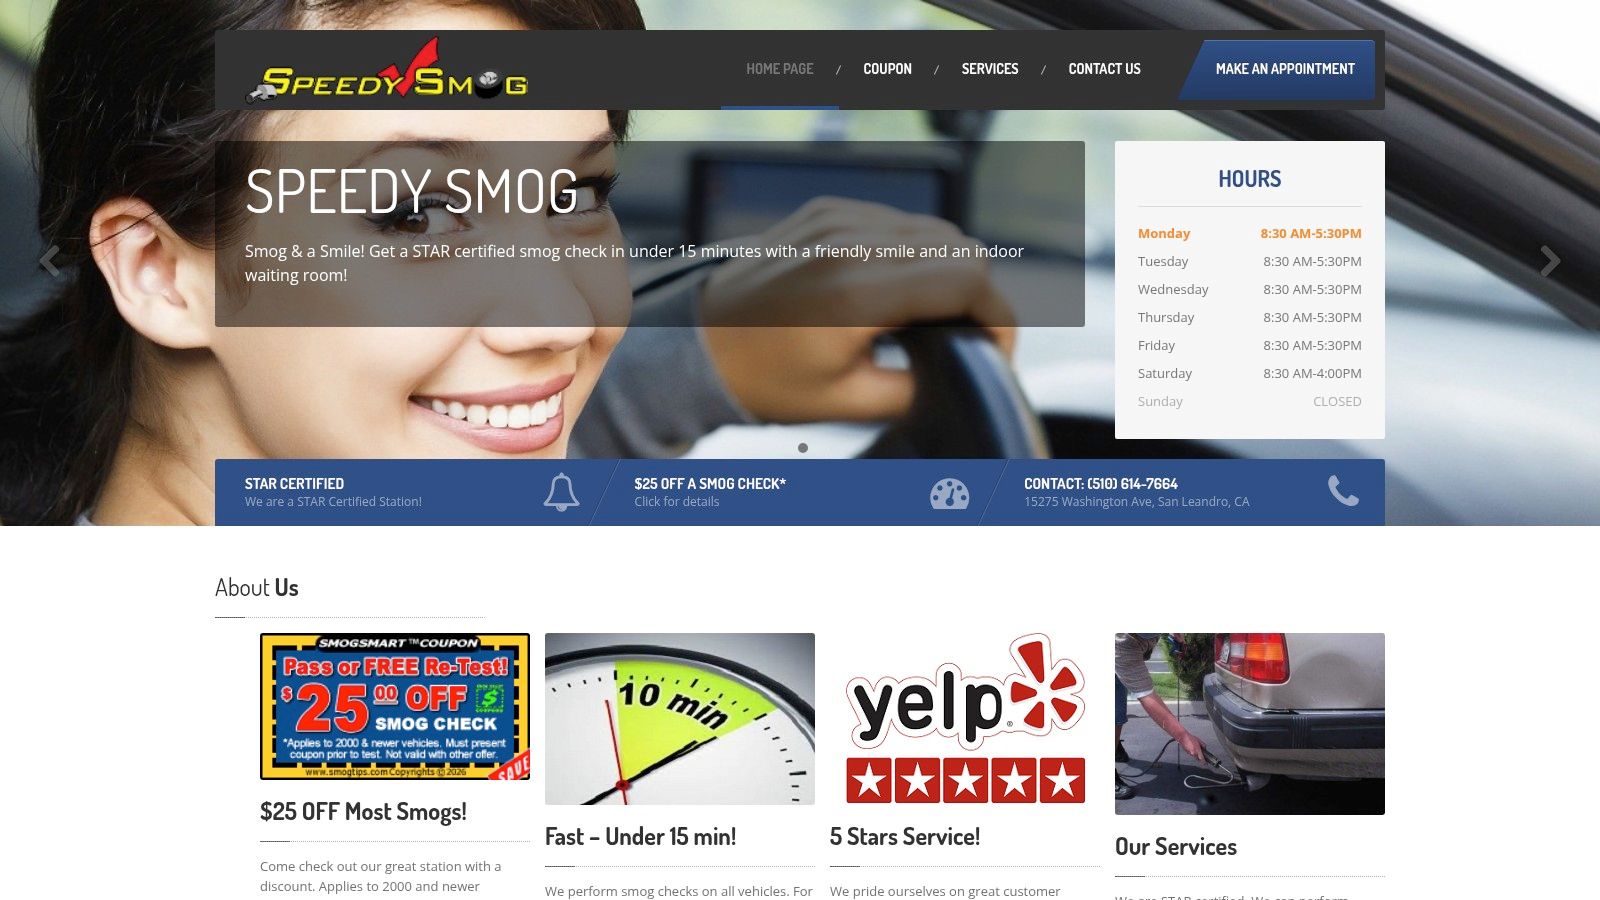
If you're not clear on the certification side, this explainer on what a smog STAR station is helps sort out the terms.
What to verify before authorizing repairs
Start with the basics. Make sure the shop is properly licensed to perform the repair work you're approving. A testing station and a repair station are not the same thing. Some places inspect only. Others diagnose and repair. If you need state-program repair assistance, ask whether they handle that process specifically.
Then pay attention to how they talk about the problem.
- Good sign: They ask for the VIR, pull codes, inspect the related system, and explain what they still need to test.
- Bad sign: They jump straight to "it's probably the converter" or "these cars always need sensors."
- Good sign: They give a written estimate and separate diagnostic time from repair time.
- Bad sign: They stay vague until the bill is done.
A careful shop doesn't promise a pass before the root cause is confirmed. That's not evasive. That's honest.
What a good shop does differently
The difference usually comes down to process. Good smog repair work is boring in the best way. The technician verifies the complaint, checks the data, tests the system involved, confirms the failed component or condition, and only then recommends parts or repairs.
That's especially important with emissions work because one fault can trigger several symptoms. A vacuum leak can create lean codes. A misfire can damage a converter. A recent battery disconnect can leave monitors incomplete. If the shop doesn't sort cause from effect, you pay for their guessing.
This short video gives a useful visual sense of what drivers should expect from a professional smog station environment and process.
A trustworthy smog repair shop doesn't sell confidence. It sells verification.
Reviews also matter, but read them with a technician's eye. Look for comments about clear explanations, accurate diagnosis, written estimates, and whether the fix held up. Fast service is nice. Honest diagnosis is what saves you money.
Preparing for Your Smog Retest to Pass the First Time
The retest is where people either finish the job cleanly or get tripped up by a preventable detail. Once repairs are done, don't rush straight back unless you're sure the vehicle is ready. A lot of repeat failures happen because the original problem is fixed, but the car's systems haven't completed their checks yet.
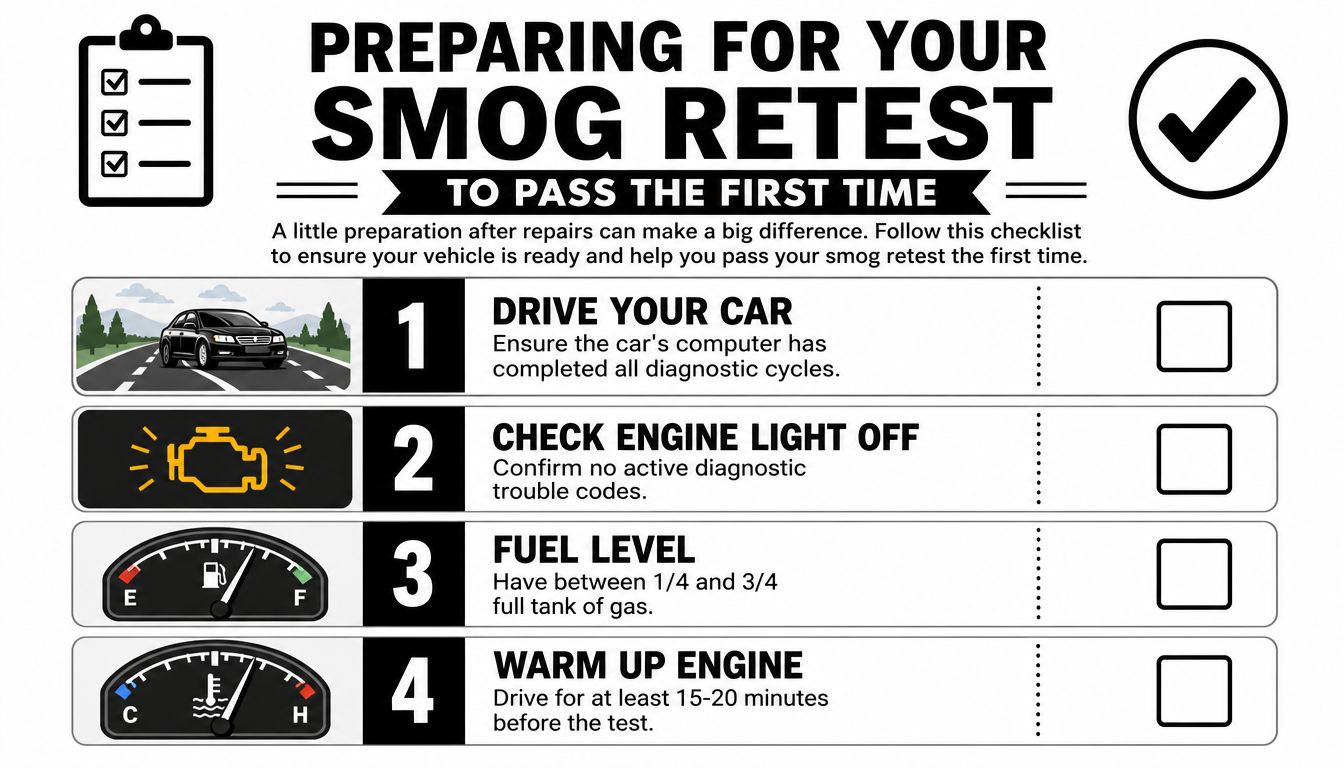
Your pre-retest checklist
Use this like cheap insurance before you head back to the station:
- Drive the car normally after repairs: Many vehicles need a proper drive cycle so the onboard monitors can reset. Short trips around the block often aren't enough.
- Confirm the check engine light stays off: It's not enough for the light to be off at startup if it comes back during driving.
- Keep the fuel level in a normal testing range: Avoid showing up nearly empty or completely full, because some systems are picky about when they run self-checks.
- Warm the vehicle up before the test: A car that has been driven is usually in a better testing state than one that rolled in cold from overnight parking.
- Bring the paperwork from the failed test and the repair invoice: This keeps the retest process smoother and helps if any question comes up.
If a shop cleared codes during repair, ask one direct question before leaving: "Are the monitors ready, or do I need to drive it first?" That's one of the most useful questions in the whole process.
You should also pay attention to the basics. If the battery is weak, if the car has been sitting, or if another warning light appears, don't assume the emissions issue is behind you. One new problem can interrupt readiness or trigger another failure.
The best time for a retest is when the car has been repaired, driven, warmed up, and checked. Not when you're simply hoping it's ready.
Patience here saves a lot of aggravation.
Smog Check Repair FAQs
Do I get a free retest if my car failed?
That depends on the station and the circumstances. Some shops offer retest policies, some don't, and the terms can vary. Ask before you authorize anything or return for another inspection.
What is a repair cost waiver?
It's a California process that may help in certain situations when a vehicle still doesn't pass after qualifying emissions-related repair efforts. Waiver rules are specific, so don't assume regular repair spending automatically qualifies you. Ask a licensed smog repair shop or BAR directly before counting on it.
What if the check engine light comes back after the repair?
Go back to the repair shop as soon as possible and bring your paperwork. Don't clear the code yourself just to get the light off. If the light returned, the root problem may still be present, or a different issue may have appeared during the drive cycle.
Can I sell a car in California if it failed smog?
That gets into transaction-specific rules, and the answer can depend on whether you're dealing with a private-party sale, transfer situation, or another exception. Don't rely on verbal advice from a buyer or seller. Check the current California rules before you sign anything.
Should I replace the part named in the code first?
Usually, no. A code points to a system or condition. It does not guarantee that the named sensor or component is the failed part. That's one of the fastest ways to waste money on smog-related repairs.
Is smog check repair assistance worth the trouble?
If repair cost is the only thing standing between you and registration, yes, it can be. The paperwork is worth it when the vehicle is otherwise worth keeping and you qualify. If the car is near the end of its useful life, retirement may be the cleaner decision.
If you need a fast, friendly place to handle your inspection or retest, Speedy Smog in San Leandro is a solid local option. They offer STAR-certified smog checks, straightforward service, and the kind of clear process stressed drivers appreciate when registration is on the line.