

You've booked a California smog check, the registration deadline is close, and someone has told you to “take the diesel on the freeway and clear the light.” That advice can help in a narrow situation, but it can also waste your time or guarantee a failure if the vehicle's OBD monitors aren't ready or a real emissions fault remains active.
Passing a diesel emissions test starts with identifying which inspection rules apply to your vehicle. From there, the priorities are straightforward: confirm eligibility, check readiness, control smoke and opacity, avoid resetting the computer before testing, and diagnose persistent faults instead of trying to drive them away.
Table of Contents
- Knowing If Your Diesel Needs a Smog Check
- Understanding Opacity Limits and OBD Readiness Rules
- Executing the Pre-Test Drive Cycle Checklist
- Avoiding the Code Clearing Trap
- Deciding Between a Long Drive and Diagnostic Repair
- Managing Test Day Logistics and STAR Certification
Knowing If Your Diesel Needs a Smog Check
The first mistake many owners make is preparing for a test their vehicle may not need, or assuming every diesel follows the same procedure. California separates diesel vehicles by model year and gross vehicle weight rating, so check those details before spending money on additives, repairs, or a pre-test inspection.
According to the California Bureau of Automotive Repair Smog Check reference, diesel vehicles built from model year 1998 onward are generally included in the program. Diesel vehicles from 1997 and earlier are exempt, and vehicles with a GVWR above 14,000 pounds are outside the standard program described for these light-duty inspections.
Check the two eligibility details
Start with the vehicle's model year. Don't rely on the year you bought it, the registration date, or the date of a major repair. The relevant detail is the vehicle's model year as identified in its records and emissions equipment documentation.
Next, check the gross vehicle weight rating, not the vehicle's current weight. GVWR is the manufacturer's rated maximum weight for the vehicle, including occupants and cargo. A diesel that looks like a normal pickup may fall under different requirements if its rating places it above the light-duty threshold.
California's diesel inspection rules also reflect a historical change that matters to owners of newer passenger vehicles and pickups. The 2010 expansion brought post-1997 diesel passenger cars and trucks up to 14,000 pounds into the Smog Check system, making modern diesel eligibility more common than many older guides suggest.
Confirm the inspection type before your appointment
Eligibility doesn't tell you every detail of the test. A qualifying diesel may be evaluated through a combination of OBD communication, visual inspection, and smoke or opacity checks, depending on its category and the applicable procedure. It isn't just the older gasoline-style tailpipe dyno test that many drivers remember.
Before you schedule, compare your vehicle's year and GVWR with the diesel Smog Check requirements. If the vehicle is subject to inspection, ask the station what information it needs and whether it handles the relevant diesel procedure.
Understanding Opacity Limits and OBD Readiness Rules
California diesel testing revolves around two different questions. How much smoke is the vehicle producing, and has the emissions computer completed the required self-tests? A diesel can look clean at idle and still fail because its monitors report “Not Ready.” It can also have a ready OBD system and fail because visible smoke or measured opacity exceeds the applicable limit.
For heavy-duty diesel fleets covered by California's Periodic Smoke Inspection Program, the BAR Smog Check Manual identifies opacity limits of 55% for pre-1991 engines and 40% for engines from 1991 onward. Those limits apply to the heavy-duty program, so don't automatically transfer them to every light-duty diesel.
For light-duty diesels, OBD readiness becomes especially important. Model year 2007 and newer light-duty diesels may have two unset readiness monitors, but the allowance is limited to the Diesel Particulate Filter and Non-Methane Hydrocarbon Catalyst monitors. If other required monitors remain incomplete, the vehicle may not qualify for a pass.
California diesel inspection thresholds
| Vehicle category | Opacity limit | OBD monitor allowance |
|---|---|---|
| Heavy-duty diesel, pre-1991 engine | 55% | Requirements vary by applicable heavy-duty procedure |
| Heavy-duty diesel, 1991 and newer engine | 40% | Requirements vary by applicable heavy-duty procedure |
| Light-duty diesel, model year 2007 and newer | Tested under the applicable diesel procedure | Two unset monitors may be allowed, limited to the Diesel Particulate Filter and Non-Methane Hydrocarbon Catalyst monitors |
The practical lesson is that smoke and readiness are separate gates. A highway drive may help a diesel complete a regeneration-related monitor, but it won't repair a failed sensor, restore damaged wiring, or correct an emissions system that has been deliberately removed or reprogrammed.
Check readiness before you pay for the test
Use a capable OBD scanner to view monitor status, not just stored trouble codes. Look for a result showing the required systems as Ready, and check whether the malfunction indicator lamp is illuminated.
The equipment used by a compliant station matters because the inspection must communicate with the vehicle and evaluate the systems required for that vehicle. If you want to understand the role of the inspection hardware, review the diesel emissions testing equipment used for this type of evaluation.
Executing the Pre-Test Drive Cycle Checklist
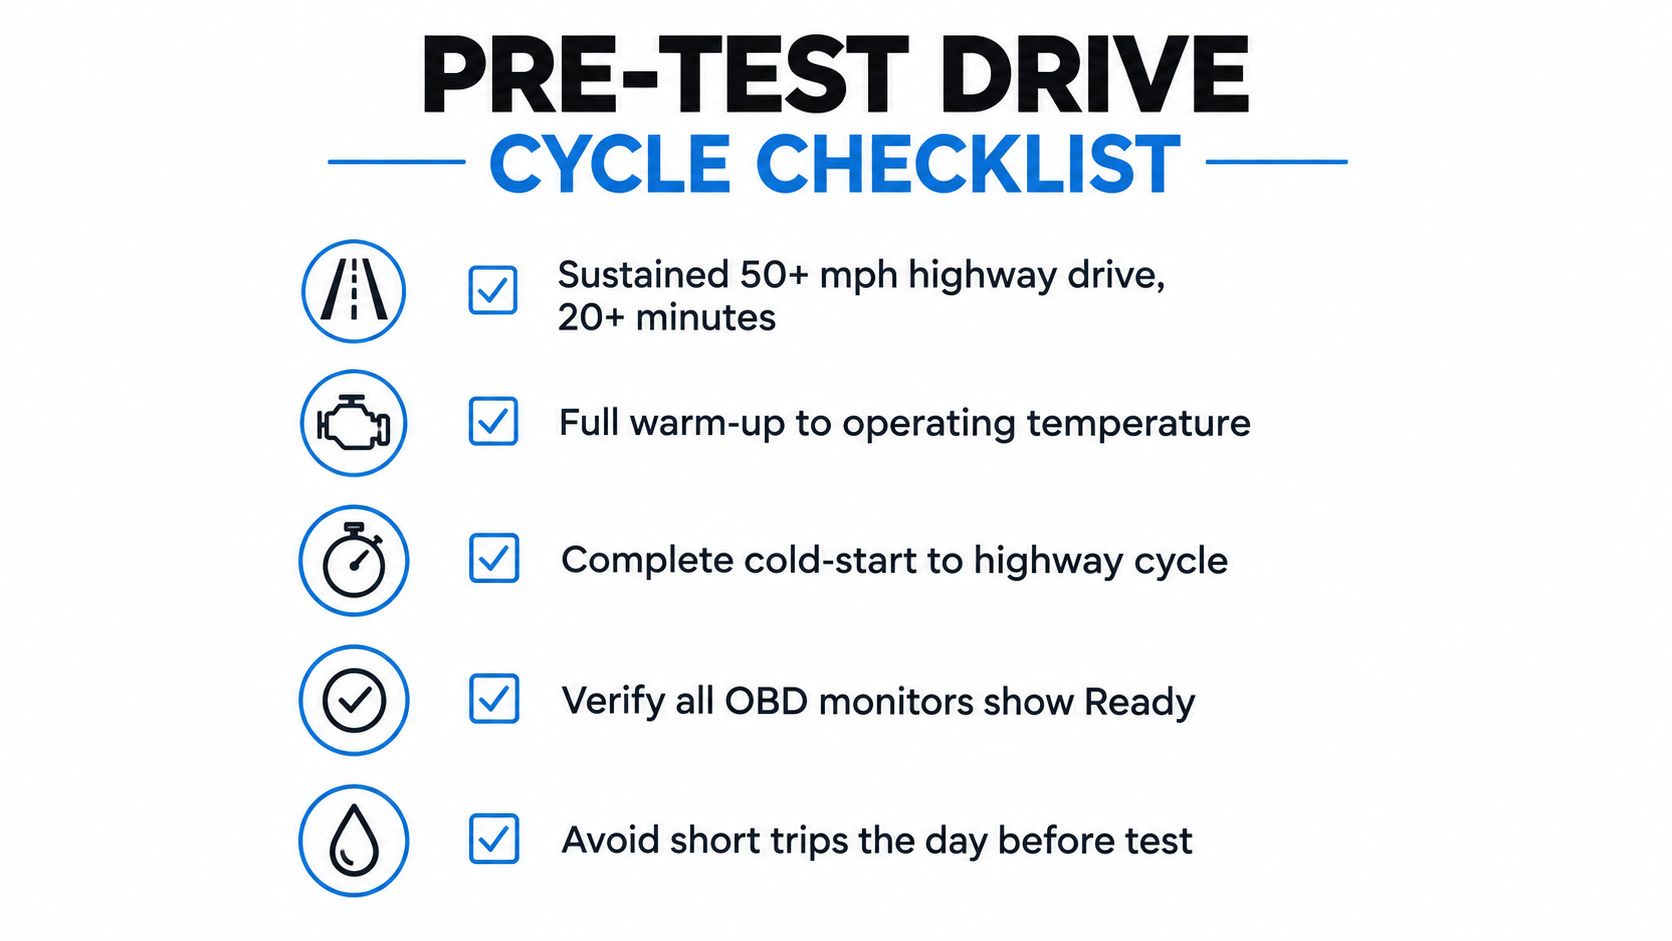
A drive cycle isn't the same as commuting to the inspection station. The vehicle's computer needs the right combination of cold-start conditions, warm-up, speed, load, and uninterrupted operation to complete its self-tests. The exact sequence varies by manufacturer, so the owner's service information remains the authority, but a controlled routine is more useful than random short trips.
Use a deliberate sequence
Begin with a genuine cold start. Let the vehicle complete its normal startup process, then drive gently while the engine and emissions system warm up. Avoid turning the first few minutes into a hard acceleration run, because the aim is stable operating conditions, not punishment.
Once the engine reaches normal operating temperature, use a sustained highway drive. The infographic's practical checklist calls for a 50-plus-mph highway drive lasting 20-plus minutes, but treat that as a preparation pattern rather than a universal manufacturer-specific procedure. Obey the speed limit, keep a safe following distance, and don't force the engine beyond its normal operating range.
A useful preparation sequence looks like this:
- Start cold: Begin after the vehicle has been sitting long enough for the engine to cool naturally.
- Warm gradually: Drive smoothly until the engine reaches its normal operating temperature.
- Hold steady conditions: Maintain a sustained highway segment rather than repeatedly stopping and restarting.
- Avoid unnecessary short trips: Don't spend the day before the test making several brief journeys that leave the diesel cold.
- Scan afterward: Check monitor status before the appointment, especially if the vehicle recently had electrical work or codes cleared.
The goal is to let the computer perform its tests under the conditions it expects. It isn't to create smoke, force a regeneration manually, or drive aggressively.
Why the routine can change the result
EPA best-practice data shows that a less strict monitor allowance reduced the overall medium-duty diesel vehicle initial “not ready” rate from 7% to 3%, as reported in its diesel OBD inspection best-practices document. Among light-duty diesel make and model groups, initial not-ready rates ranged from 0–9% under a two-monitor criterion, compared with 0–13% under a one-monitor criterion, using the same EPA source.
Those figures don't promise that a particular vehicle will pass after one drive. They do show why monitor preparation deserves attention. A vehicle may have no obvious drivability complaint while its computer still needs the correct conditions to finish testing.
Practical rule: Drive to complete the vehicle's diagnostic routine, then verify “Ready” with a scanner. Don't assume the trip happened just because the odometer moved.
If monitors remain incomplete after a proper warm drive, stop repeating the same route blindly. Look for a stored fault, an operating-temperature problem, a battery or charging issue, or a manufacturer-specific condition that the generic routine didn't satisfy.
Avoiding the Code Clearing Trap
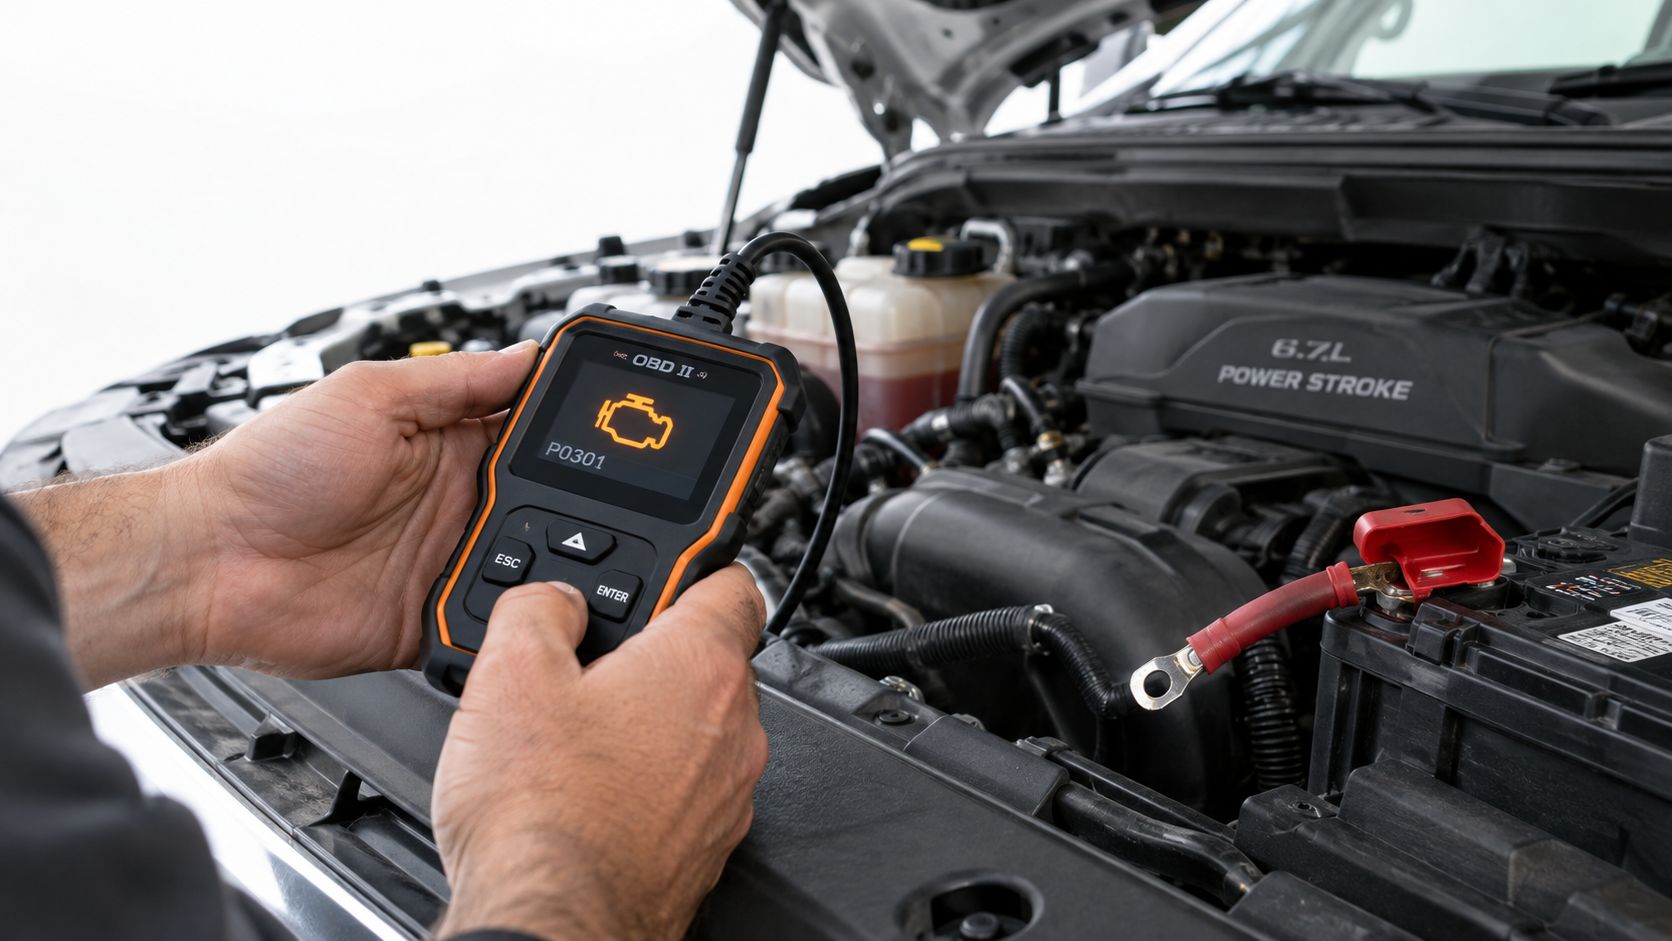
Clearing a check engine light immediately before a smog check is one of the fastest ways to create an inspection problem. Disconnecting the battery, using a basic scan tool to erase codes, or allowing a repair shop to reset the computer can also erase the monitor history that the inspection machine needs to see.
Why a reset produces a “Not Ready” result
The monitors are not simple lights that switch back on as soon as you start the engine. They run self-tests during specific operating conditions. After a reset, the computer needs time and the correct drive conditions to complete them again.
The Missouri inspection guidance on readiness monitors explains that diesel vehicles can fail when required monitors haven't completed their self-tests. Battery disconnection, code clearing, a repair-shop reset, power or ground problems, and unmet temperature conditions can all leave monitors incomplete.
The same principle applies even if the original fault has been repaired. A reset may remove the warning light, but it also removes evidence that the emissions systems have completed their checks. The inspection station sees the incomplete state, not your intention.
Use a scan tool to diagnose the code rather than erase it. Record the code, freeze-frame information, and monitor status before making repairs. If the problem is repaired, follow the vehicle's specified drive cycle and confirm that the monitors have returned to Ready before booking the inspection.
The guide to clearing a check engine light can help explain the difference between resetting a warning and resolving the fault, but clearing codes alone isn't a pass strategy.
Treat electrical problems as emissions problems
A weak battery, poor ground, damaged connector, or charging fault can interrupt monitor testing. The diesel may start and drive normally while the computer loses the stable power or communication it needs to complete diagnostics.
Watch for these warning signs:
- Recent battery work: The monitors may have been reset during replacement or service.
- Intermittent warning lights: A power or ground fault can cause inconsistent computer behavior.
- Scan-tool communication failure: The inspection can't proceed normally if the vehicle's diagnostic connector doesn't communicate.
- Repeated “Not Ready” status: A drive cycle won't solve a monitor that cannot run because an enabling condition or circuit fault remains.
The correct order is diagnosis, repair, drive cycle, and verification. Don't erase the evidence before you know what caused the warning.
Deciding Between a Long Drive and Diagnostic Repair
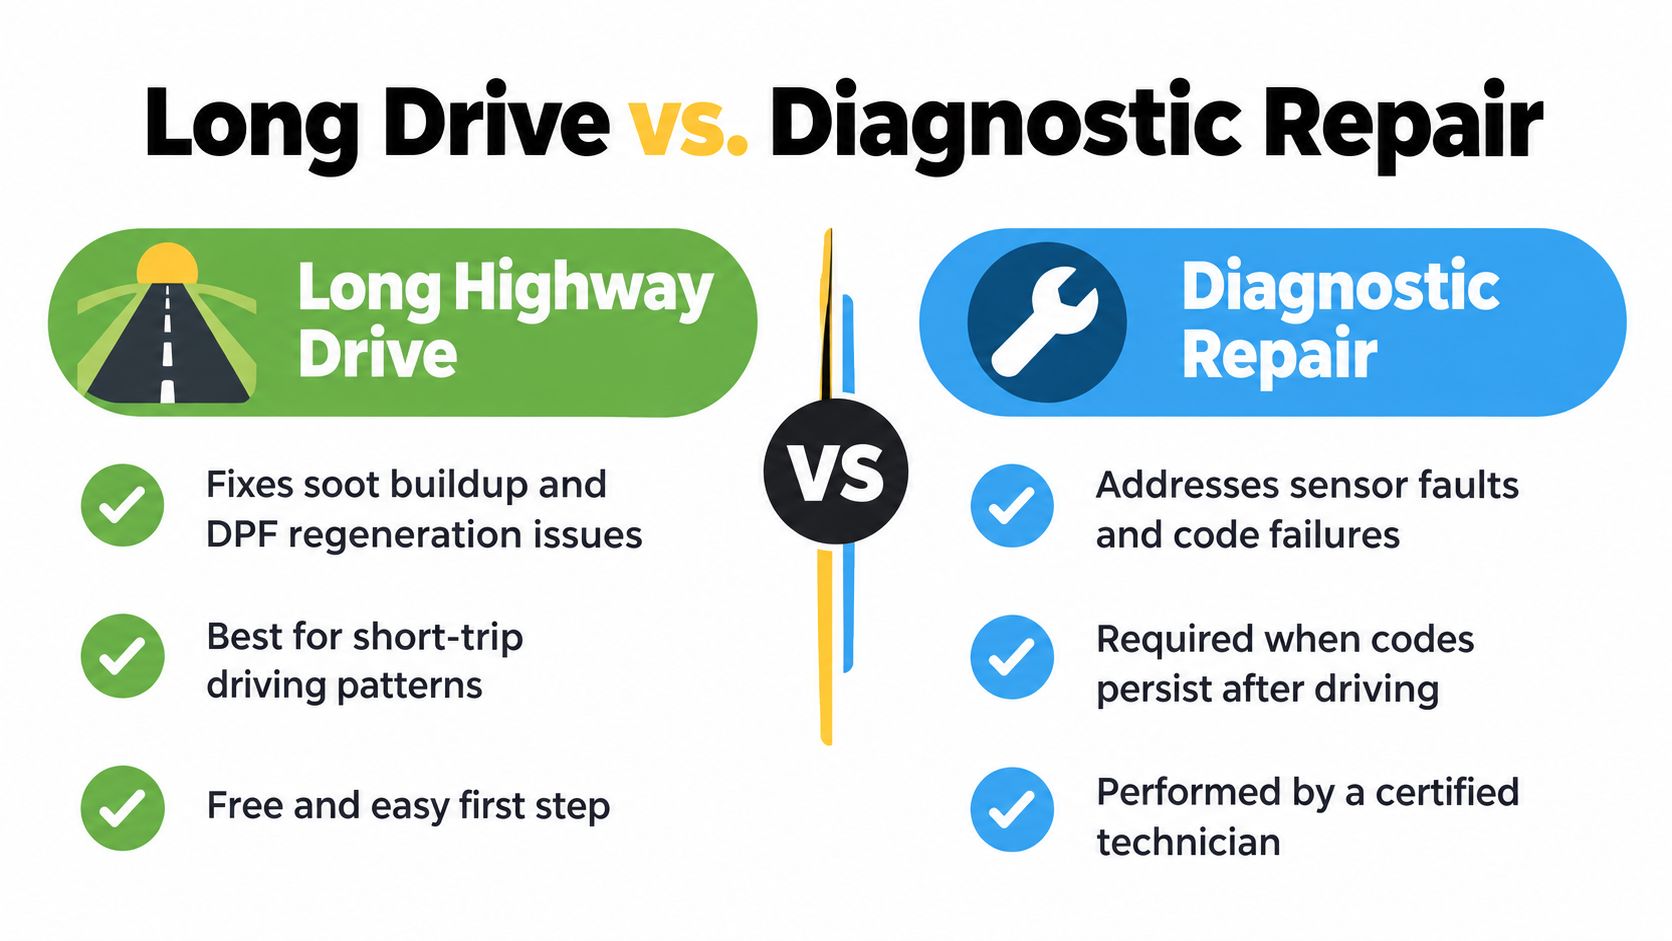
A long highway drive is a reasonable first step when the diesel's main problem is its operating pattern. Short trips can prevent the vehicle from reaching the conditions needed for effective emissions-system operation, and a sustained warm drive may help the vehicle complete its routine.
It's not a universal repair. A drive can't restore a damaged sensor, repair an exhaust leak, reconnect a diagnostic circuit, or undo emissions-control software changes.
When a highway drive makes sense
Choose the low-cost preparation route when the vehicle has no active warning light, communicates normally with the scanner, and the issue appears related to repeated short-trip use. Give the engine a complete warm-up, drive steadily on the highway, and scan the vehicle afterward.
A fuel top-up and correct engine oil may be sensible maintenance steps if the vehicle is due for them, but neither should be treated as a guaranteed emissions repair. Use only fluids and specifications approved for the vehicle, particularly where a diesel particulate filter requires low-ash oil.
The test is simple: did the monitors become Ready, and did the warning condition stay away? If yes, the preparation may have addressed a readiness issue. If not, more driving is unlikely to provide a different result.
When diagnosis comes first
Persistent codes deserve repair before testing. Common failure signatures include DPF-related codes such as P2002, P244A, and P246C, along with visible exhaust leaks and communication problems at the diagnostic connector, according to this diesel emissions failure guide.
A technician should investigate rather than repeatedly clear these codes. Possible causes include damaged pressure or temperature sensors, wiring faults, an exhaust leak that affects readings, inactive regeneration logic, or deleted DPF software. These conditions can keep returning after every reset and can prevent the required monitors from completing.
| Long highway drive may help | Diagnostic repair is the better choice |
|---|---|
| The vehicle has no active warning light | A warning light returns after clearing |
| The issue follows repeated short trips | DPF codes remain stored or return |
| The scan tool communicates normally | The connector won't communicate reliably |
| Monitors are incomplete but no fault is present | Sensors, wiring, software, or exhaust components show faults |
| The engine reaches normal temperature | The engine or emissions system can't meet enabling conditions |
A clean-looking exhaust doesn't prove that the emissions system is healthy. The scanner and the physical inspection need to agree.
Don't drive aggressively to hide smoke. Excessive load, unsafe speeds, or improvised regeneration attempts can add risk without fixing the underlying fault. If the scan shows a persistent problem, pay for diagnosis before paying for another test.
Managing Test Day Logistics and STAR Certification
A prepared vehicle can still have an avoidable problem on test day. Bring the vehicle's registration information and any documents connected with the inspection request or recent emissions repair. If a prior failure report identifies a specific monitor or emissions component, give it to the technician instead of relying on memory.
Arrive with the engine fully warmed through normal driving, but don't turn the trip into an aggressive “tune-up.” A warm engine allows the inspection to occur under normal operating conditions, while careful driving protects you, other road users, and the vehicle.
Confirm the station and procedure
Choose a station that handles the diesel category and test method your vehicle requires. California diesel inspections may involve OBD checks, visual review, and opacity testing depending on the vehicle and applicable rules. Ask before arrival if you're uncertain about model year, GVWR, or the required equipment.
A STAR Certified station meets the Bureau of Automotive Repair's performance standards for participating inspections. That designation doesn't replace vehicle maintenance, but it gives you a compliant testing location for transactions that require a STAR inspection.
Before the technician begins, mention recent battery replacement, code clearing, electrical repairs, or a check engine light. These details help explain why monitors may be incomplete and can prevent you from treating a readiness problem as a mechanical mystery.
Use the result intelligently
If the vehicle passes, keep the paperwork for your records and complete the registration process as required. If it fails, read the failure result carefully. The next repair should target the listed cause, whether that's monitor readiness, a DPF-related code, smoke, visible emissions equipment, or communication.
Don't approve unrelated parts replacement before the diagnostic evidence supports it. A proper pre-test scan can tell you whether the vehicle needs more drive-cycle time or a repair appointment, which is often the difference between a useful visit and paying for a repeat inspection.
For East Bay owners, Speedy Smog performs diesel Smog Checks in San Leandro for applicable vehicles, with OBD, visual, or opacity procedures selected according to the vehicle and inspection requirements. Visit the station with your monitors verified and any recent repair information available so the technician can complete the inspection accurately.